|
|
 |
|
 CAT 320D excavator CAT 320D excavator |

caterpilar
Doppel-As

Dabei seit: 09.04.2012
Beiträge: 113
Maßstab: 1:16
Level: 33 [?]
Erfahrungspunkte: 502.879
Nächster Level: 555.345
|
|
I have started last week with the drawings for my new excavator. I am still working on the plans for the boom and the arm. All plans are based on the 1/16 scale model from Bruder. I am intending to make everything out of metal, except the cabine.
I made two versions of the bucket.
The standard Bruder one

and one which has a quick coupler

the undercarriage design is almost complete. I am waiting from my CTI parts to arrive so I can make sure that all motors fit into it.
I hope that all my CTI parts will come soon, so I can get all the parts created. I can't wait to put the prototype together. I might need to order several sets to bring the cutting cost down (hope to get a quote of the cutting this week)
will update you on the progress
Grussen
Koen
|
|
 24.05.2012 12:06
 |


|
|
 |
|
 |
 |
|
 |
|
|
|
|
|
|
caterpilar
Doppel-As
Dabei seit: 09.04.2012
Beiträge: 113
Maßstab: 1:16
Level: 33 [?]
Erfahrungspunkte: 502.879
Nächster Level: 555.345
Themenstarter 
|
|
| Zitat: |
Original von Marcel2612
Nice project.
So you want to use these CTI-motors? >CLICK<
I'm not sure if these motors are strong enough for an excavator made of metal.
Usually, the RB35 motors from Conrad or Servonaut are used in those excavators. |
Thanks for the warning Marcel. I might keep the CTI motors for my bruder model and put the RB35 in the metal version.
I wonder if the CTI zylnders would be strong enough otherwise I will have to go to hydraulics. I prefer to have an oil free excavator
|
|
|
24.05.2012 12:42 |
|
|
|
|
|
|
|
|
|
|
|
|
|
|
caterpilar
Doppel-As
Dabei seit: 09.04.2012
Beiträge: 113
Maßstab: 1:16
Level: 33 [?]
Erfahrungspunkte: 502.879
Nächster Level: 555.345
Themenstarter
|
|
I finally completed the drawings for the cat 320. I have sent the cad files off to get the parts cut by the water jet. All parts will be made out of aluminum.
The parts kit I created contains:
- 4 buckets in different sizes
- undercarriage (excl. chains)
- cabin and body of the excavator
- baseplate for boom
- boom
- arm
if you are interested in the kit, let me know. if i have several people who want the kit, I should get a better price for the kits.
|
|
|
19.06.2012 12:22 |
|
|
|
|
|
|
|
|
caterpilar
Doppel-As
Dabei seit: 09.04.2012
Beiträge: 113
Maßstab: 1:16
Level: 33 [?]
Erfahrungspunkte: 502.879
Nächster Level: 555.345
Themenstarter
|
|
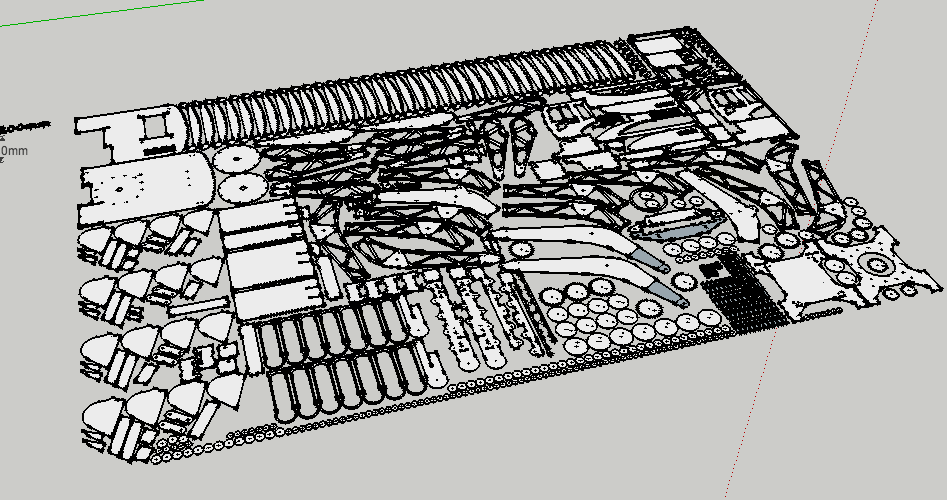
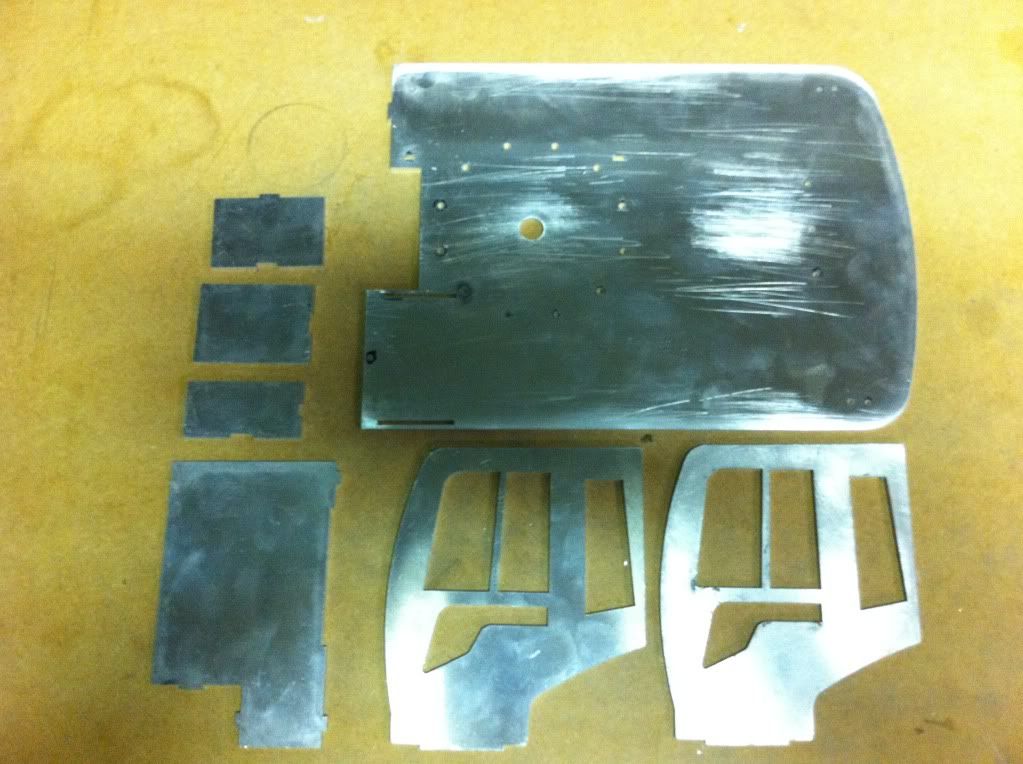
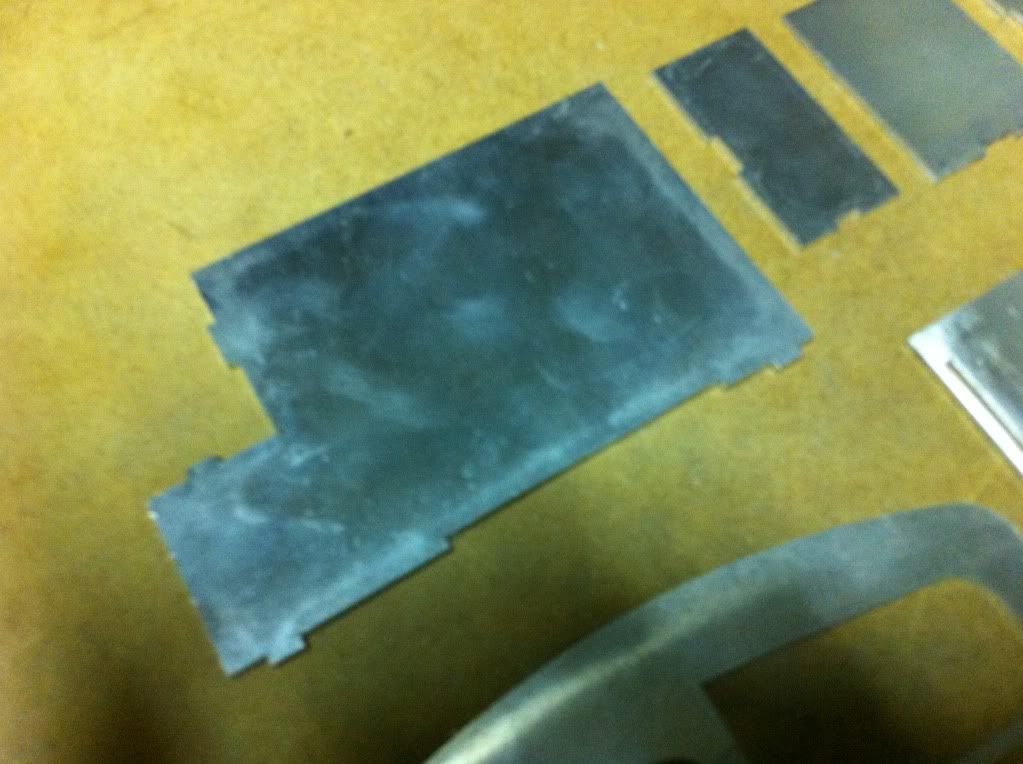
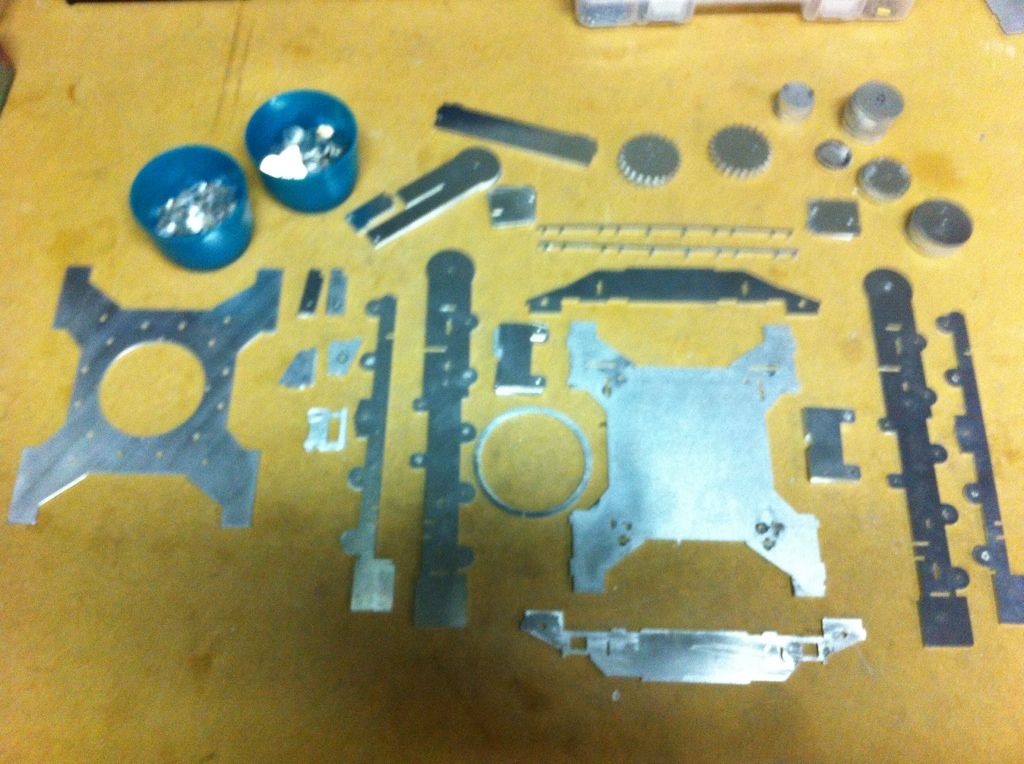
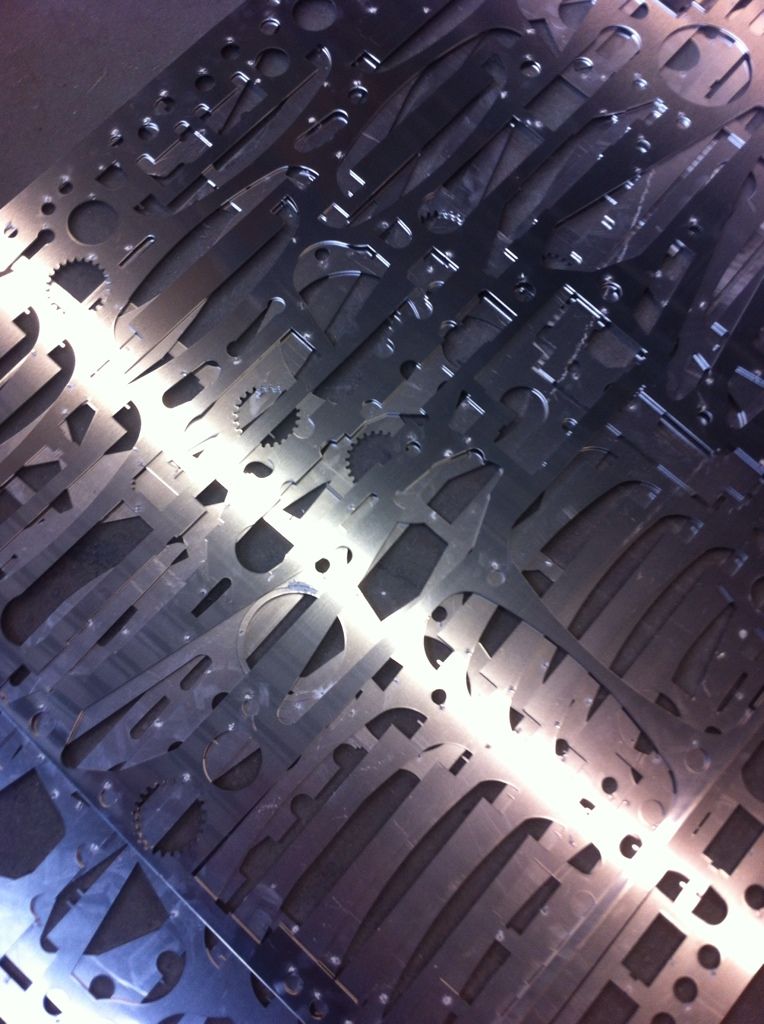
Holiday season is over! so I will make some time available to continue my project. Yesterday I received all my Aluminium parts.
Total weigth of the parts is 4.5Kg and all together 482 pieces.
I still need to clean up the parts with some sanding paper to remove traces from the laser cutting.
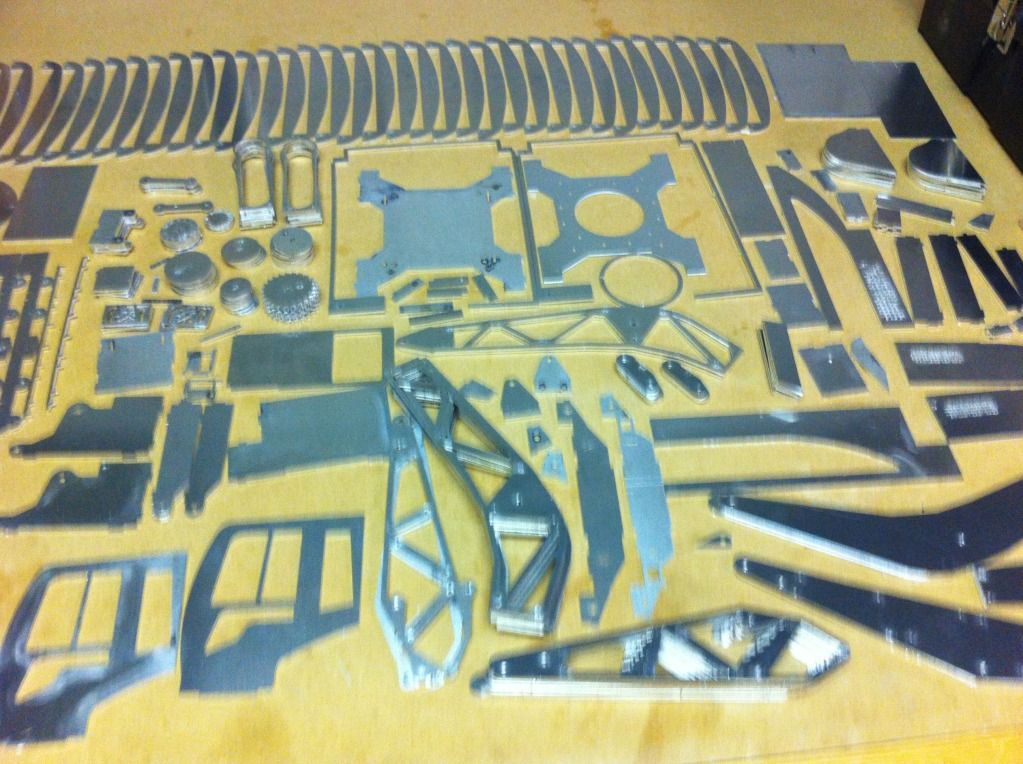
I have 3 sizes of buckets that will come with the kit
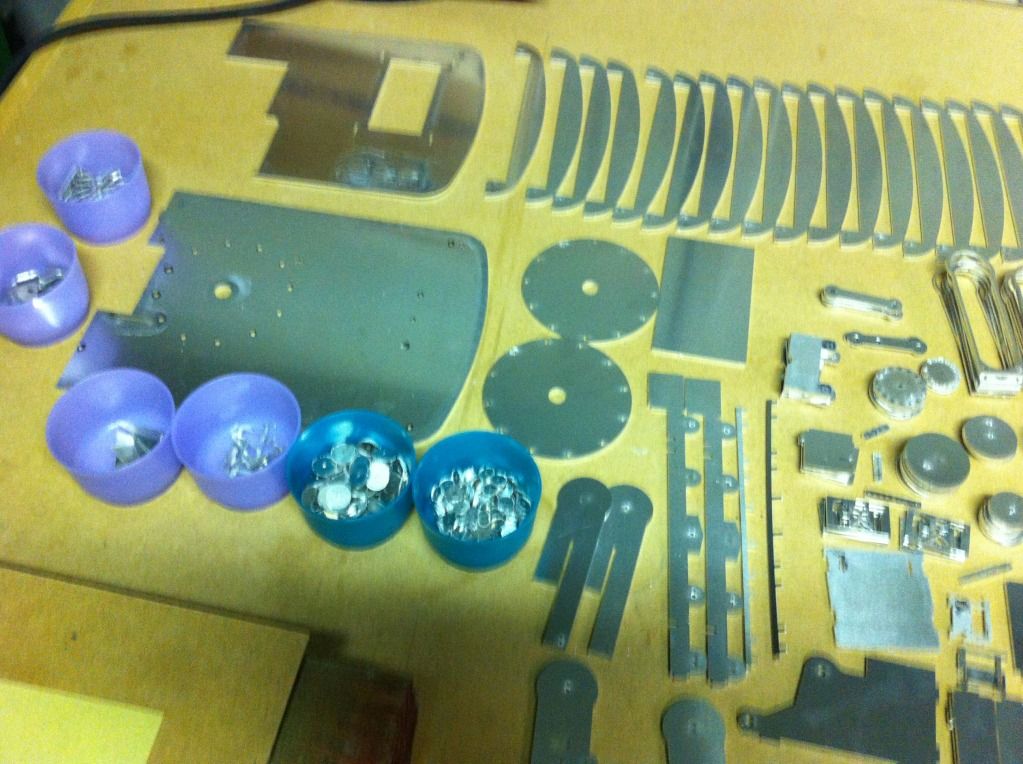
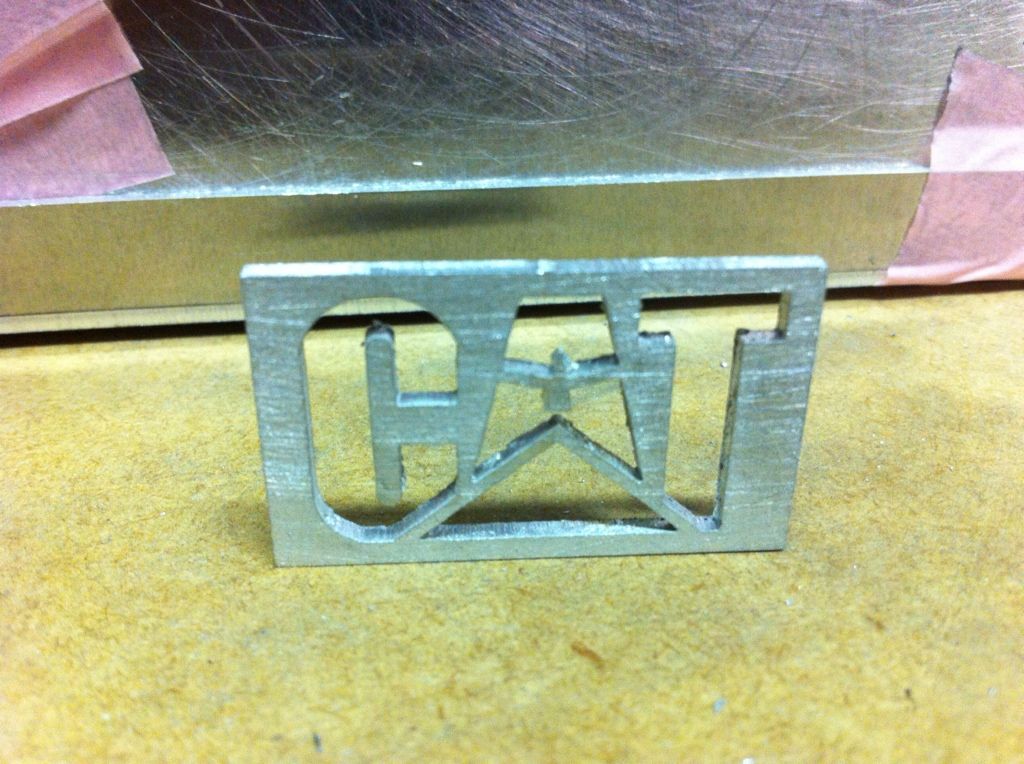
I added a few CAT logo's. That is always nice to create the final touch 
Once I complete the sanding I will start putting some pictures and explain step by step the building process.
|
|
|
05.09.2012 10:29 |
|
|
|
|
|
|
|
|
caterpilar
Doppel-As
Dabei seit: 09.04.2012
Beiträge: 113
Maßstab: 1:16
Level: 33 [?]
Erfahrungspunkte: 502.879
Nächster Level: 555.345
Themenstarter
|
|
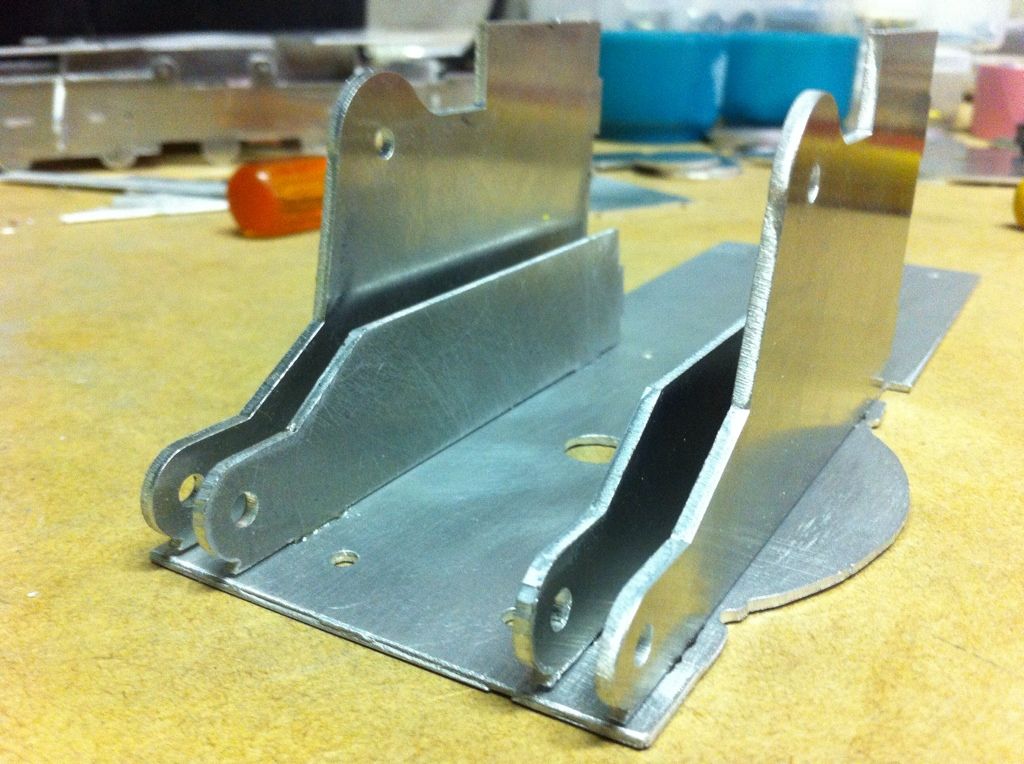
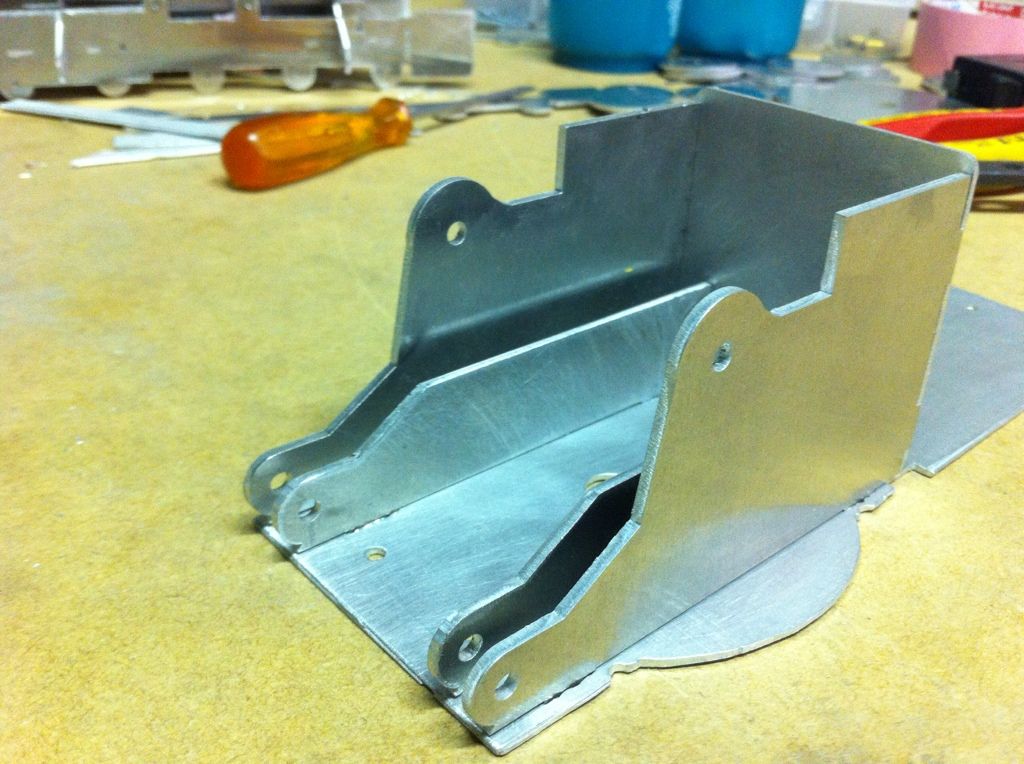
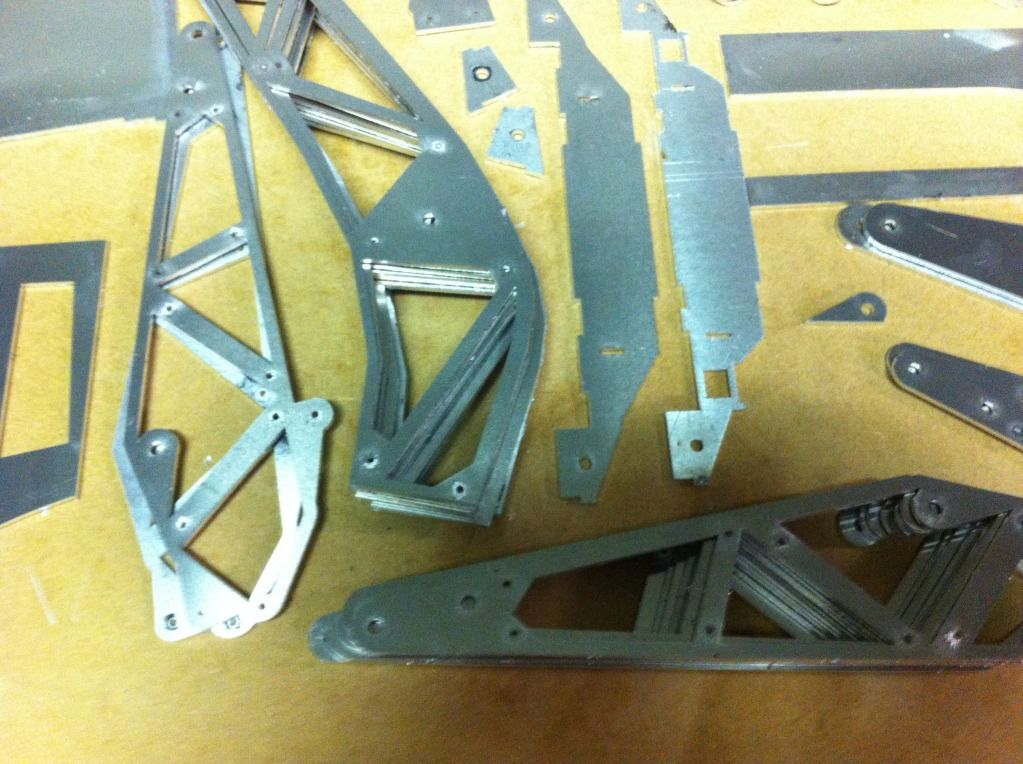
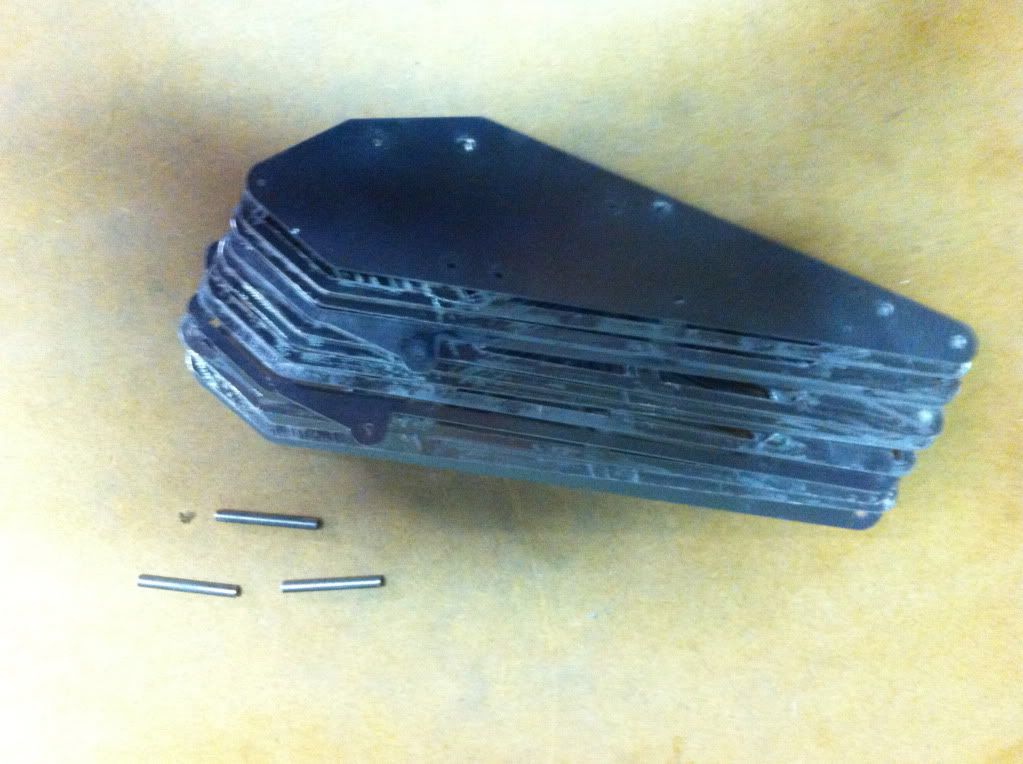
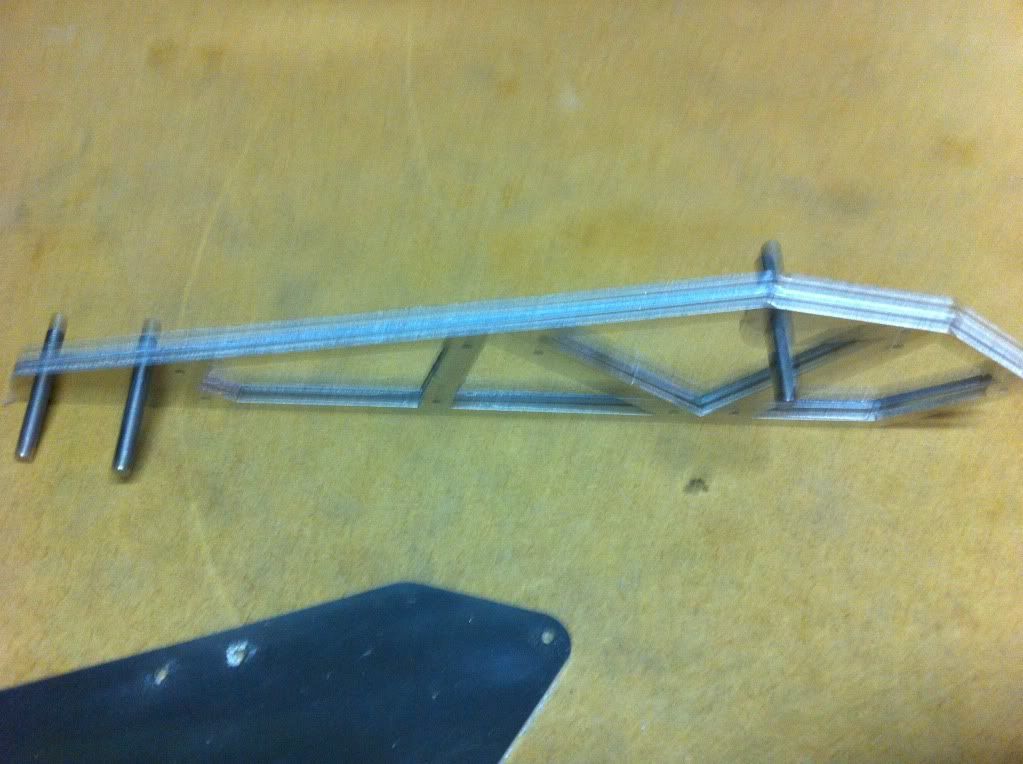
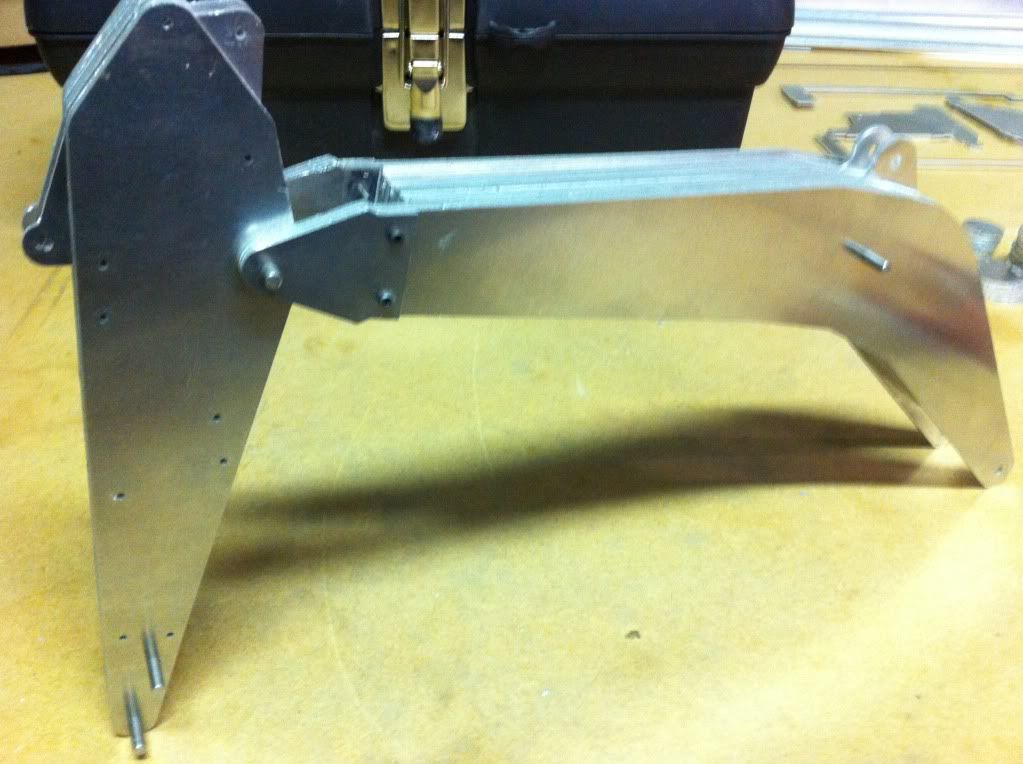
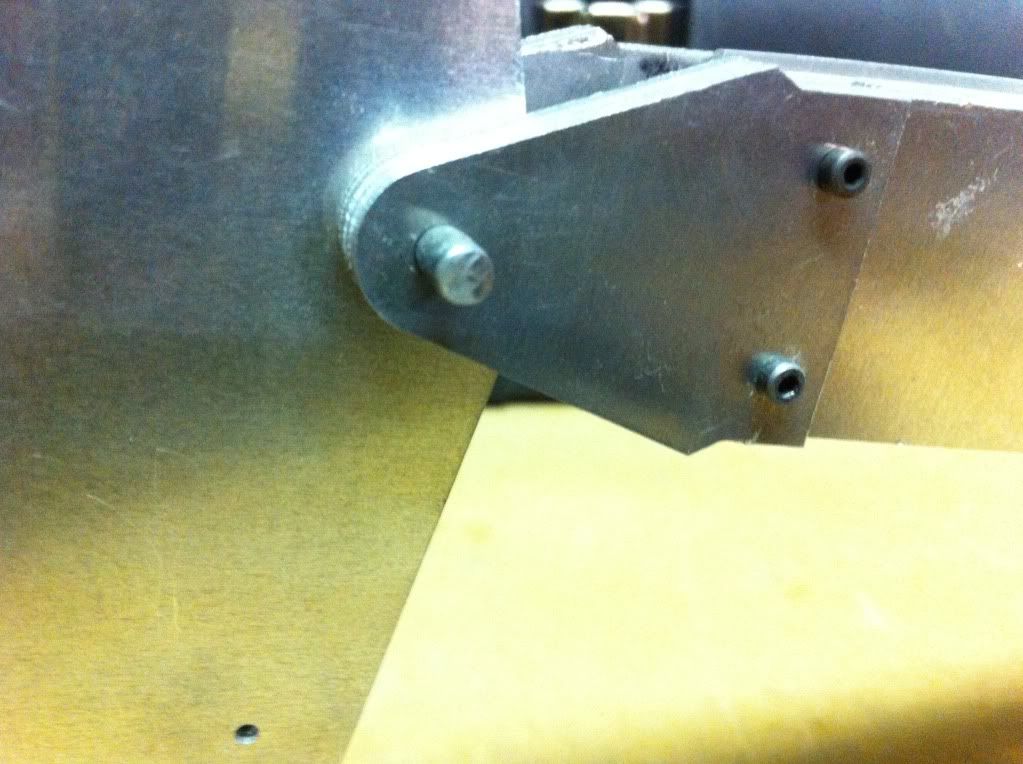
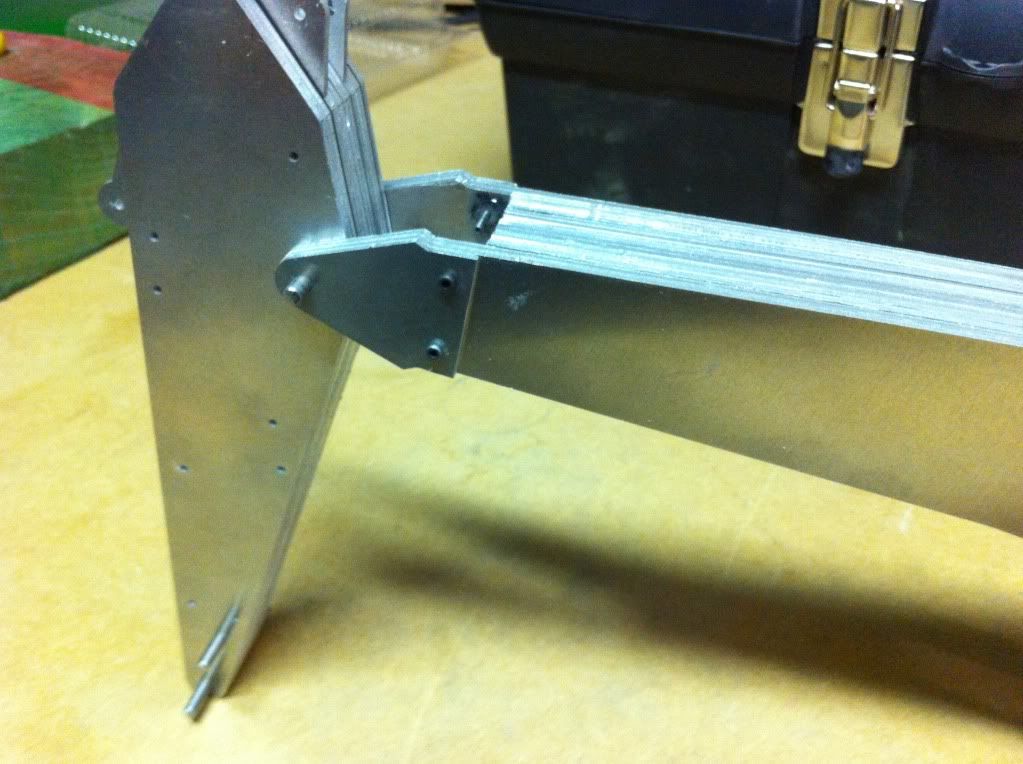
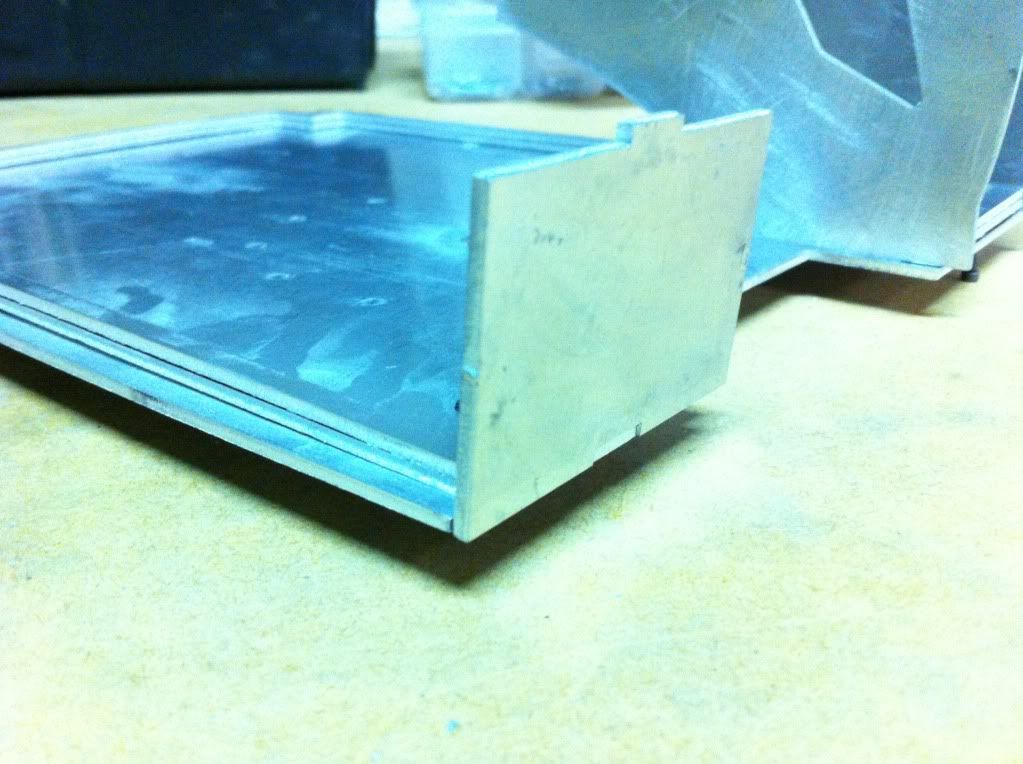
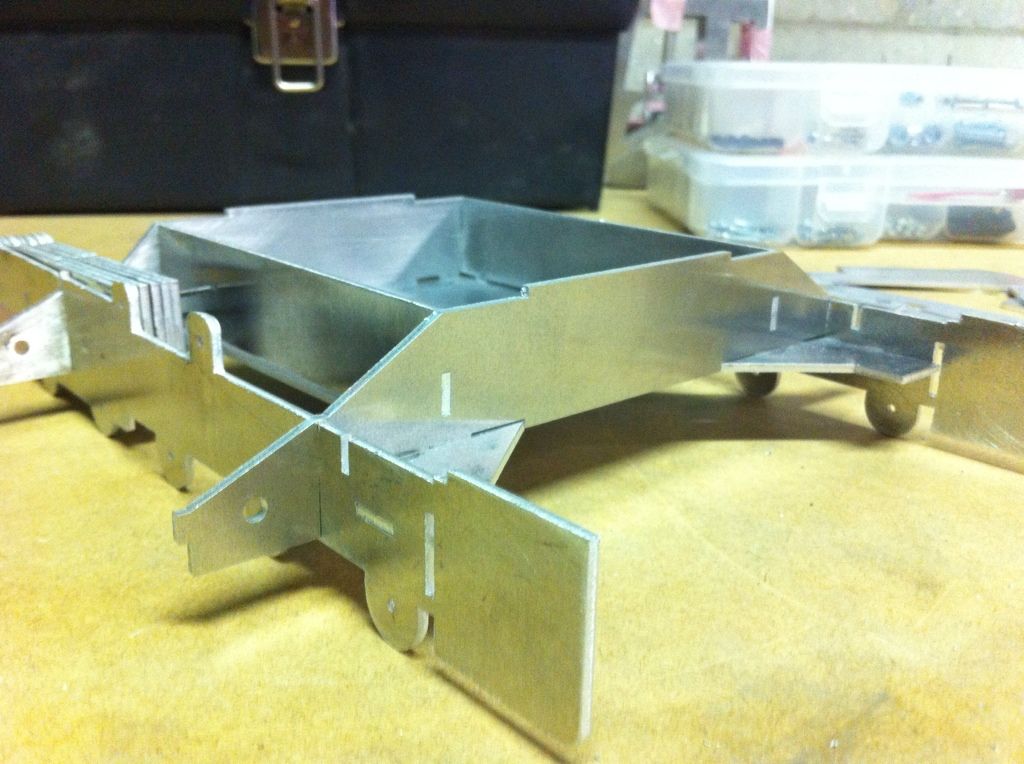
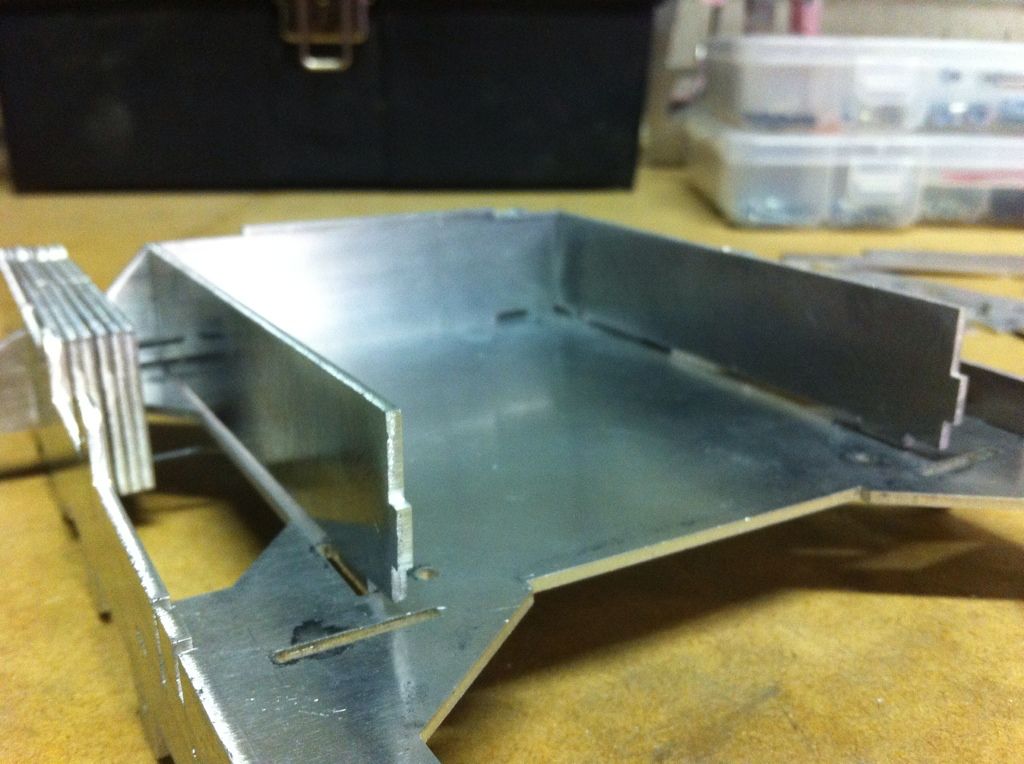
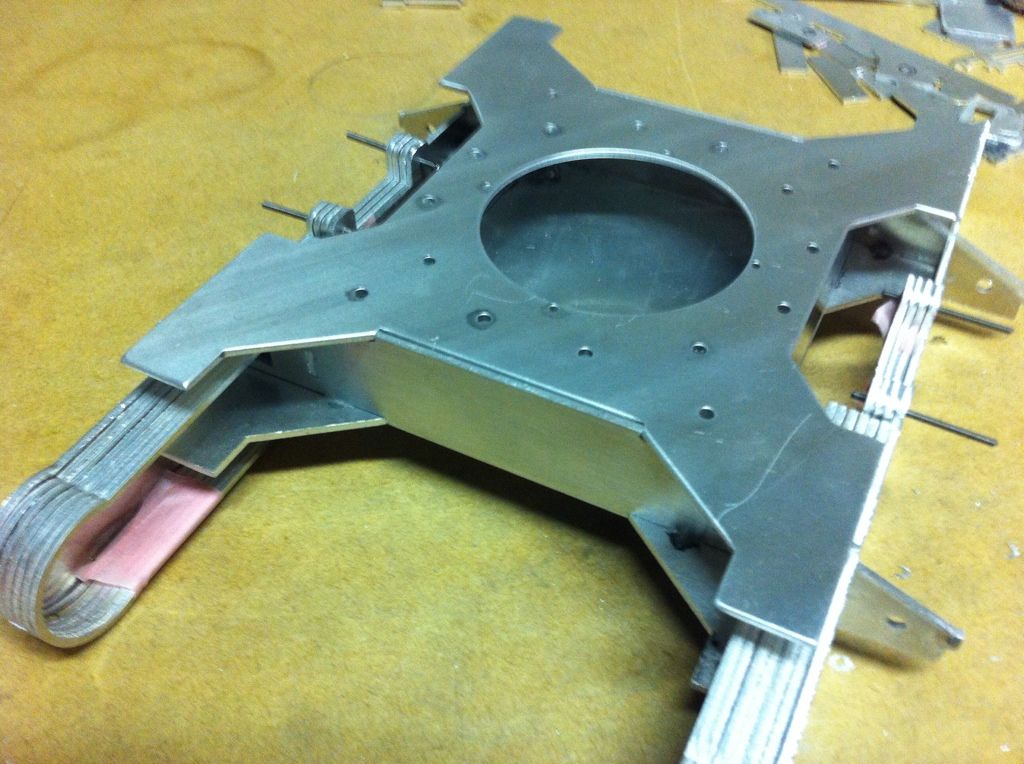
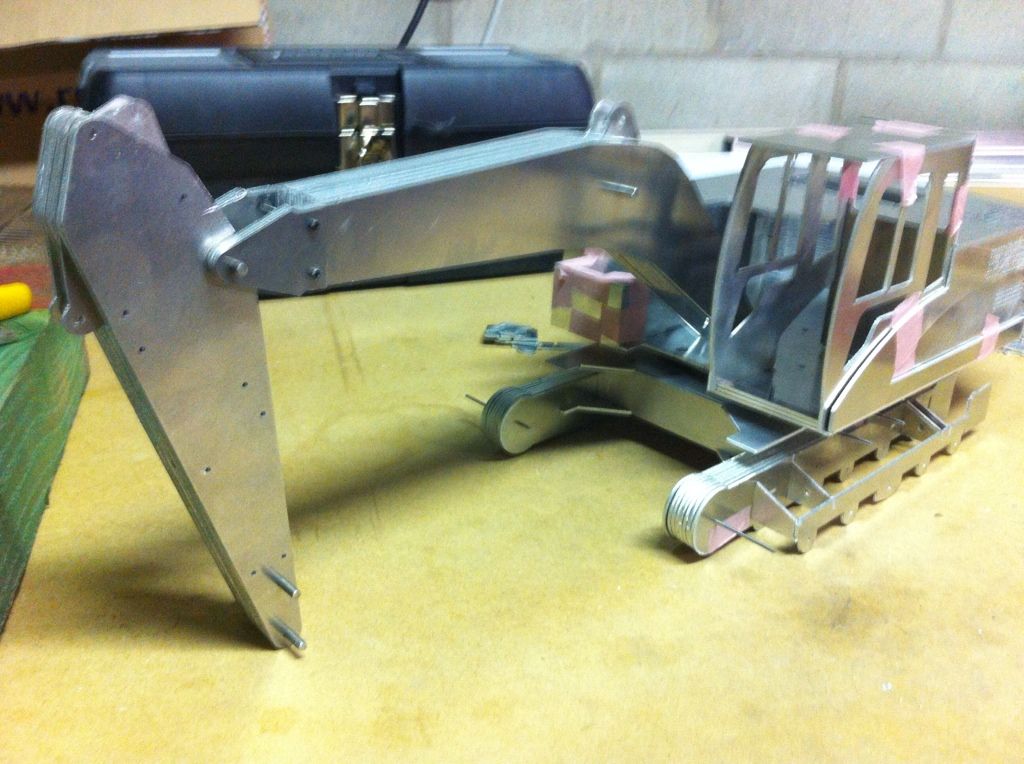
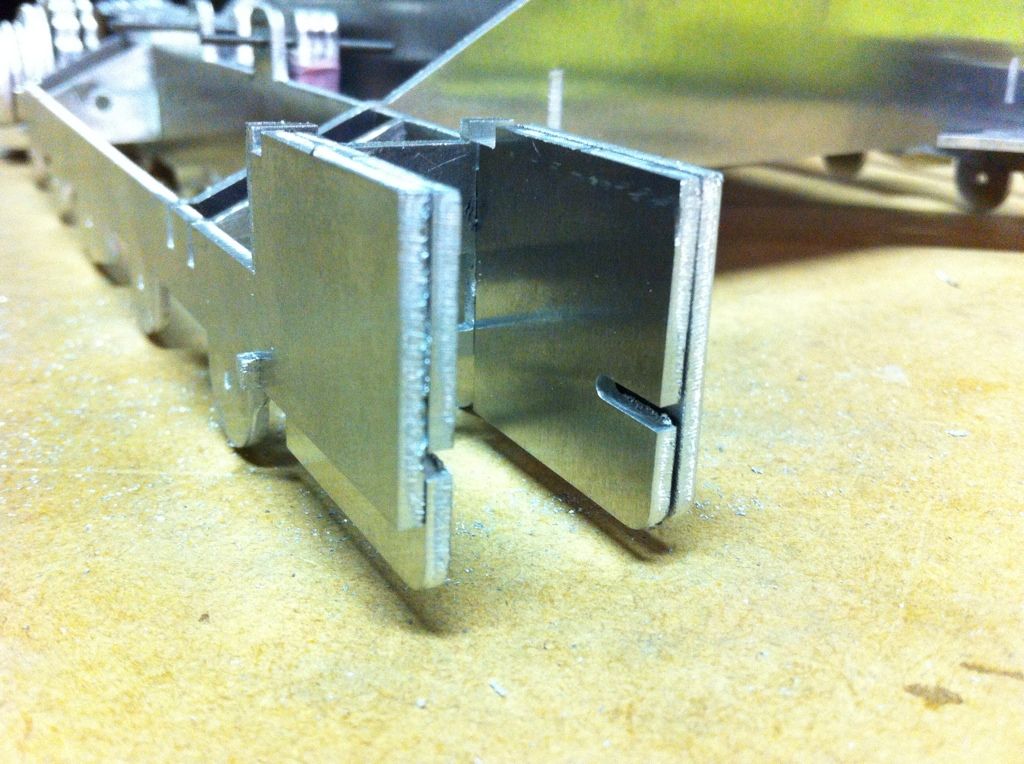
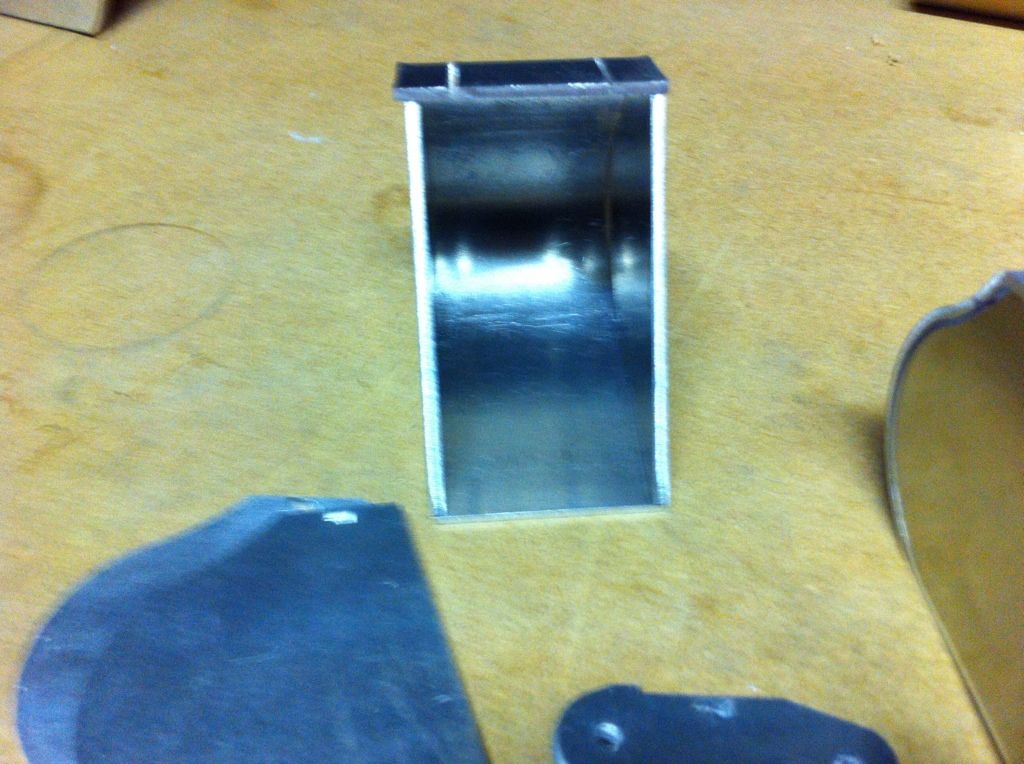
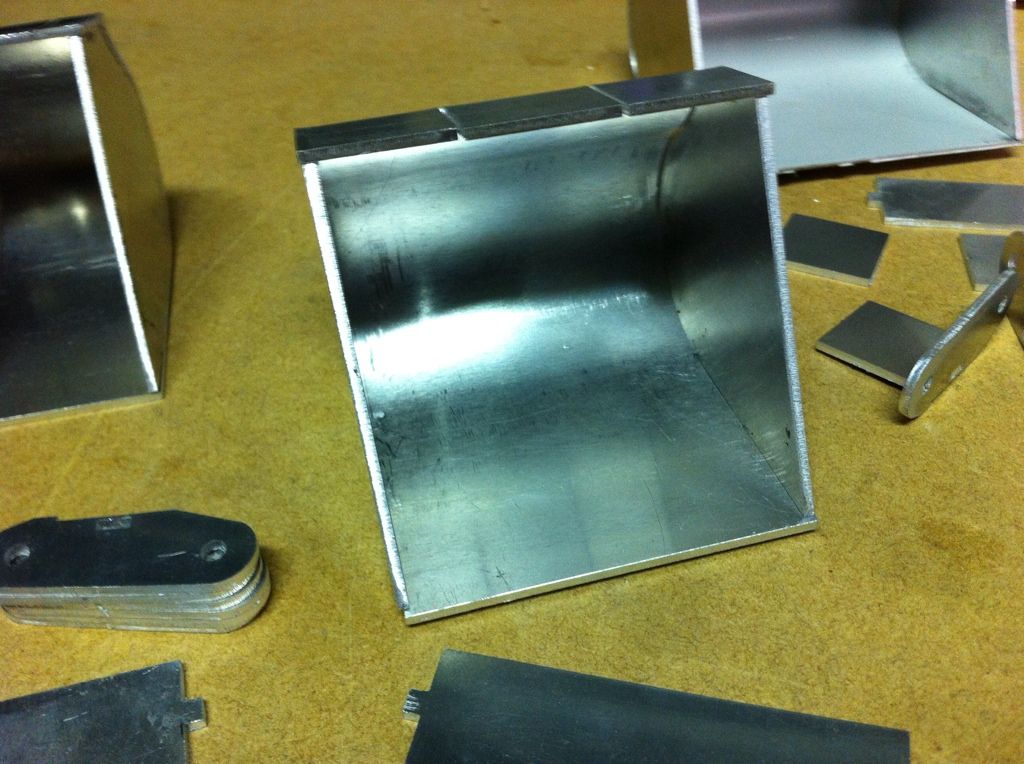
day 2.
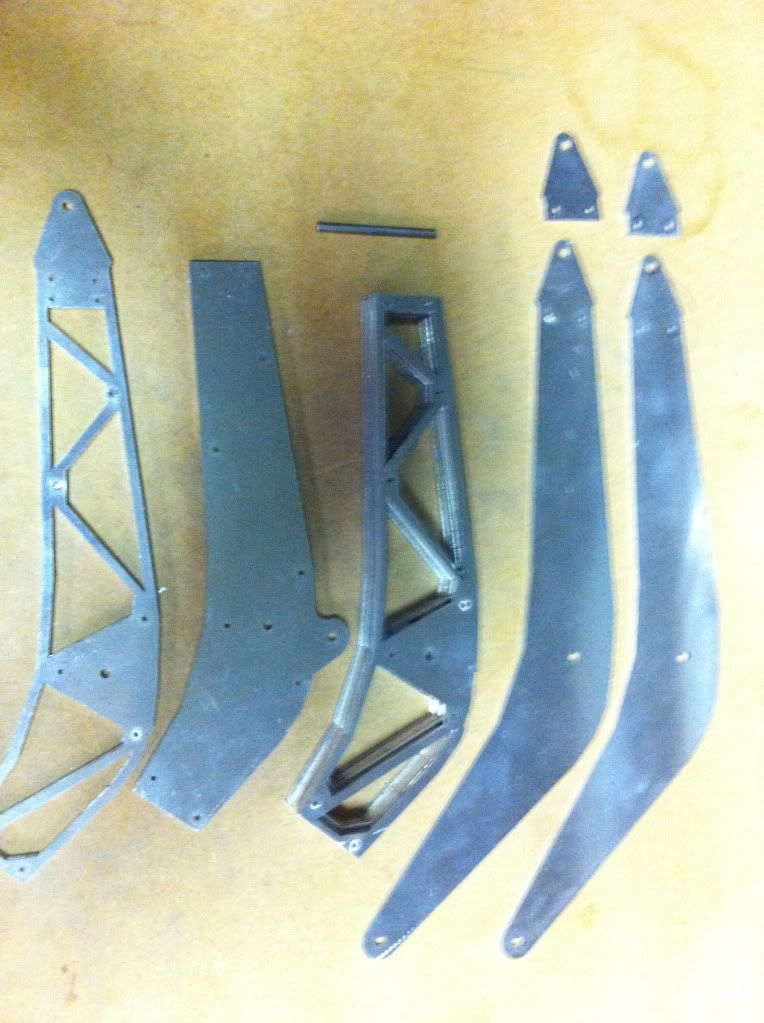
I started to built the boom and the arm and the body/cabin of the excavator. I started by preparing a few 4mm rods with a length of 50mm to hold the boom and arm parts together until all pieces are fitted. I still need to put the 2 mm screws in.
I sorted all the parts needed for the arm
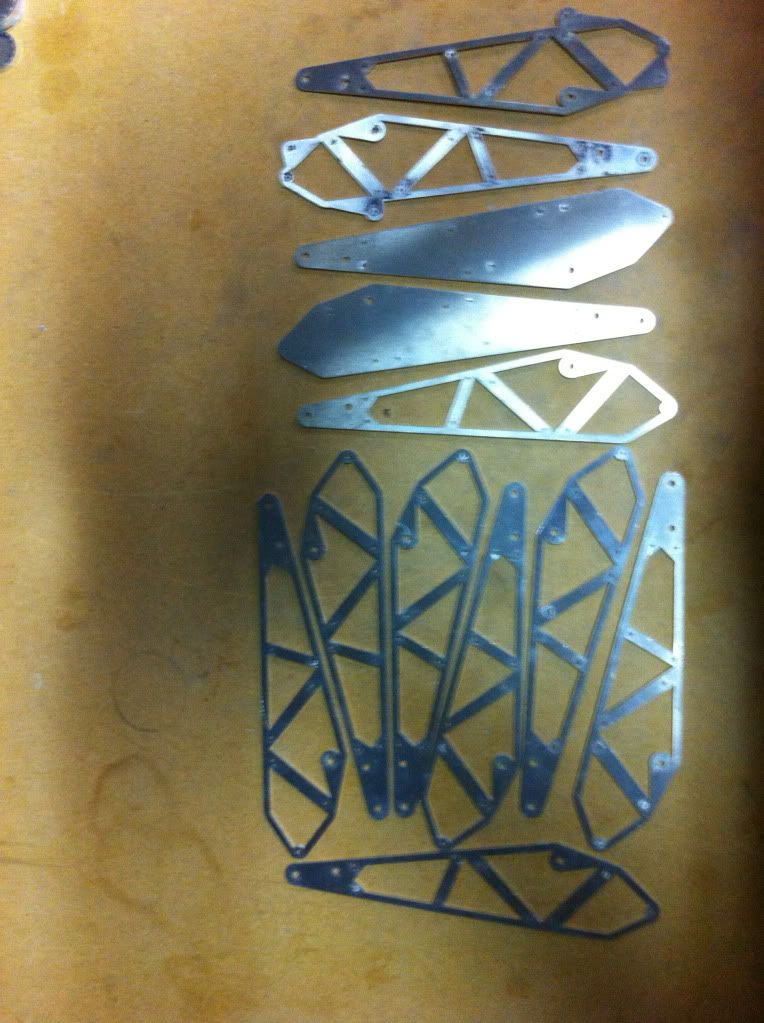
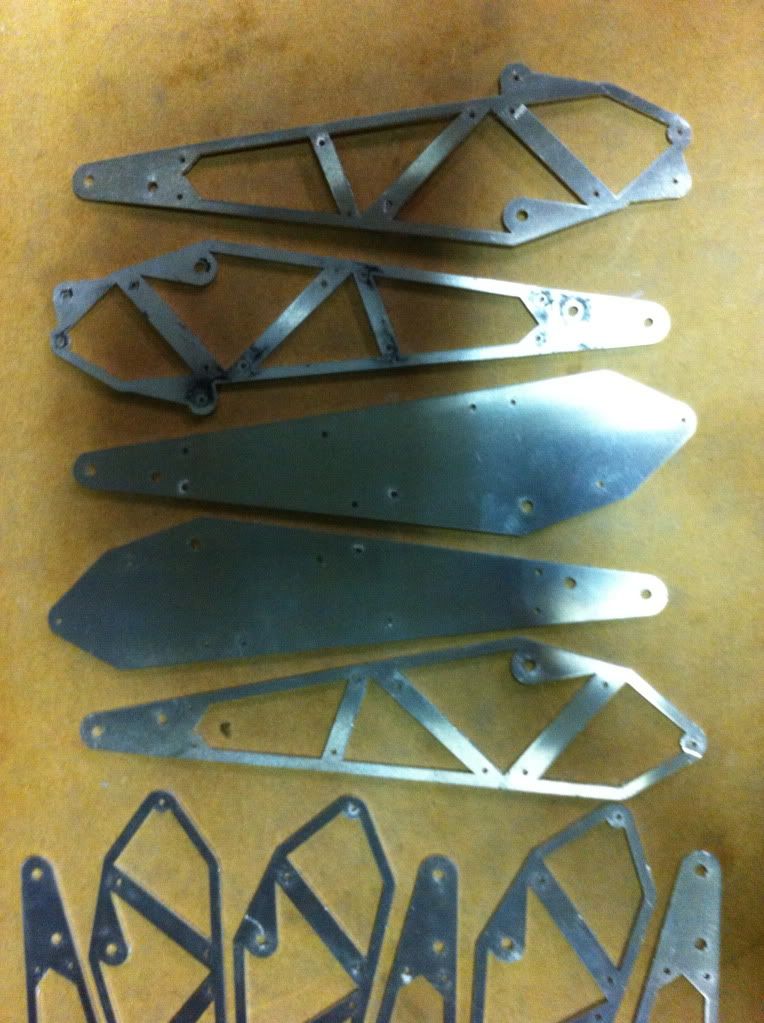
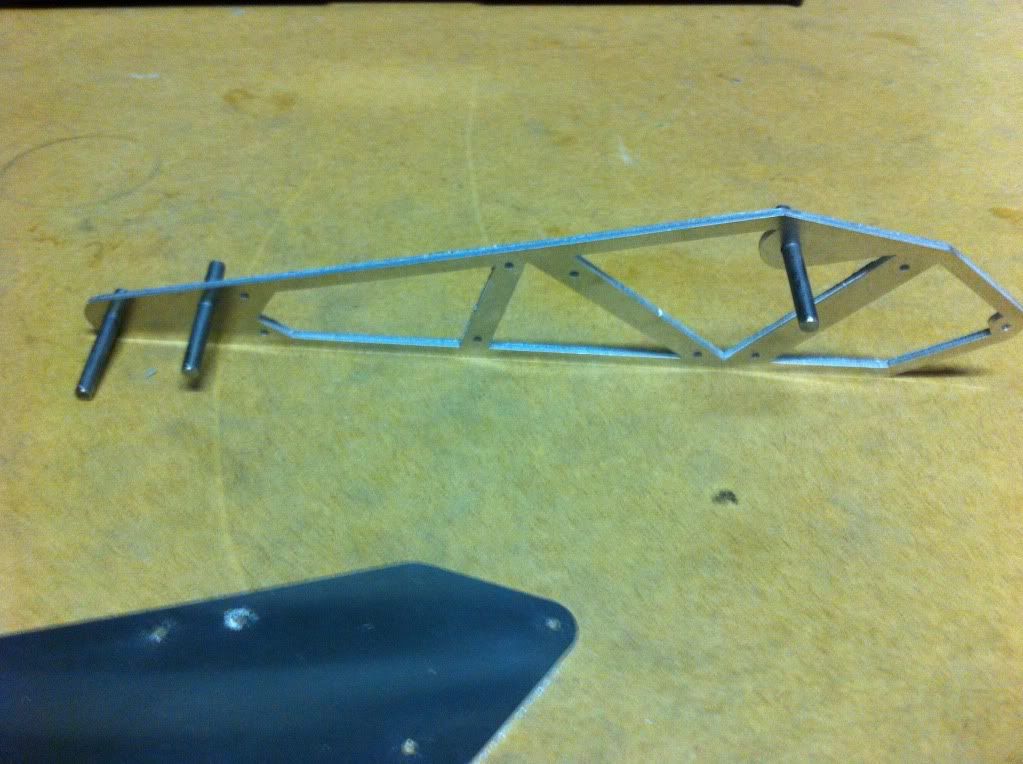
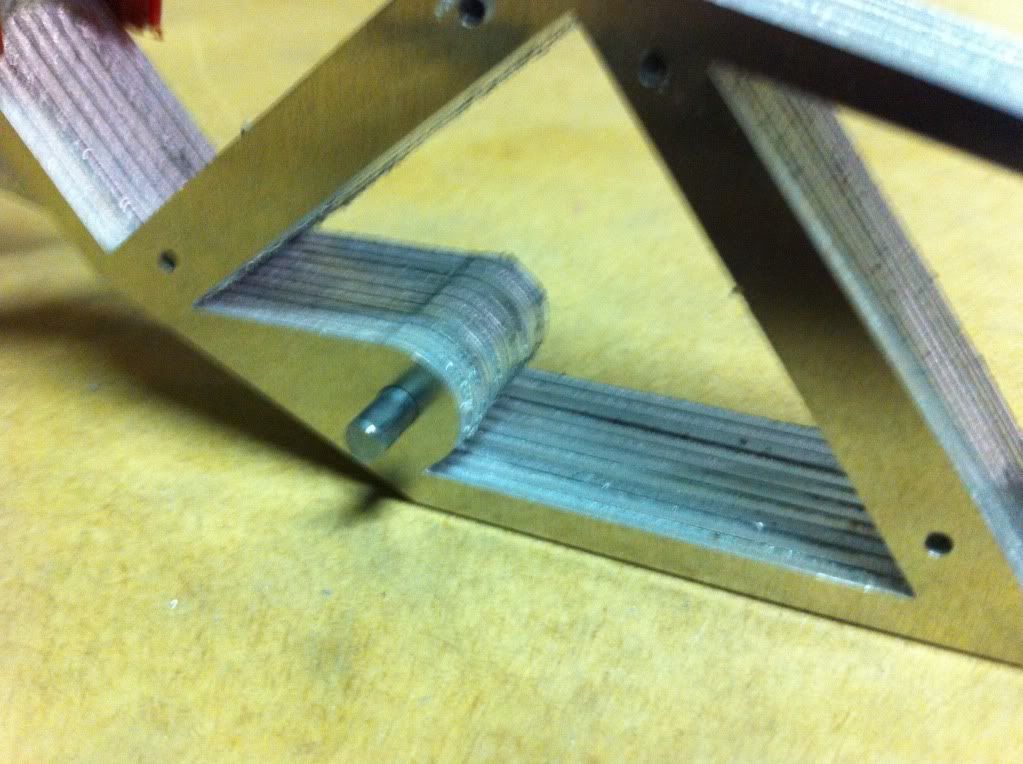

and finally the side plates to complete the arm.
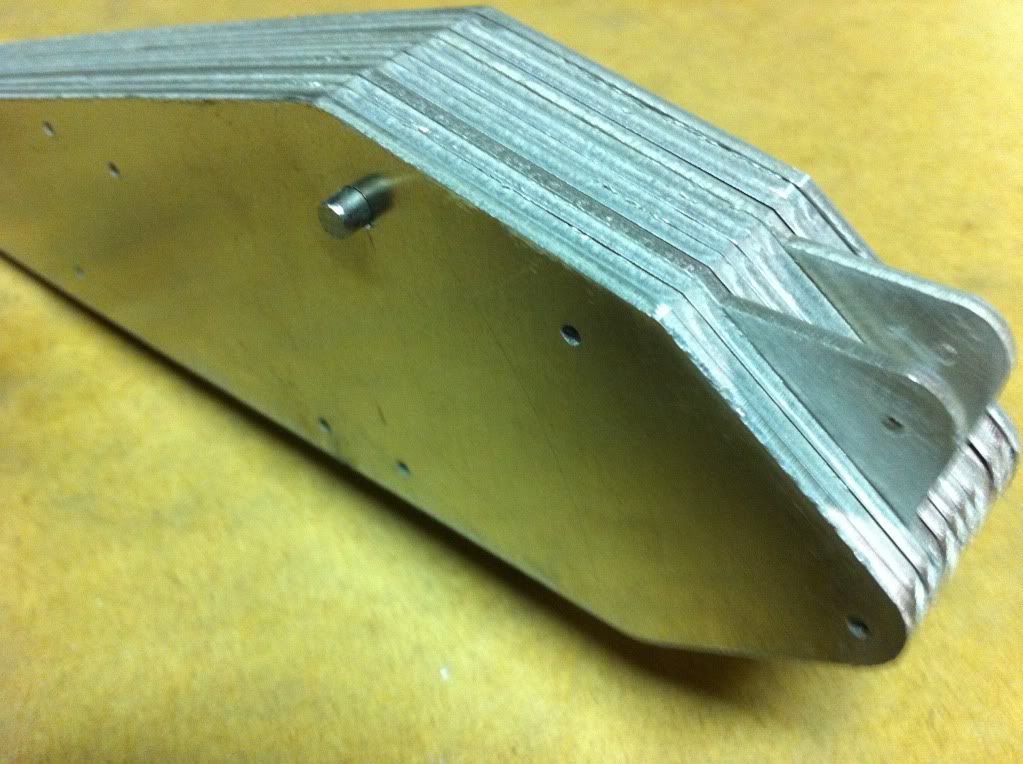
For the boom it went just as easy. I put everything temporary together for now. I will still need to buy the screws.
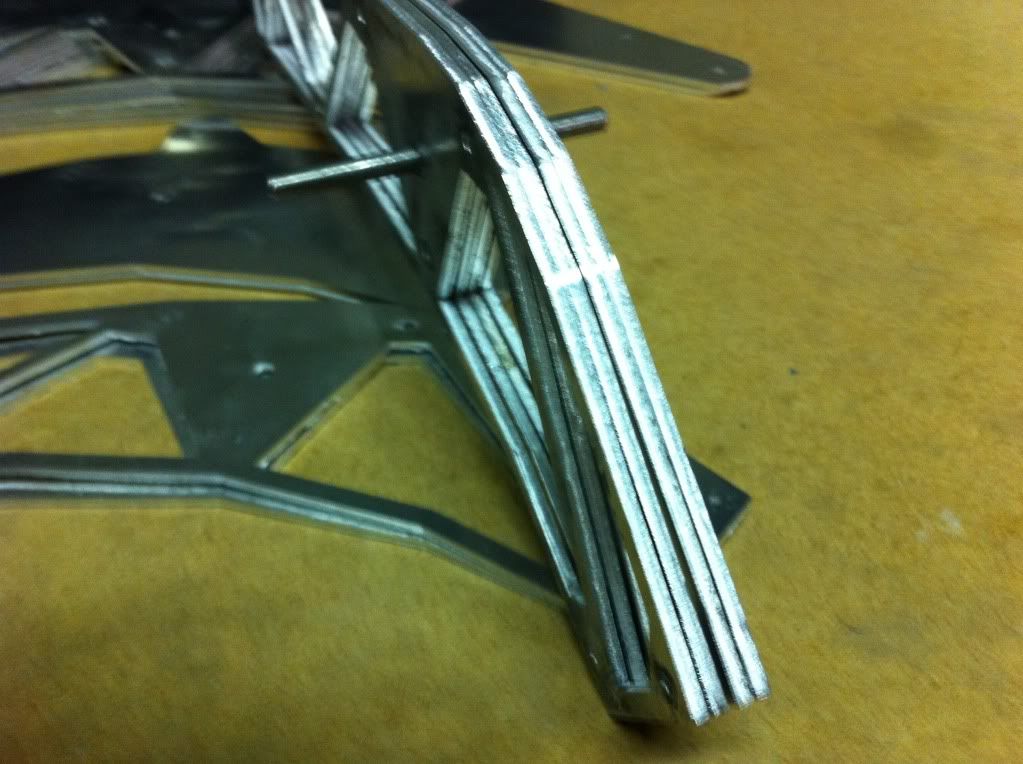
Four units in the middle and then the 2 cylinder attachment plates added
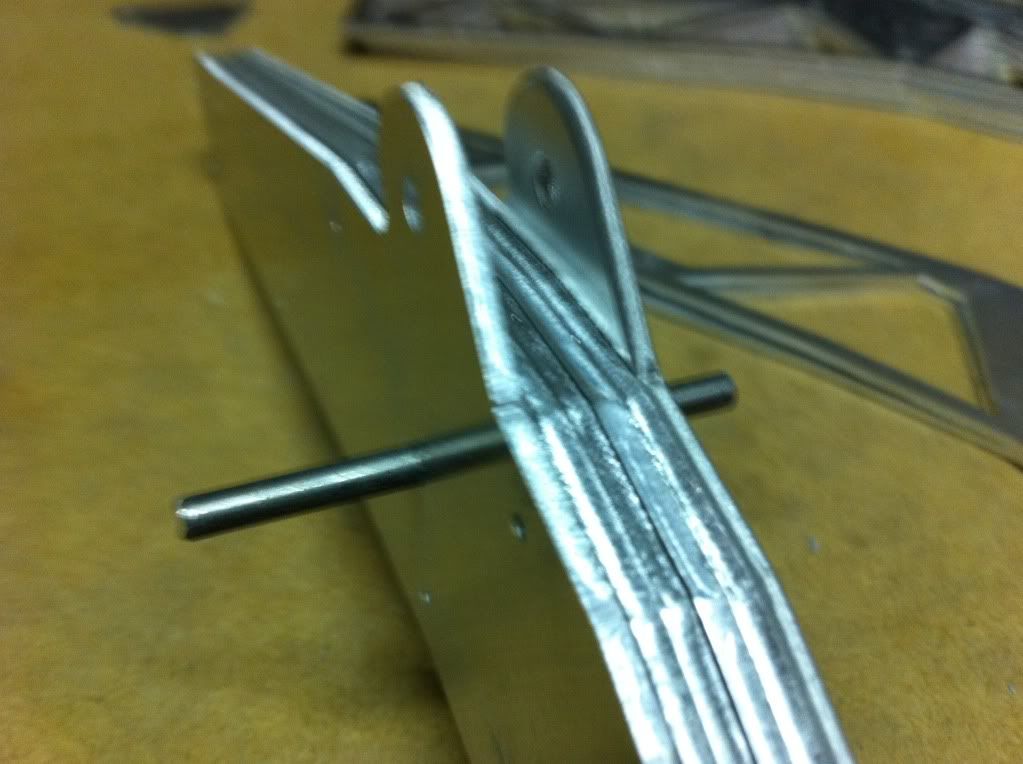

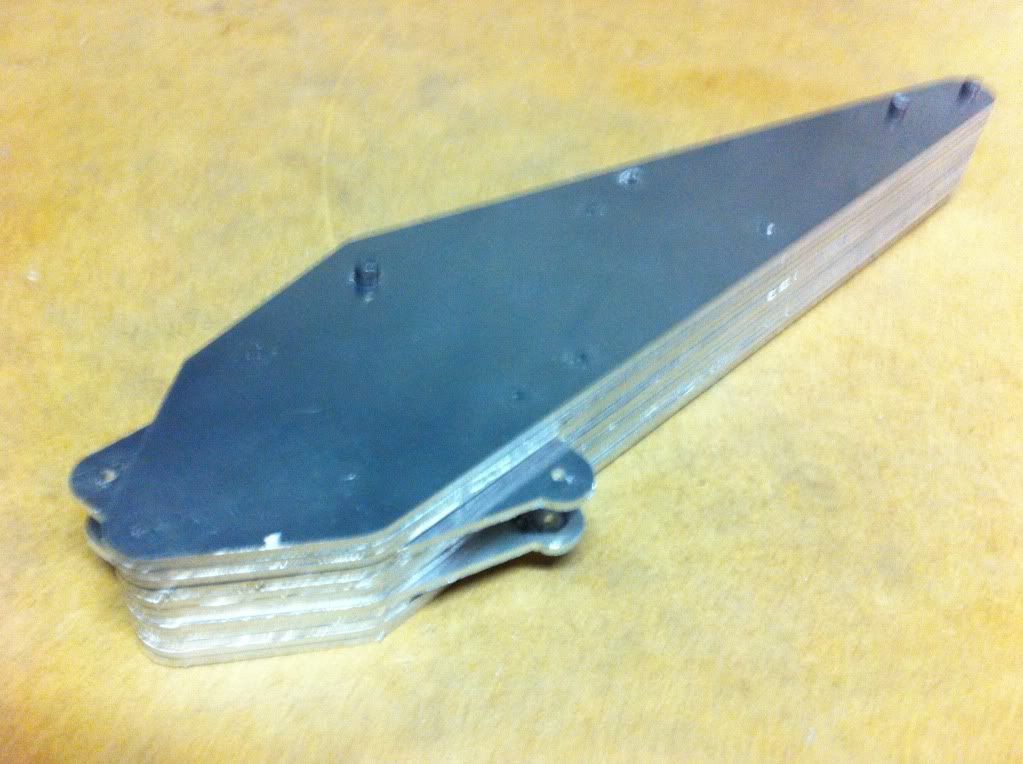
that is how the arm looks when completed (without the screws)
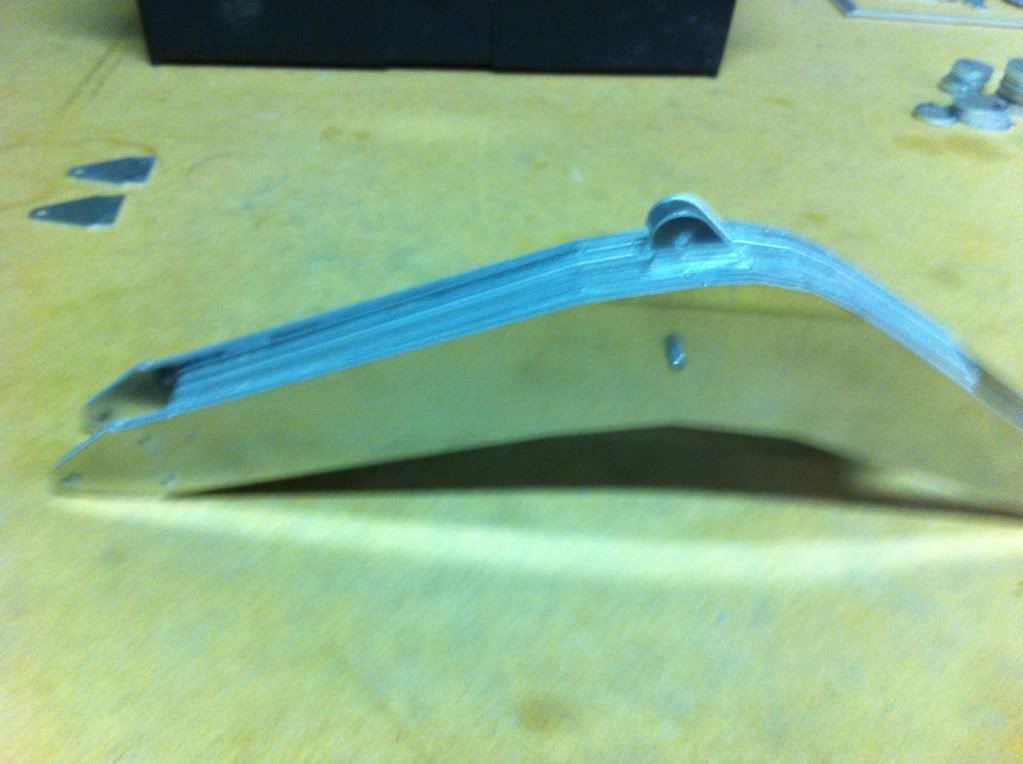
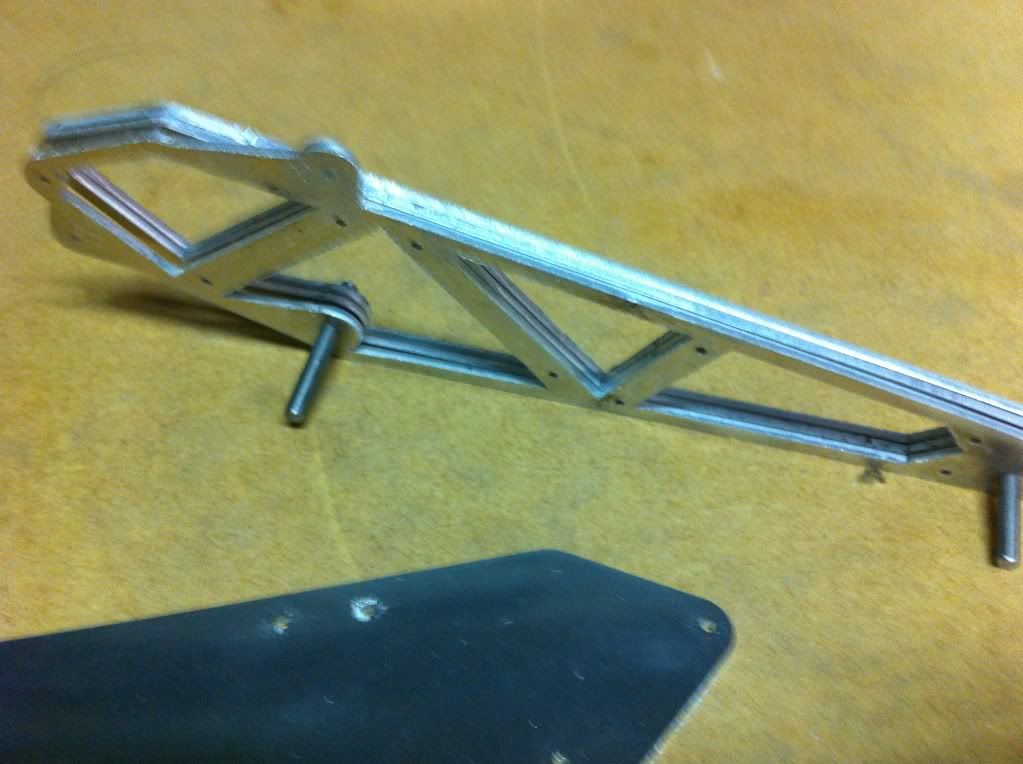
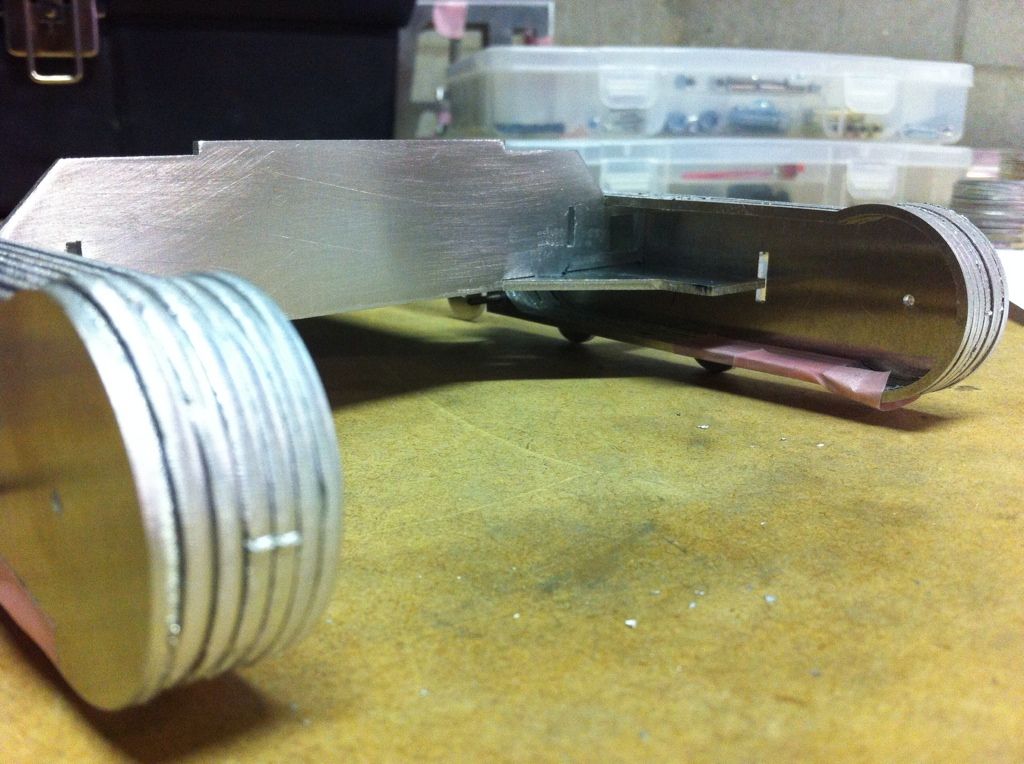
and the arm and boom fitted together
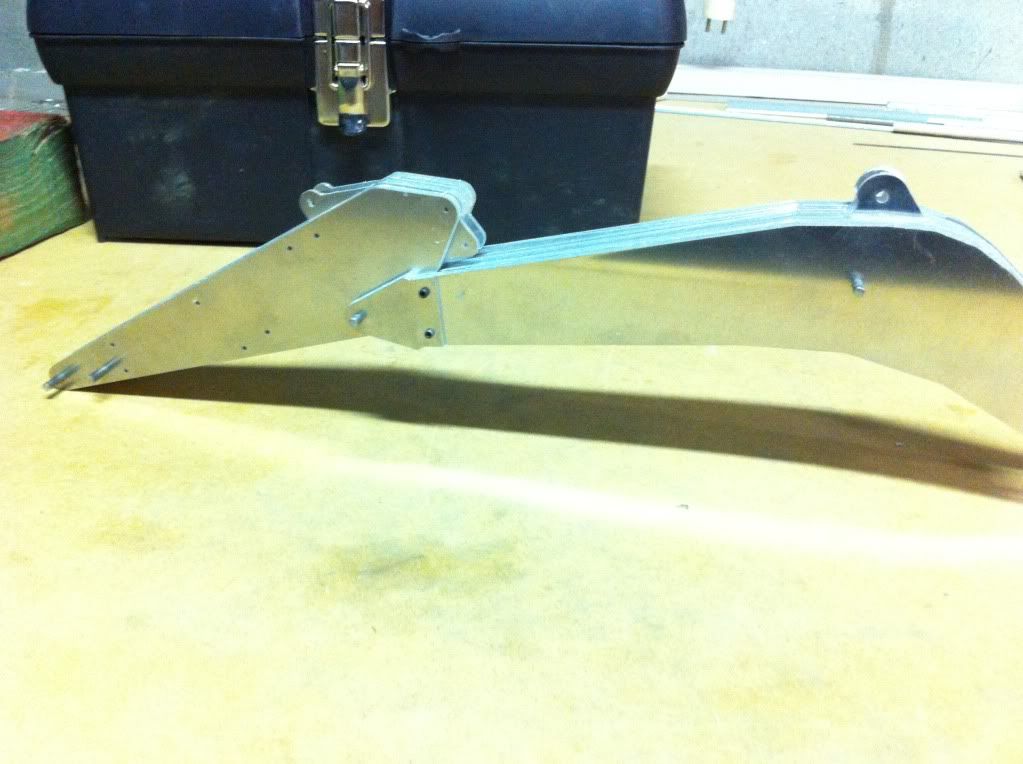
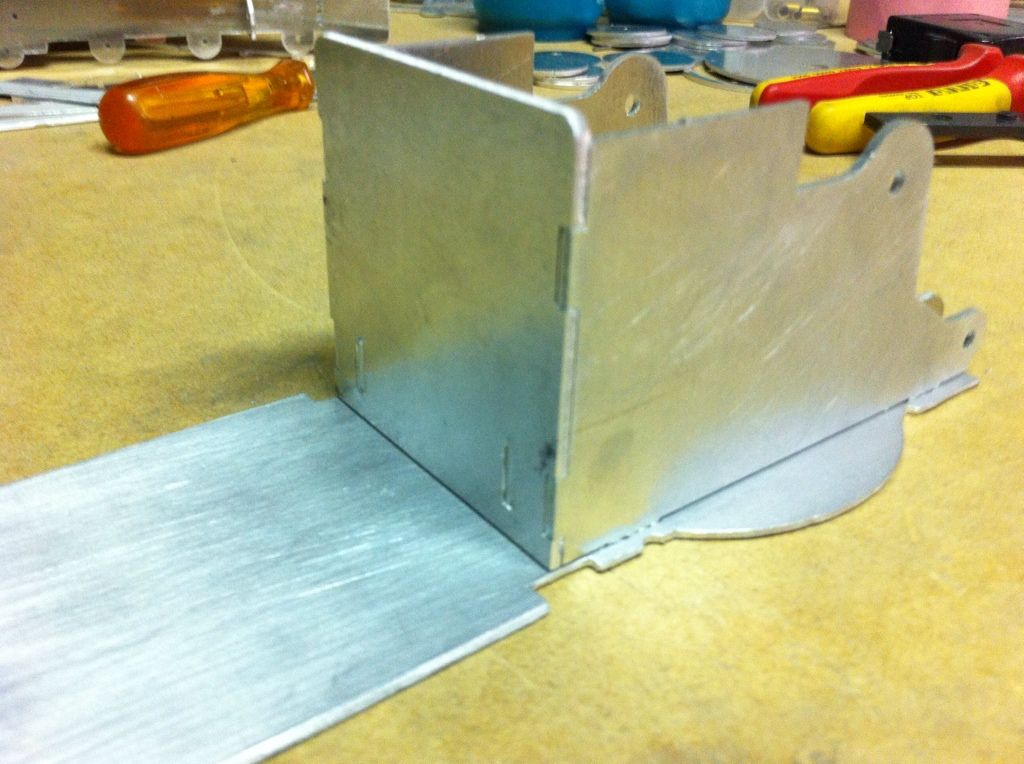
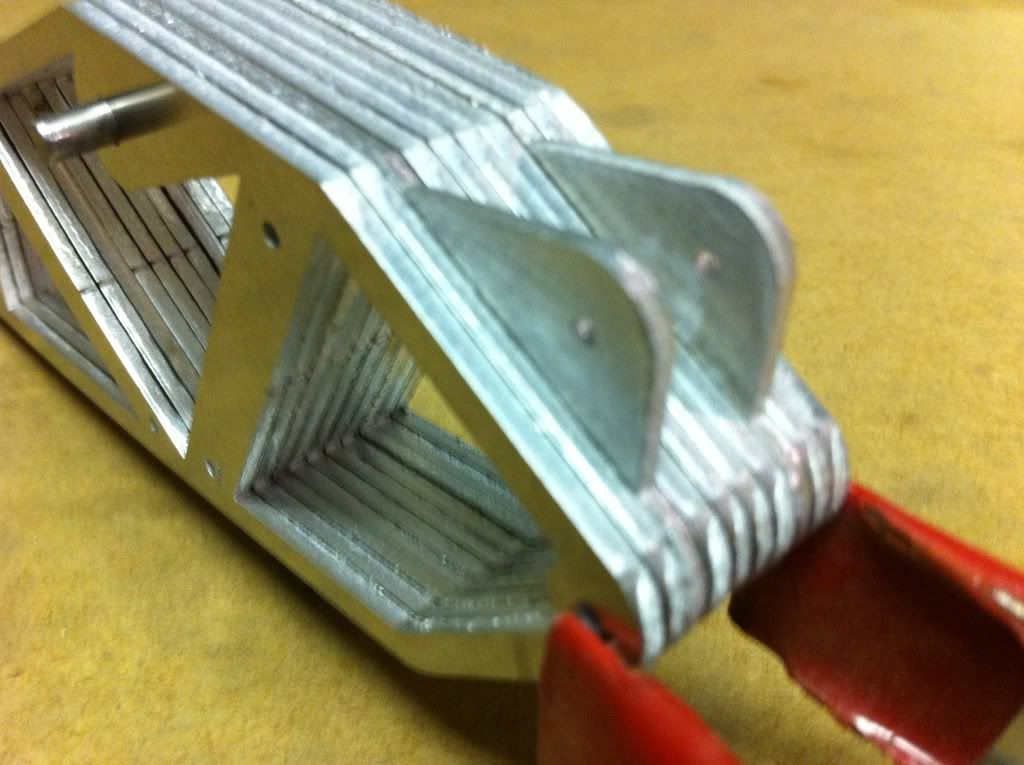
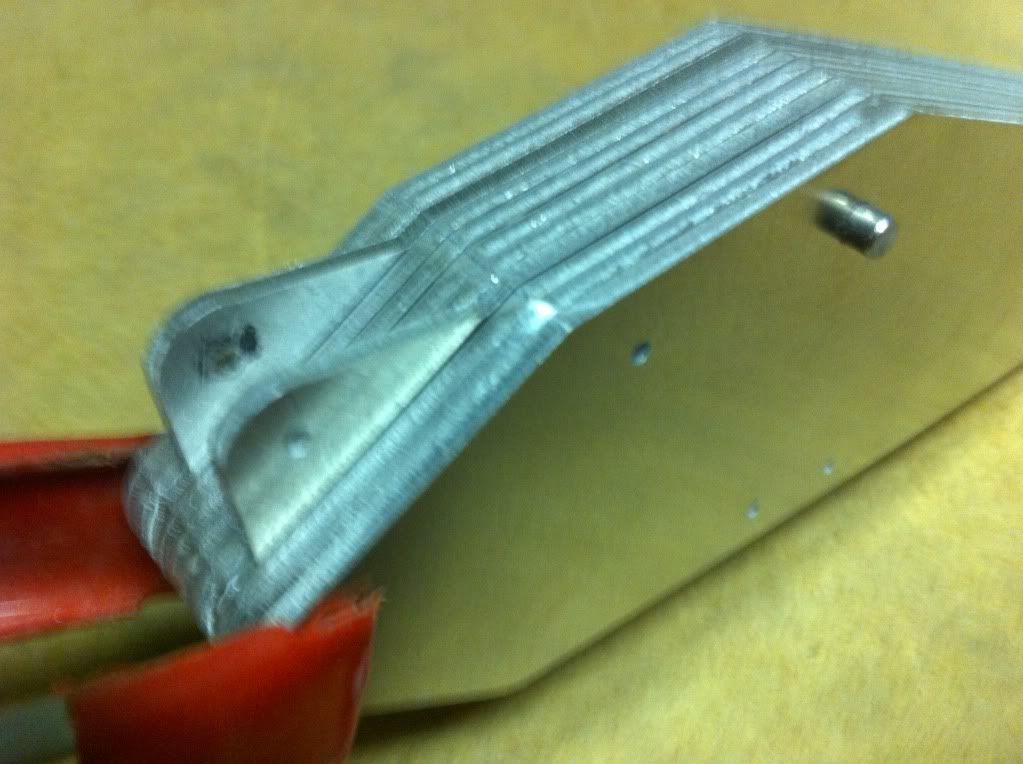
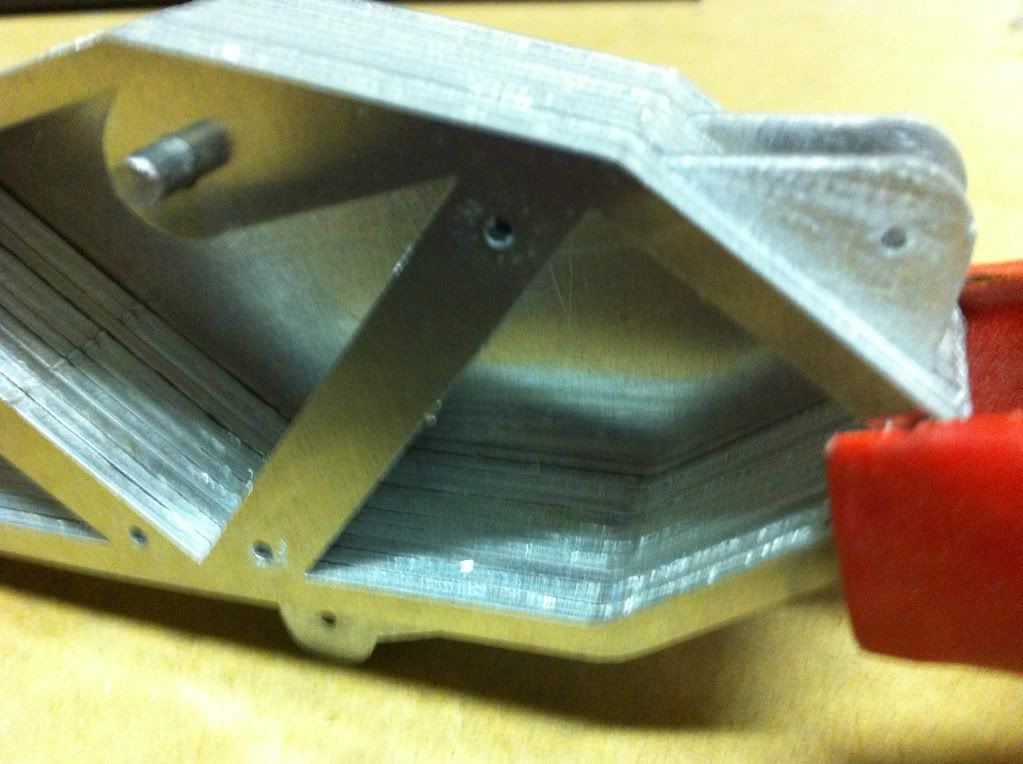
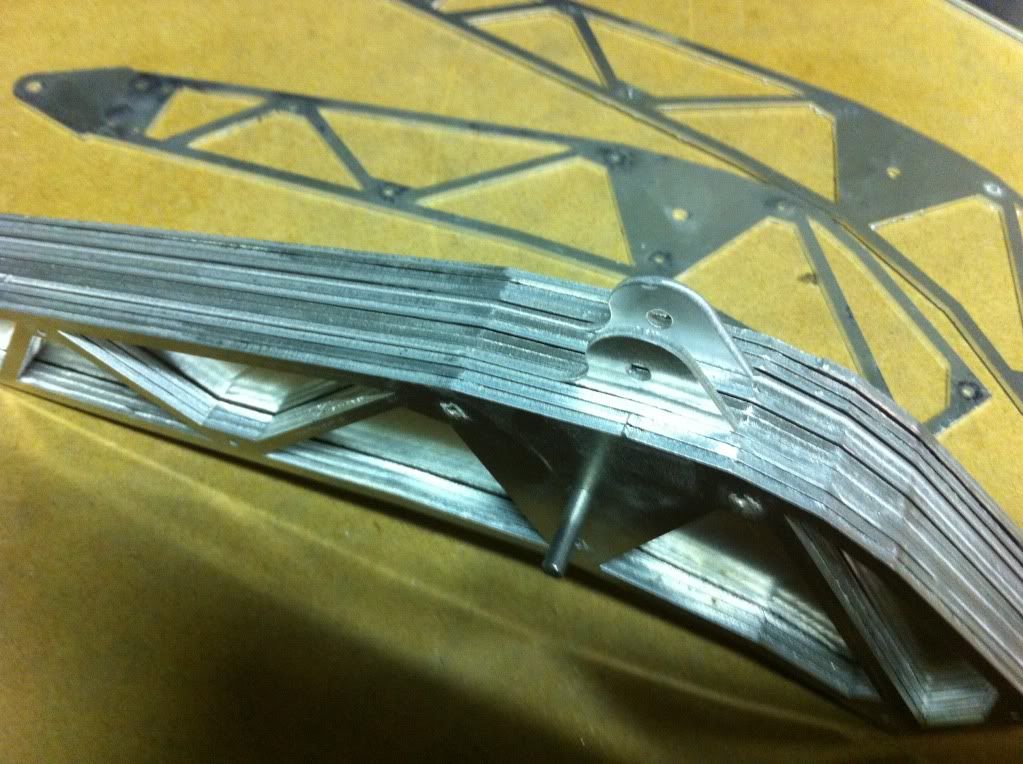
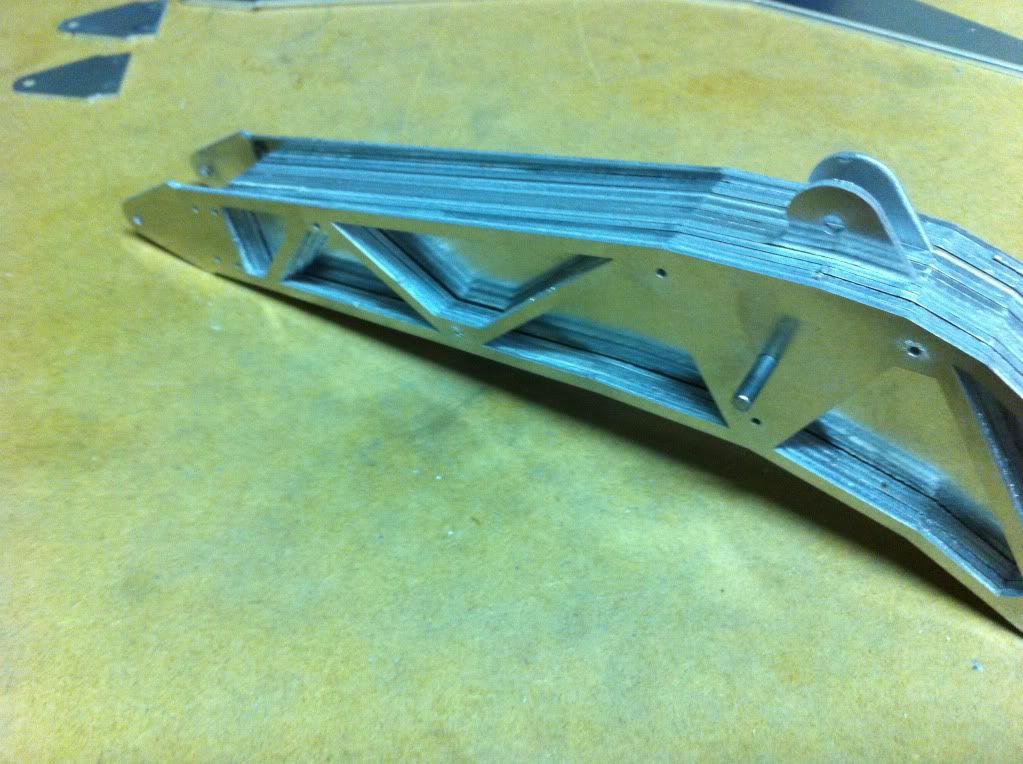
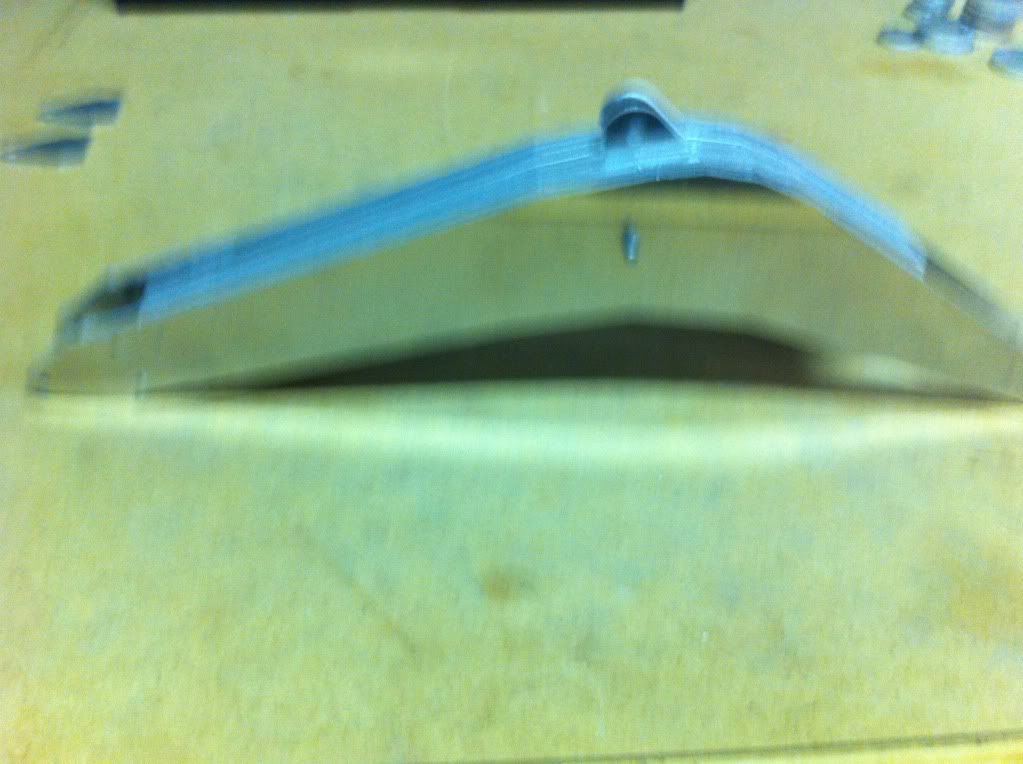
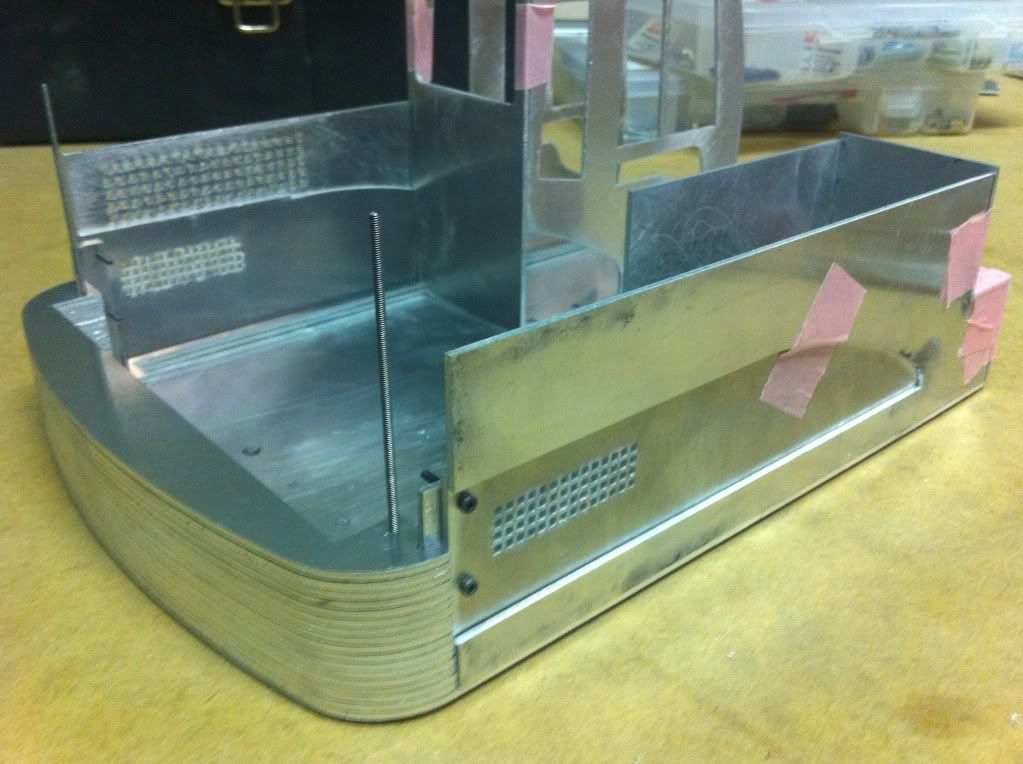
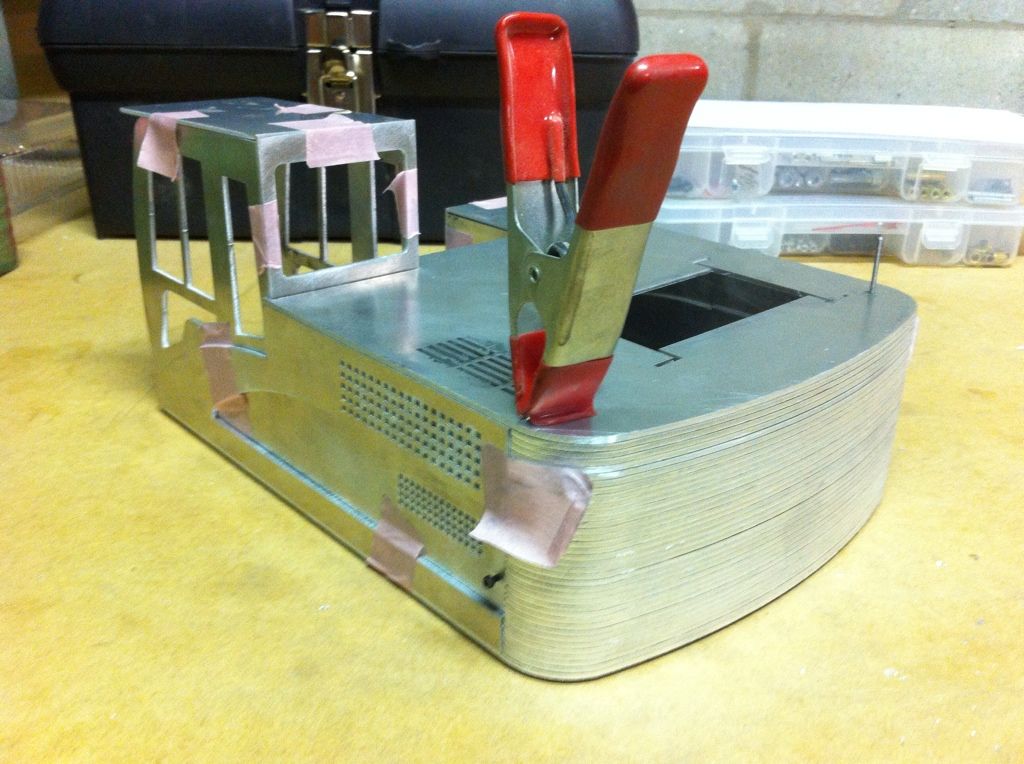
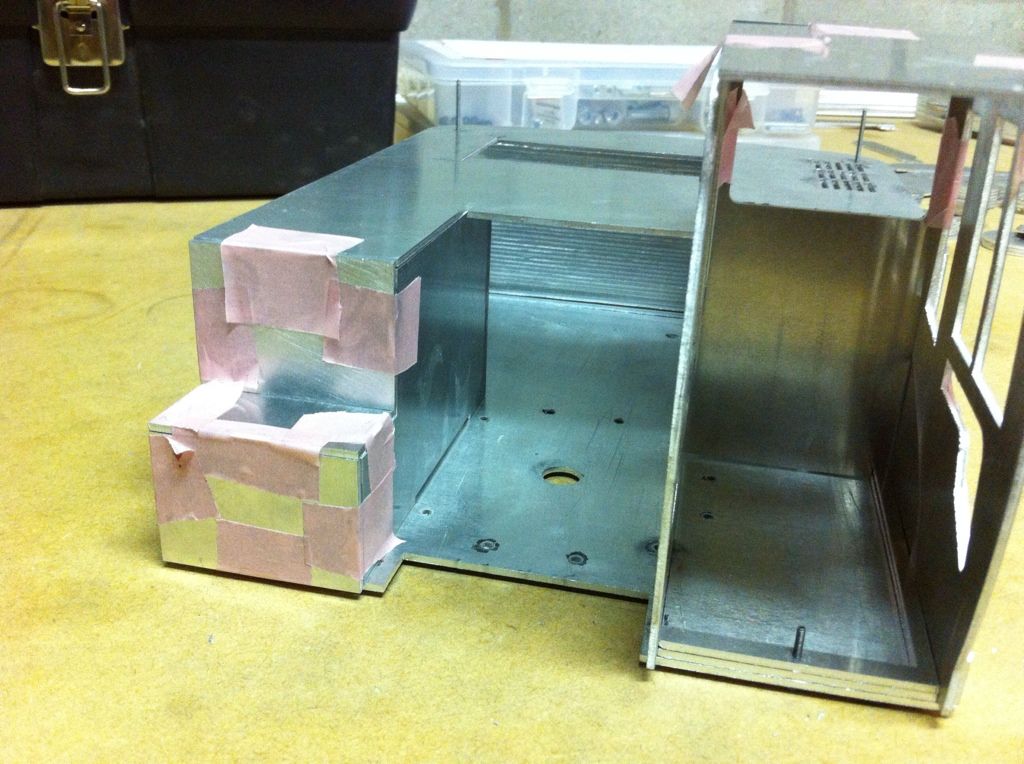
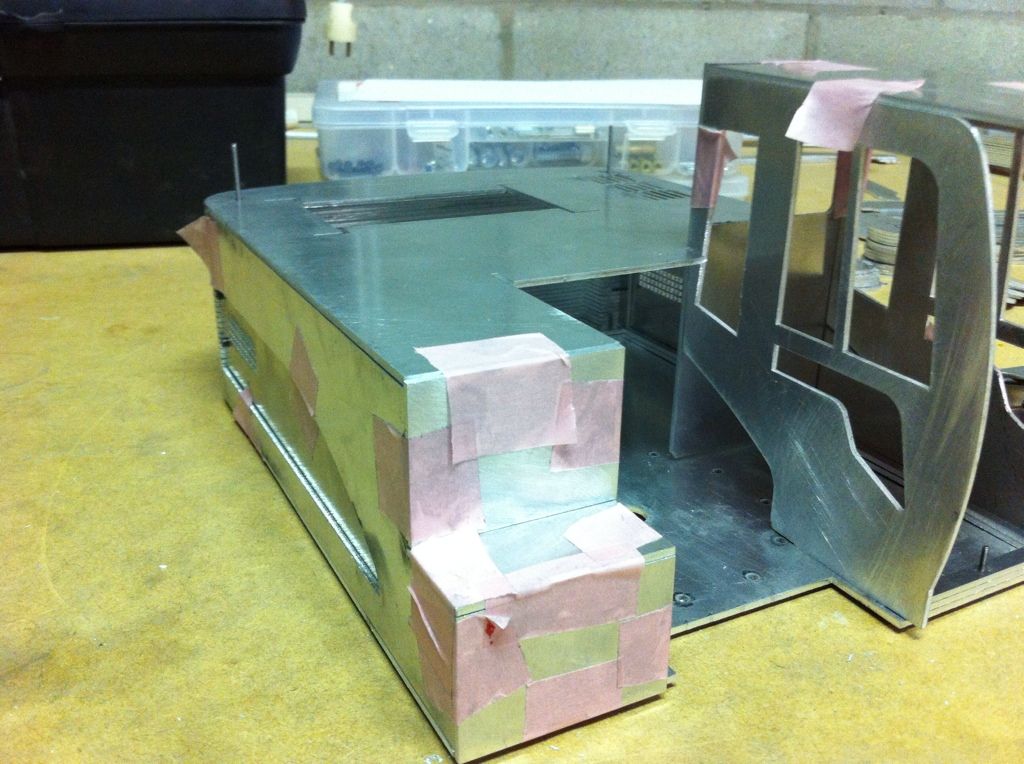
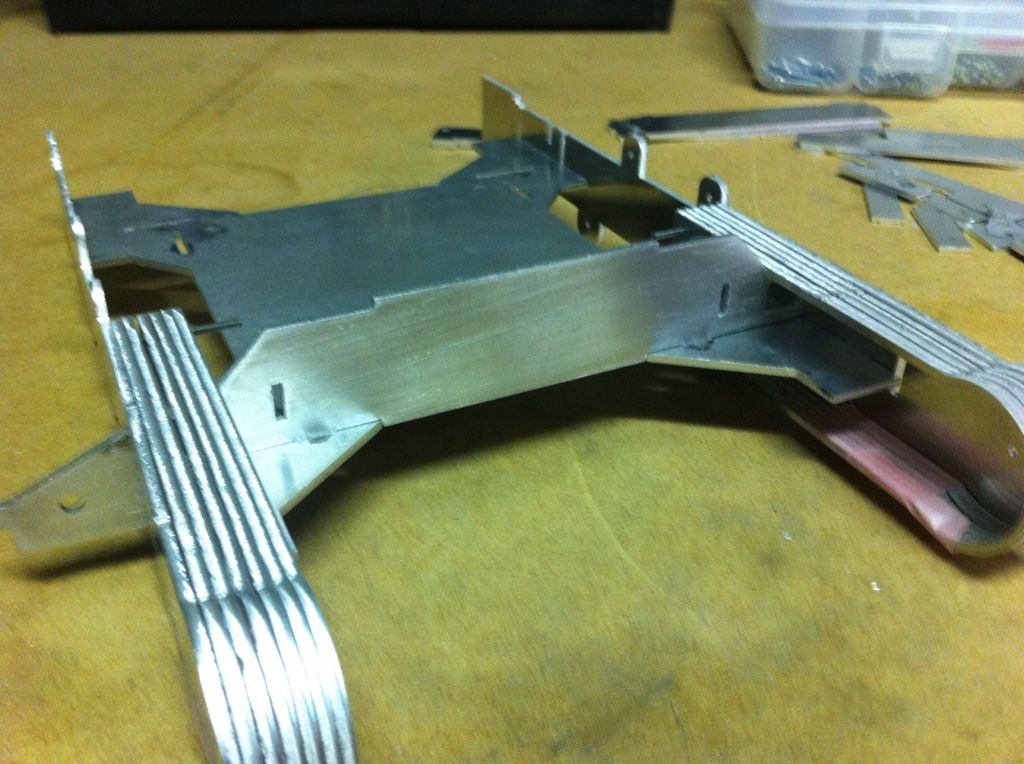
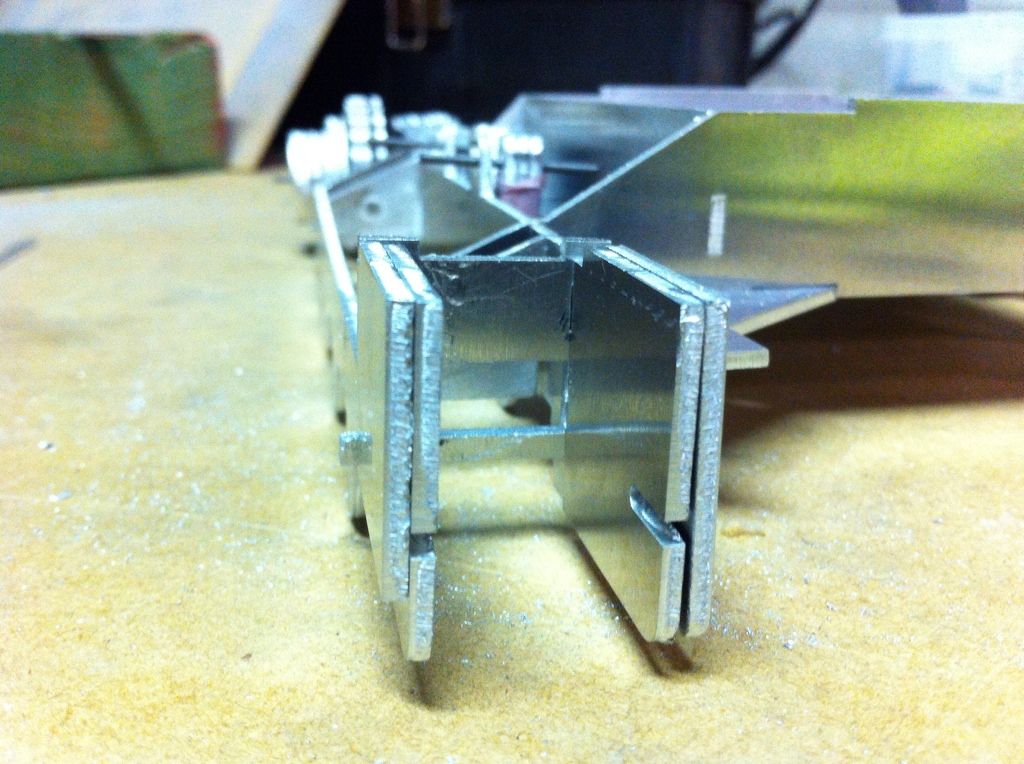
I wanted to do only the boom and the arm today but when they were completed I couldn't resist to start working on the cabin and got quiet a parts fitted together
I have created an inlay to help with the fixation for all the body parts.
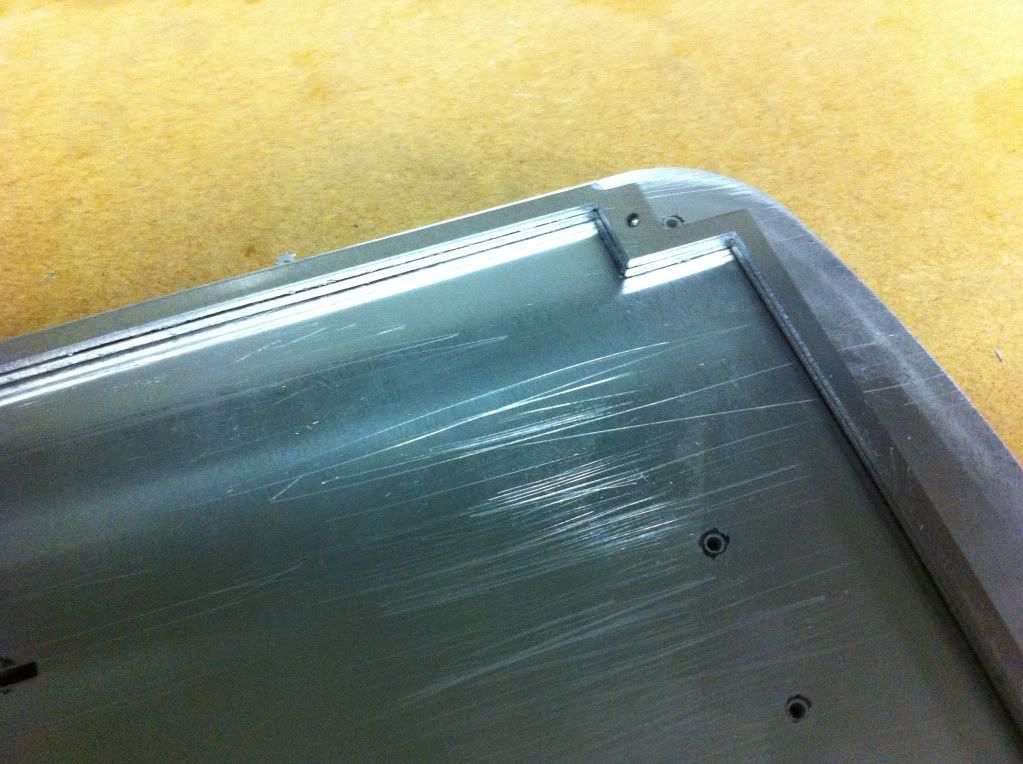
Here a picture with the 2 inlays mounted
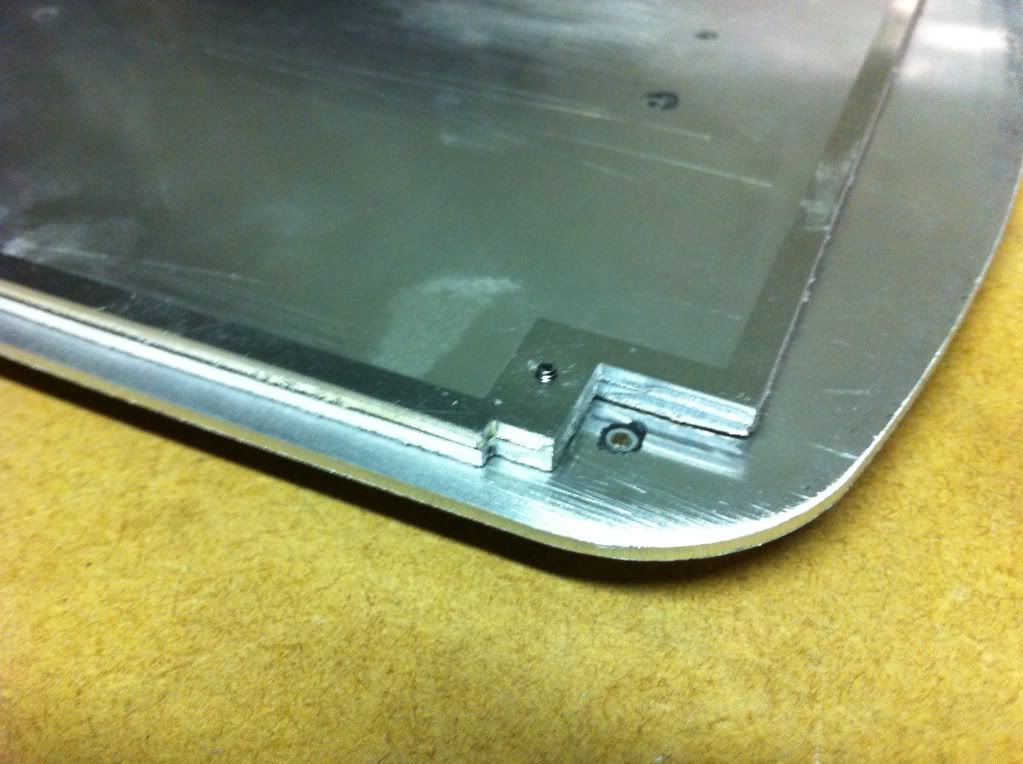
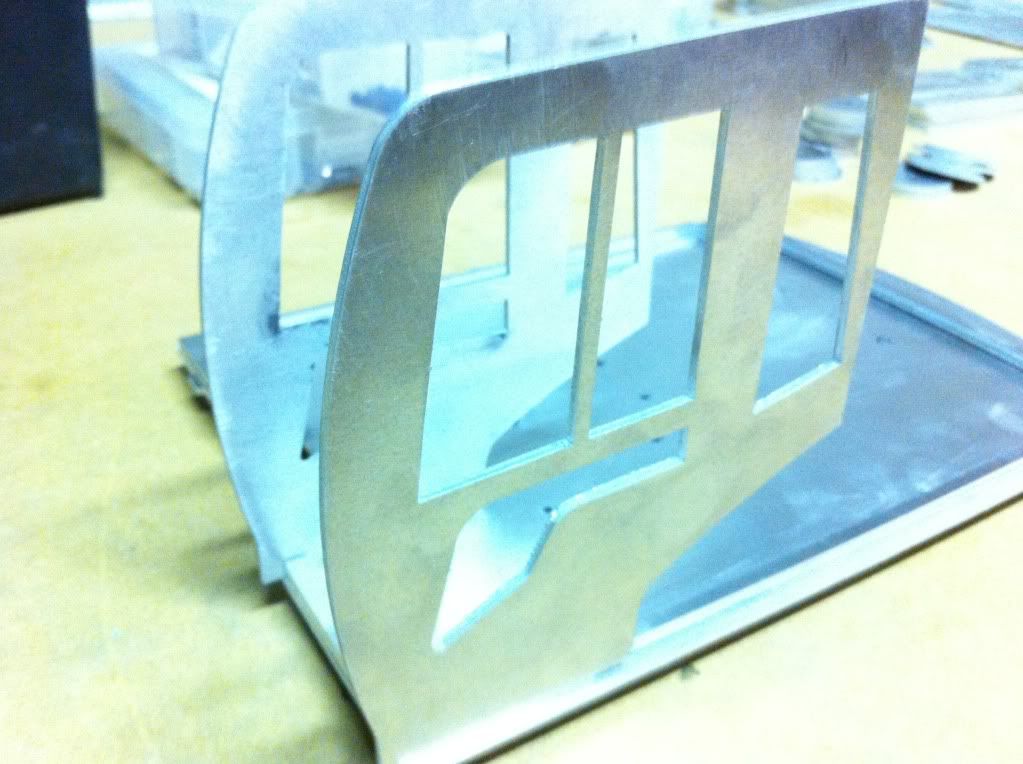
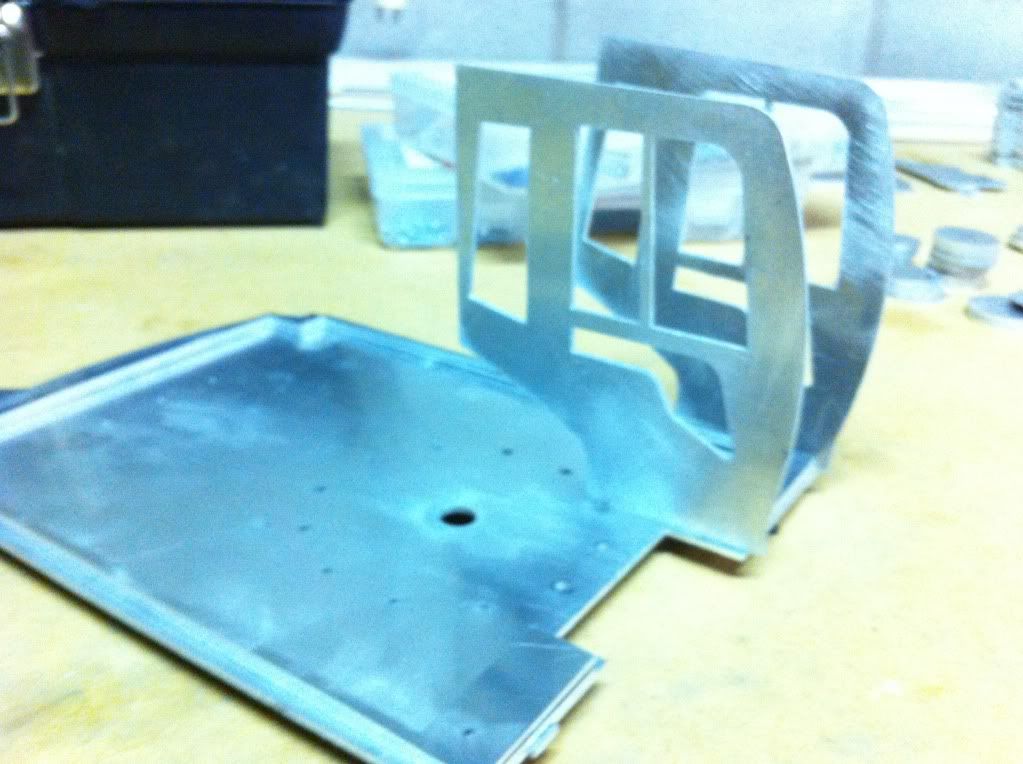
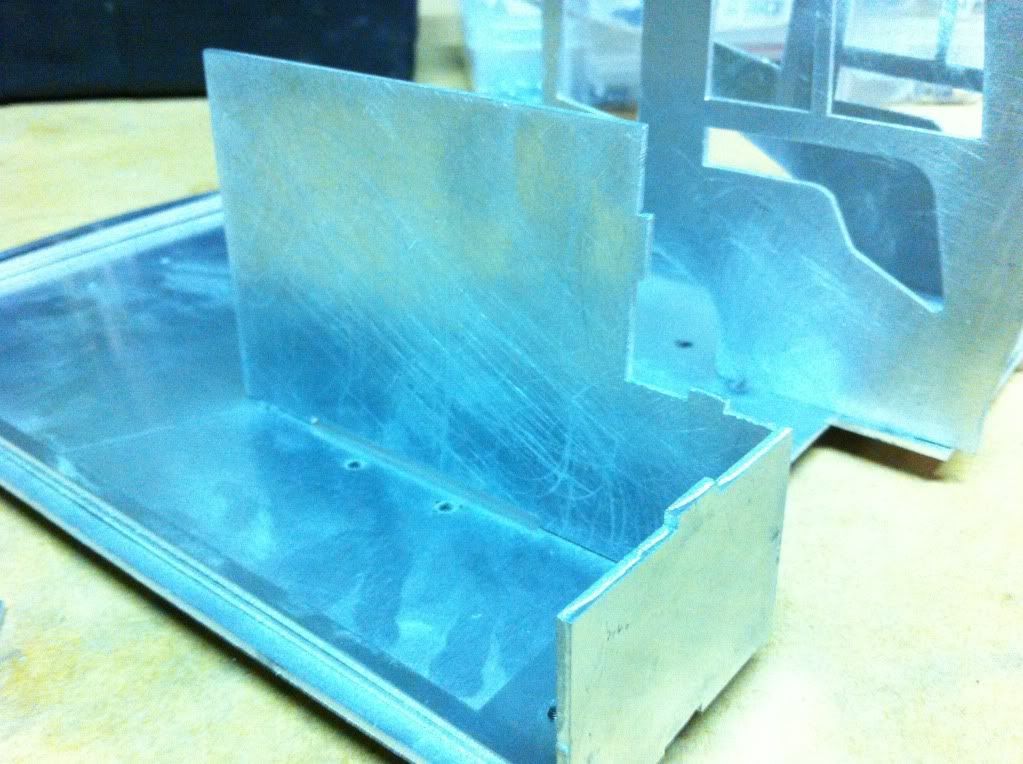
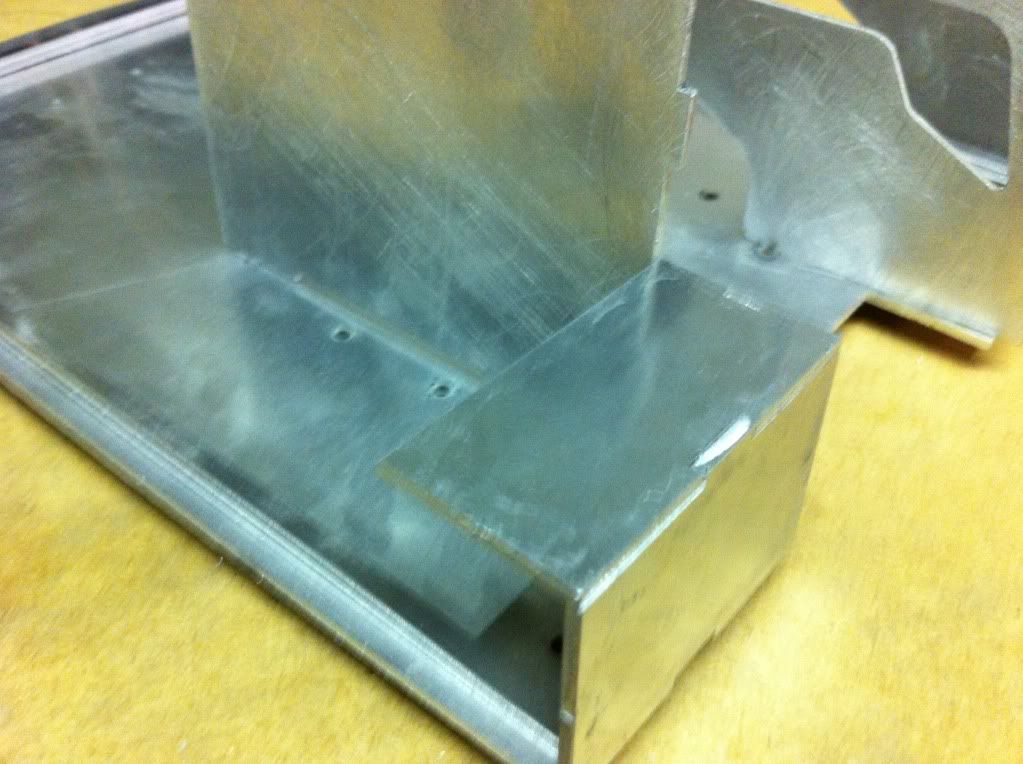
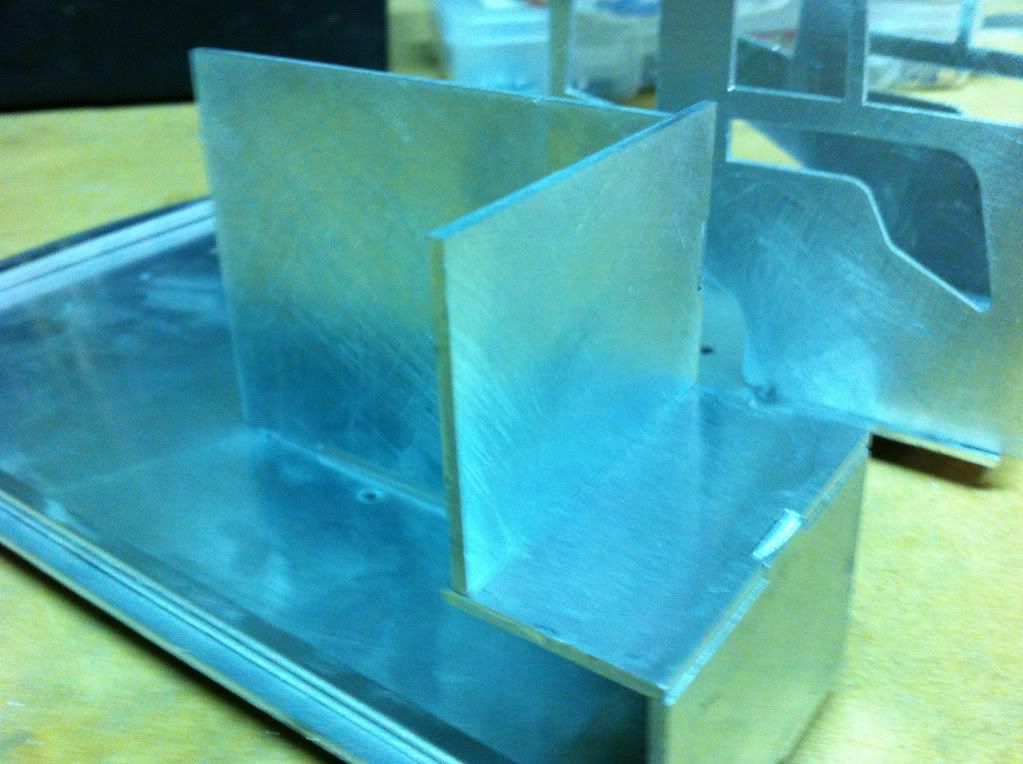
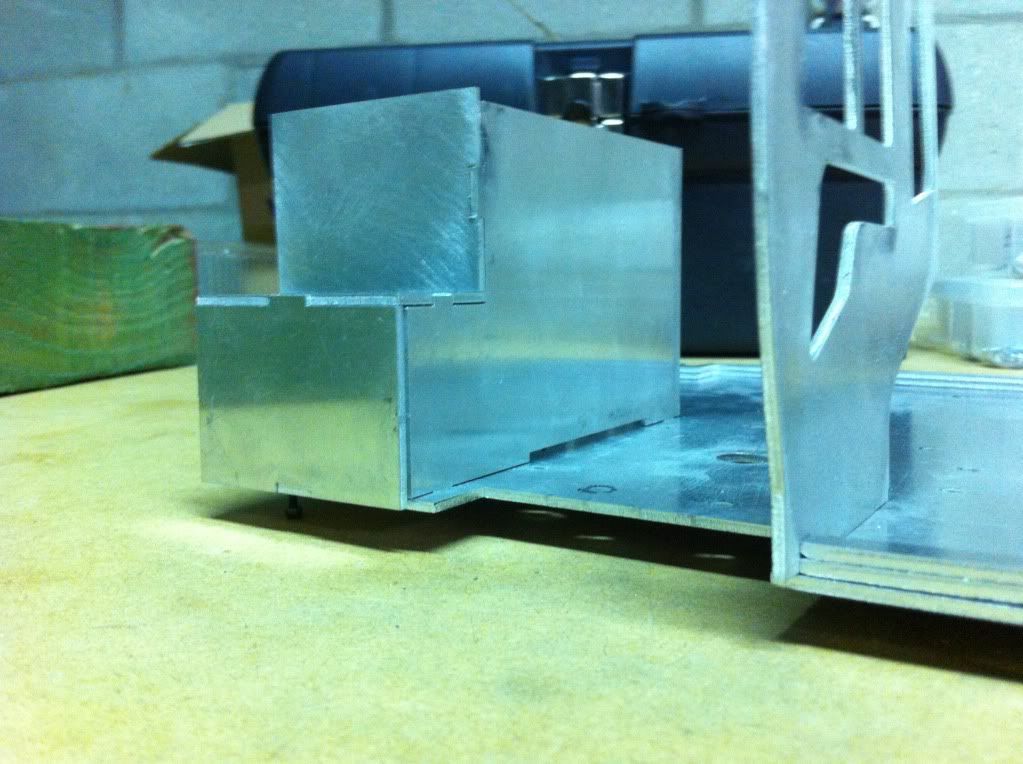
I still have quiet a way to go to add all the backparts for the body
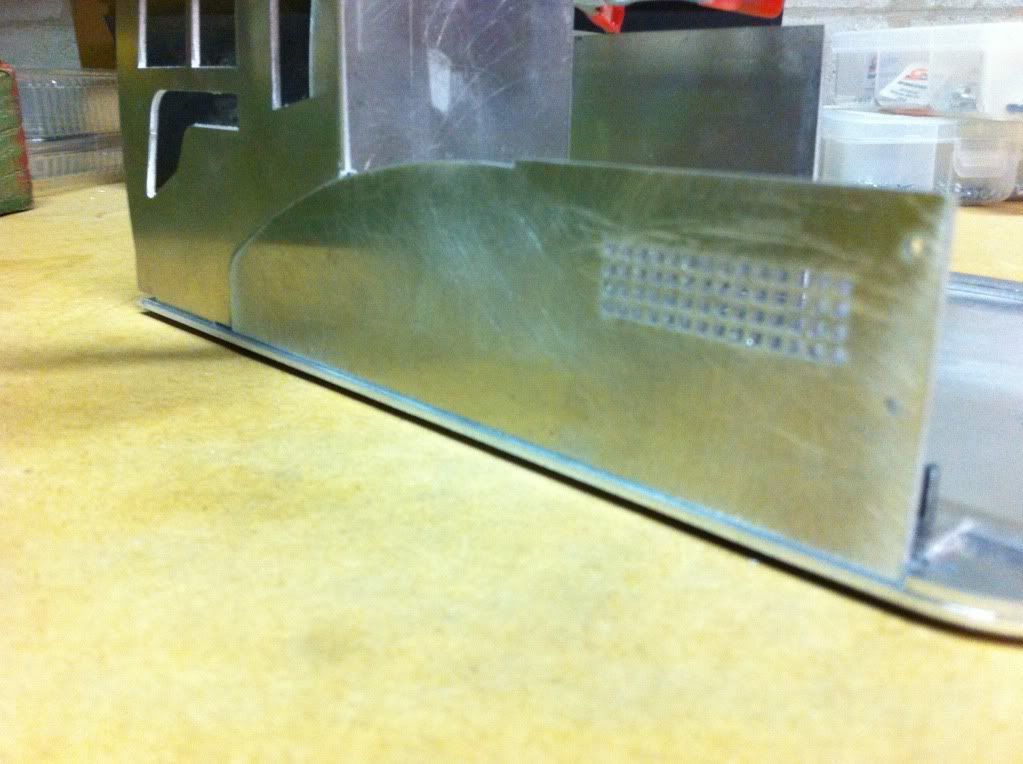
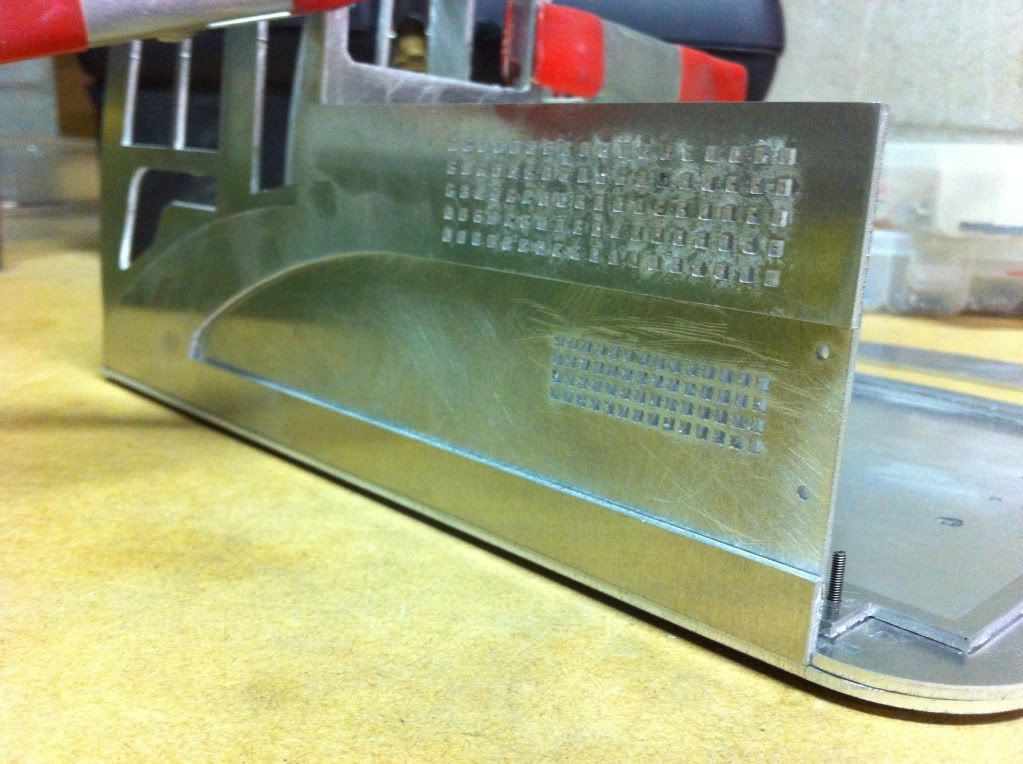
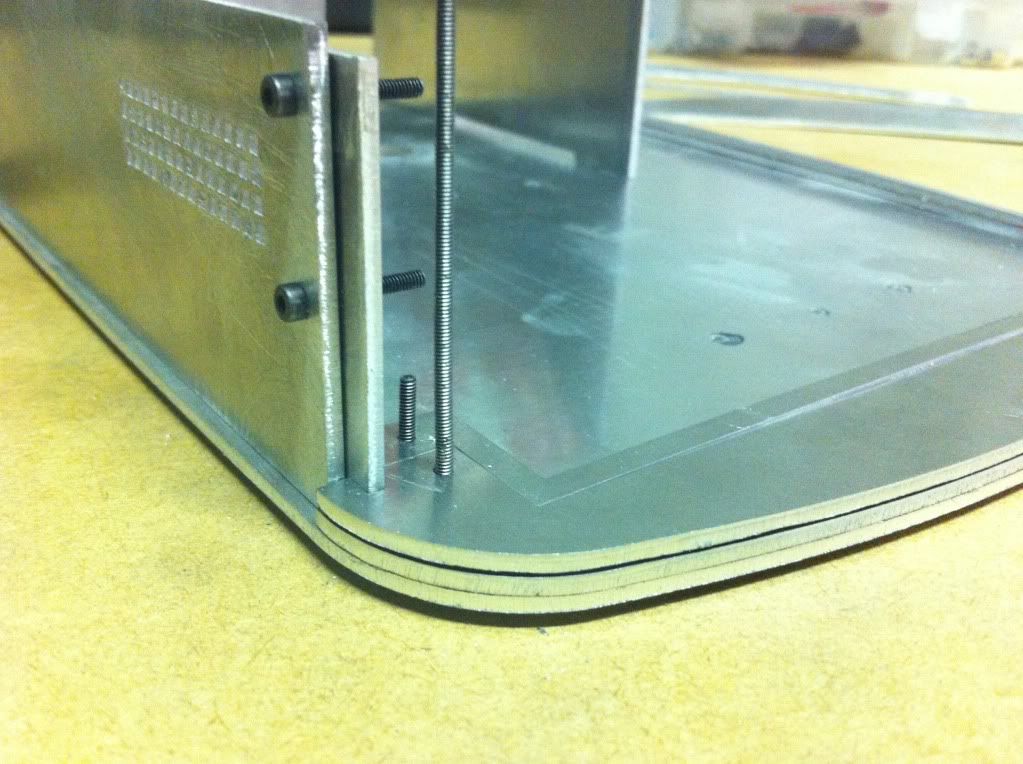
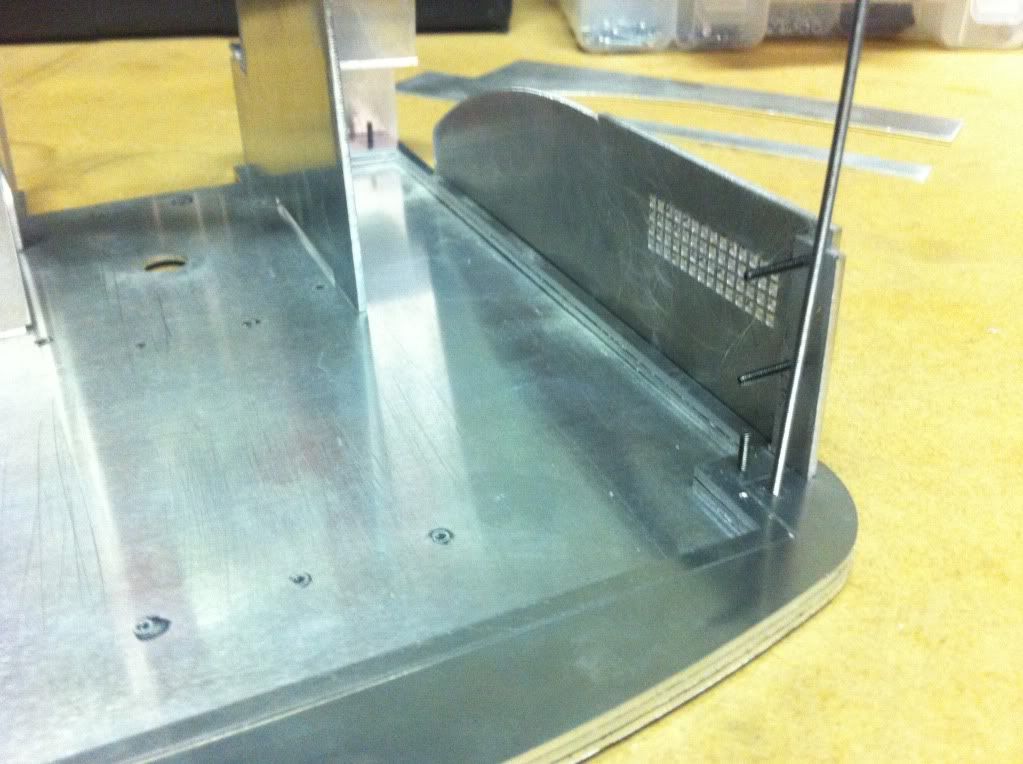
I use a 2 mm threaded rod to assemble and fix all the backplates. Its pretty easy and very ridged.
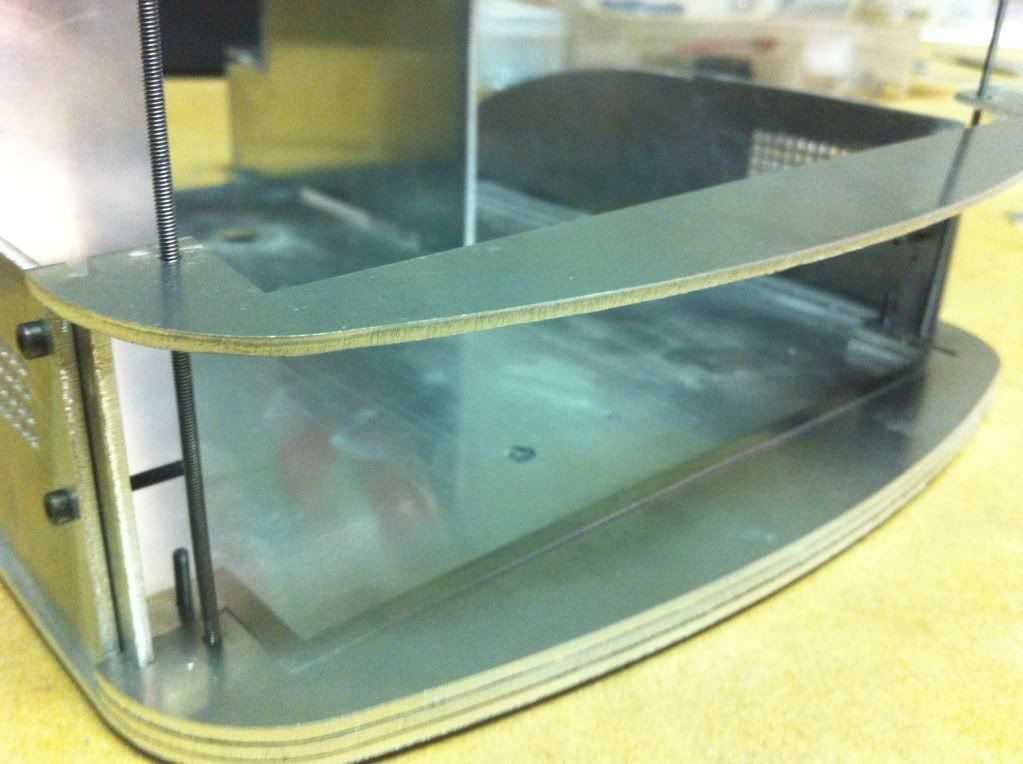
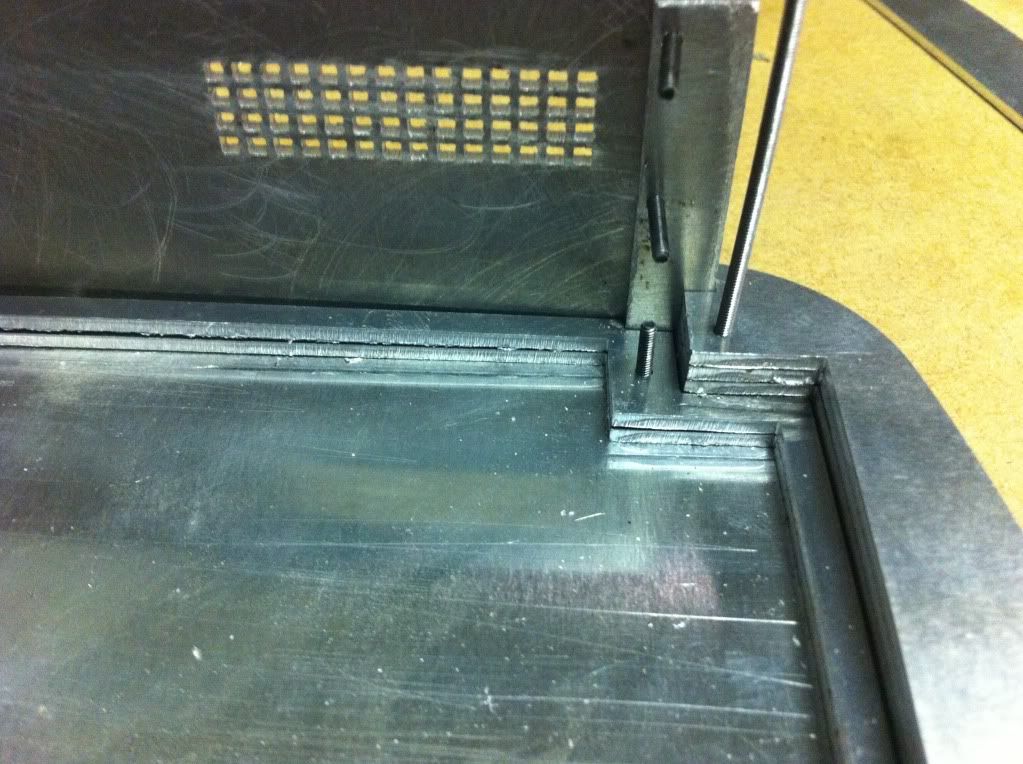

the body is starting to take shape

so far everything is still put together temporary. I have used some tape to recover my clamps as I will need them later in the built.
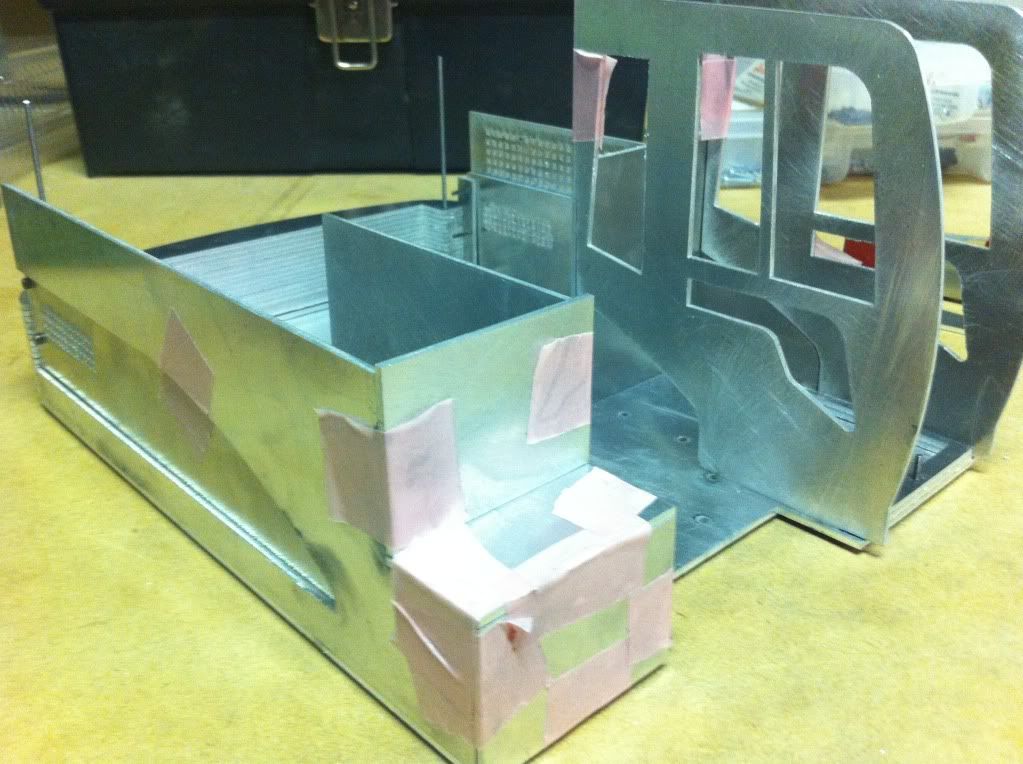
and this is the end result of todays work !!

I won't be able to do any more work until next week. I have a busy weekend coming up. I promise that I will continue next week and post some more pictures.
|
|
|
06.09.2012 18:32 |
|
|
|
|
|
|
|
|
ari
Eroberer

Dabei seit: 23.08.2011
Beiträge: 53
Level: 30 [?]
Erfahrungspunkte: 248.066
Nächster Level: 300.073
|
|
|
|
06.09.2012 21:18 |
|
|
JensR
Administrator

Dabei seit: 16.01.2010
Beiträge: 5.265
Maßstab: 1:14,5
Wohnort: England
Level: 56 [?]
Erfahrungspunkte: 27.719.421
Nächster Level: 30.430.899
|
|
Great job!
> I use a 2 mm threaded rod to assemble and fix all the backplates. Its pretty easy and very ridged.
I think you mean "rigid"?
|
|
|
06.09.2012 21:34 |
|
|
|
|
|
|
|
|
caterpilar
Doppel-As
Dabei seit: 09.04.2012
Beiträge: 113
Maßstab: 1:16
Level: 33 [?]
Erfahrungspunkte: 502.879
Nächster Level: 555.345
Themenstarter
|
|
I am getting a lot of private messages asking for a copy of the drawings. I am not planning to sell any of the drawings. I spent months creating them and will not sell them. So please do not PM me asking for the drawings. If you want me to cut the parts for you, that's a different thing and I am willing to look into that.
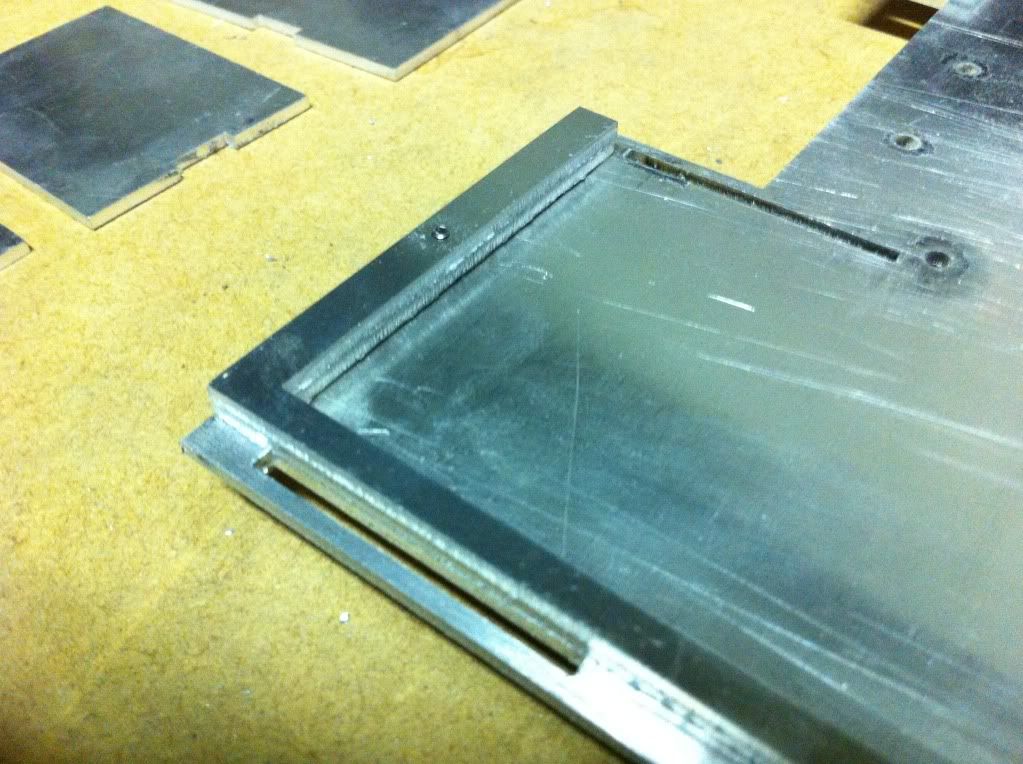
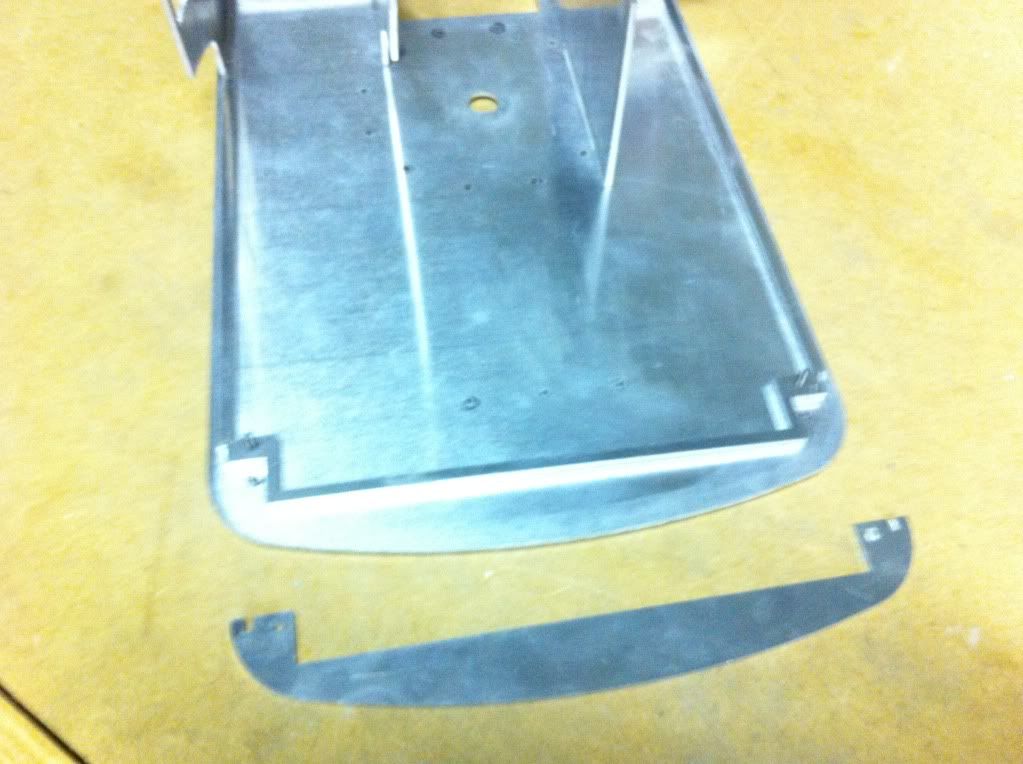
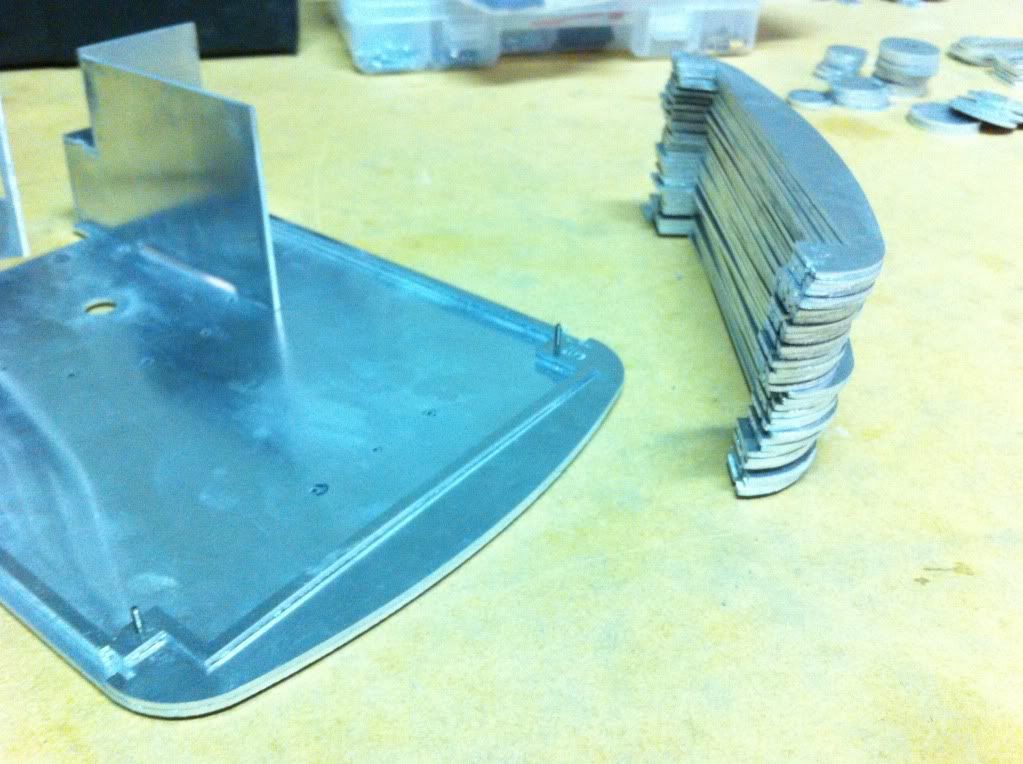
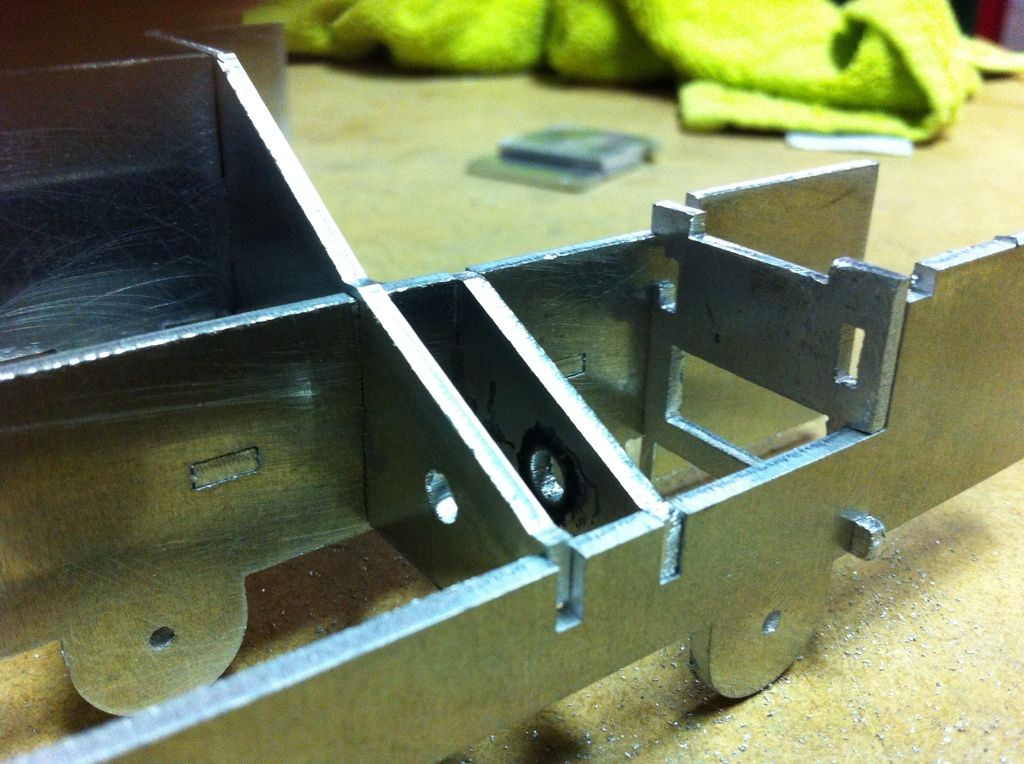
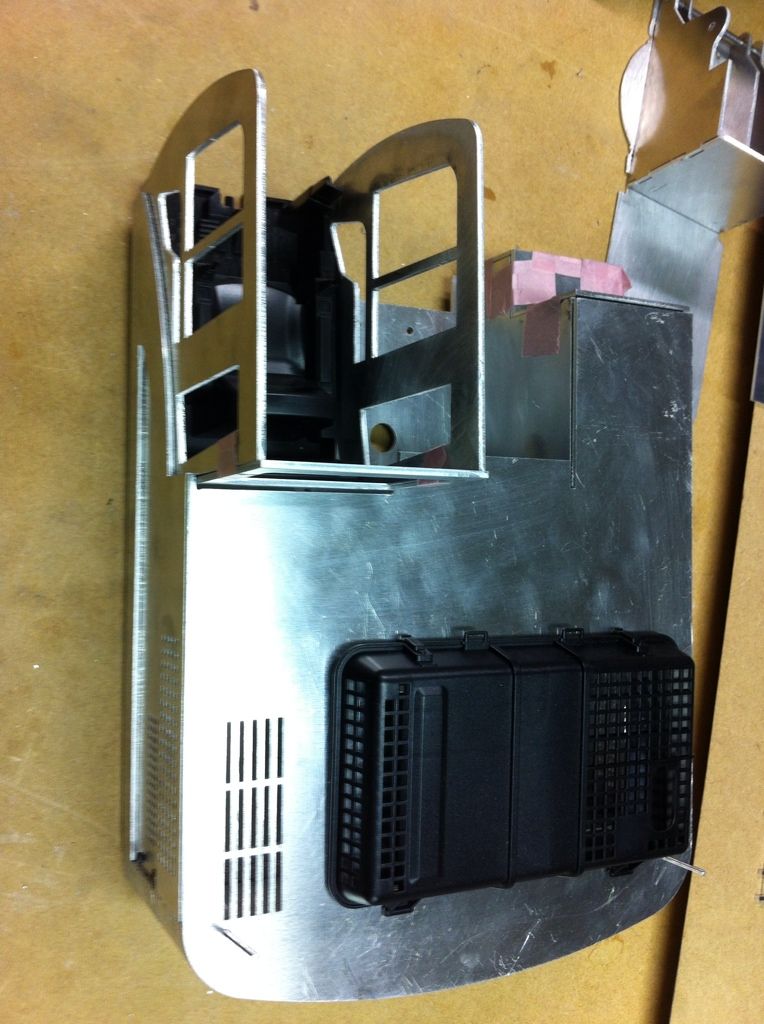
Here is how the body looks with all the counter weight plates in place.
I also cut out a few logo's to add on the body and boom
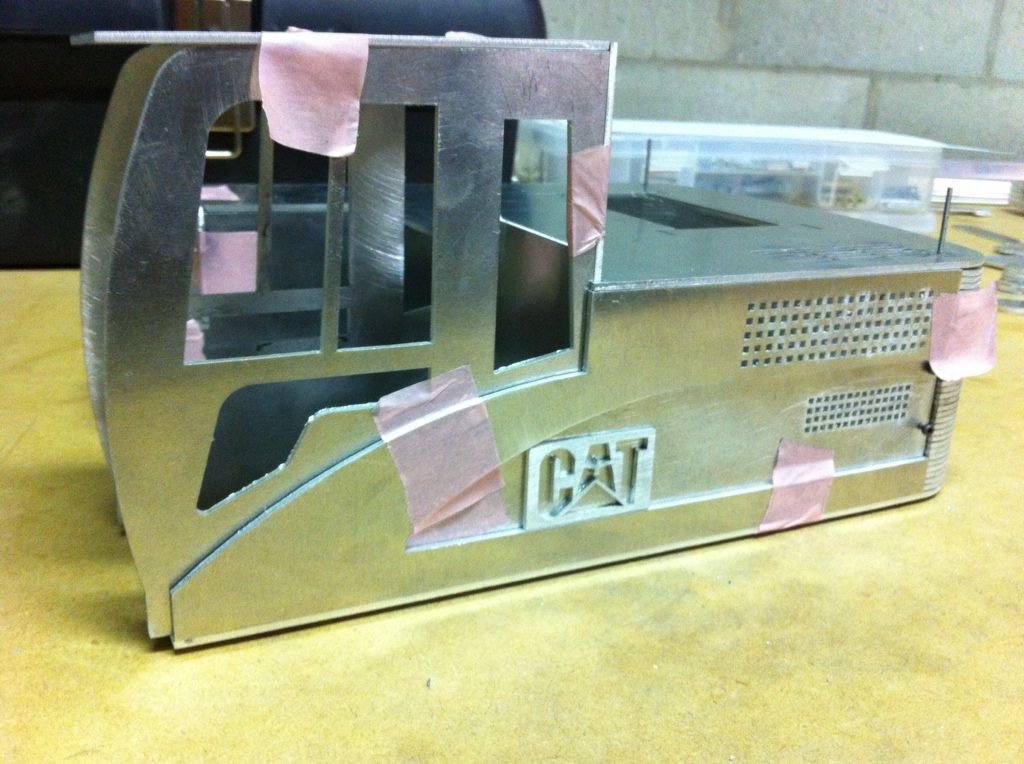
the body is nearly finished. I still need to cut out he baseplate and parts to hold the boom.
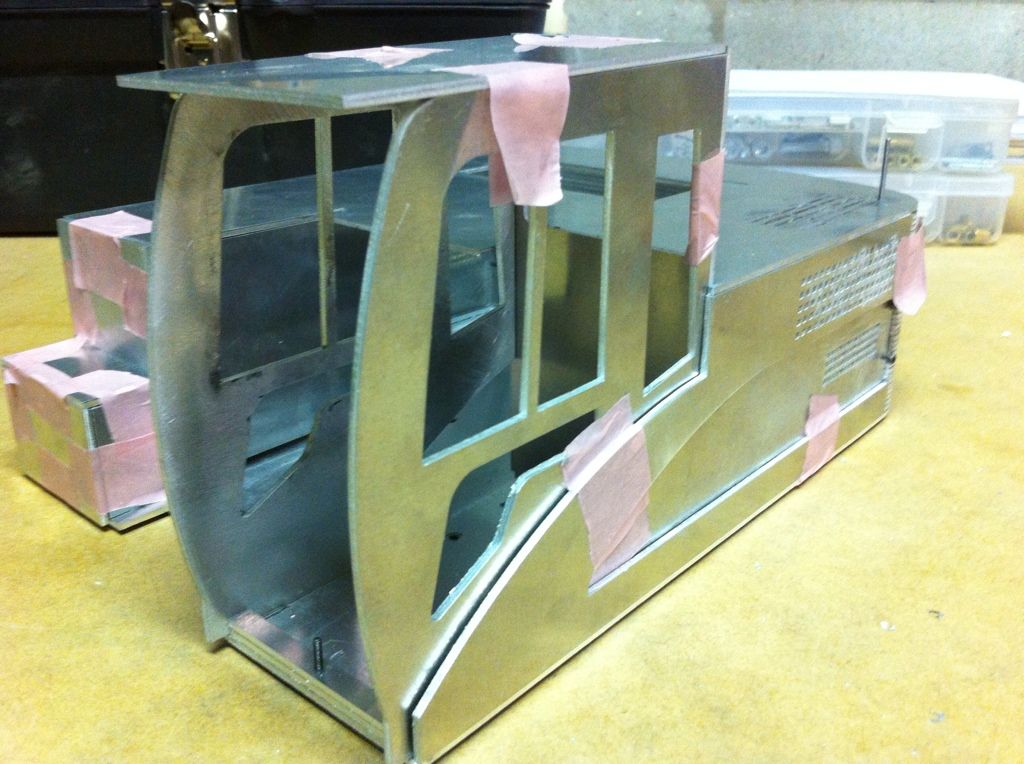
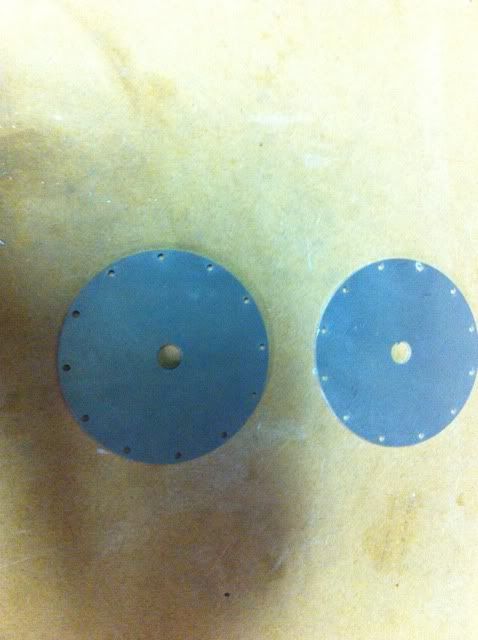
For the 360 degree swing, I have made two round plates which I will mount a slip ring on with a motor and gear.
Next on the agenda will the the undercarriage
|
|
|
07.09.2012 09:34 |
|
|
|
|
|
|
|
|
caterpilar
Doppel-As
Dabei seit: 09.04.2012
Beiträge: 113
Maßstab: 1:16
Level: 33 [?]
Erfahrungspunkte: 502.879
Nächster Level: 555.345
Themenstarter
|
|
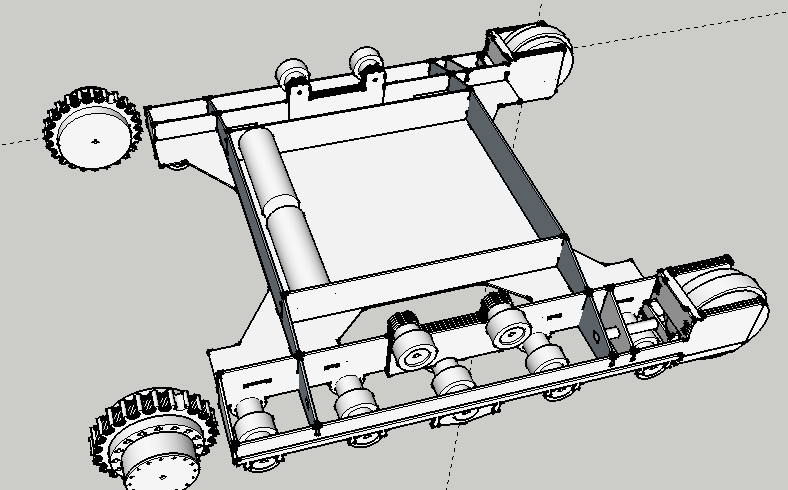
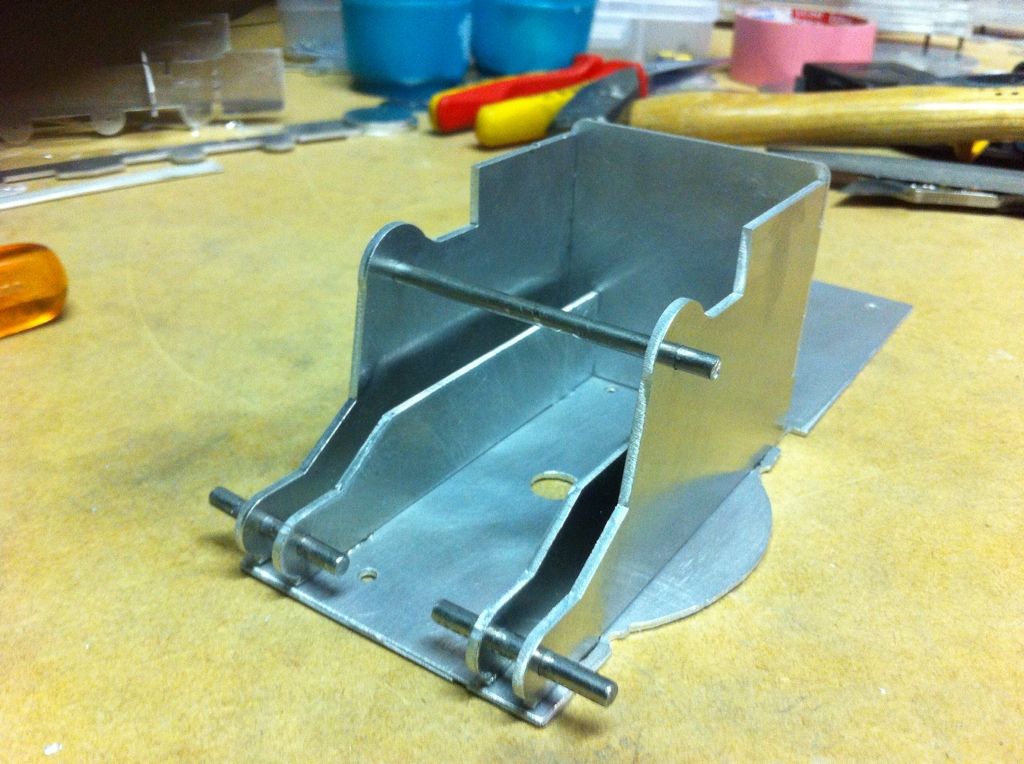
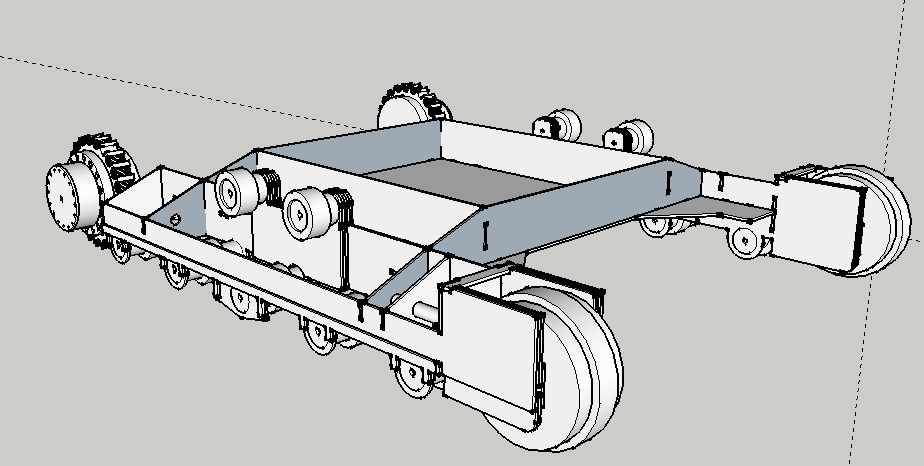
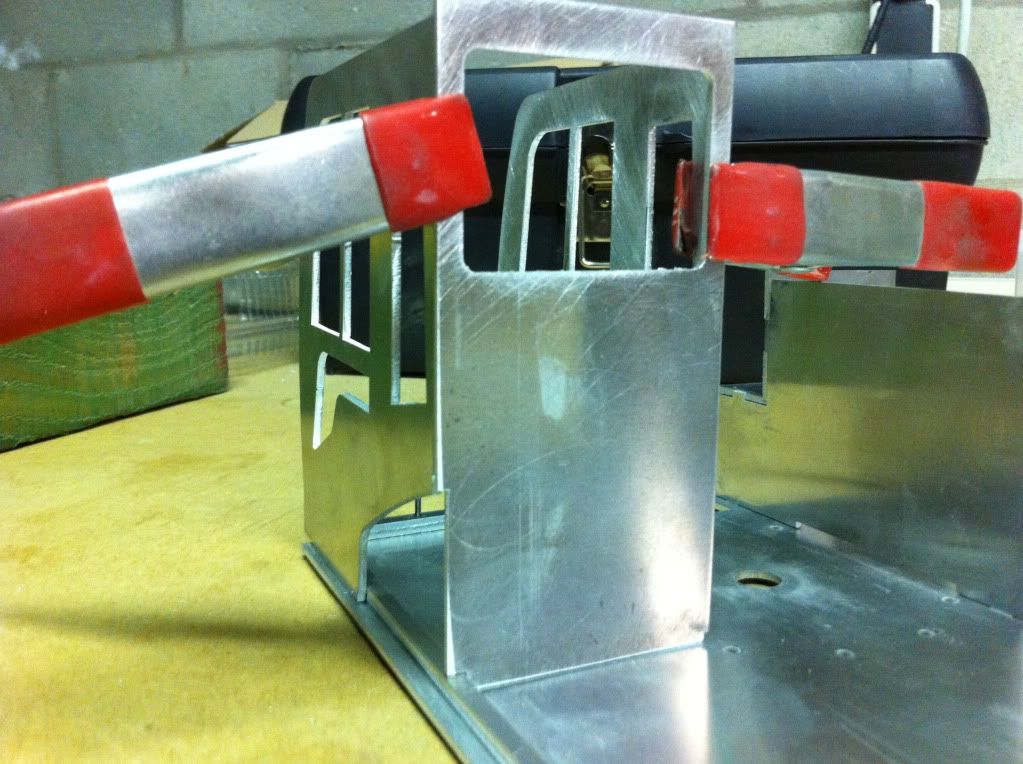
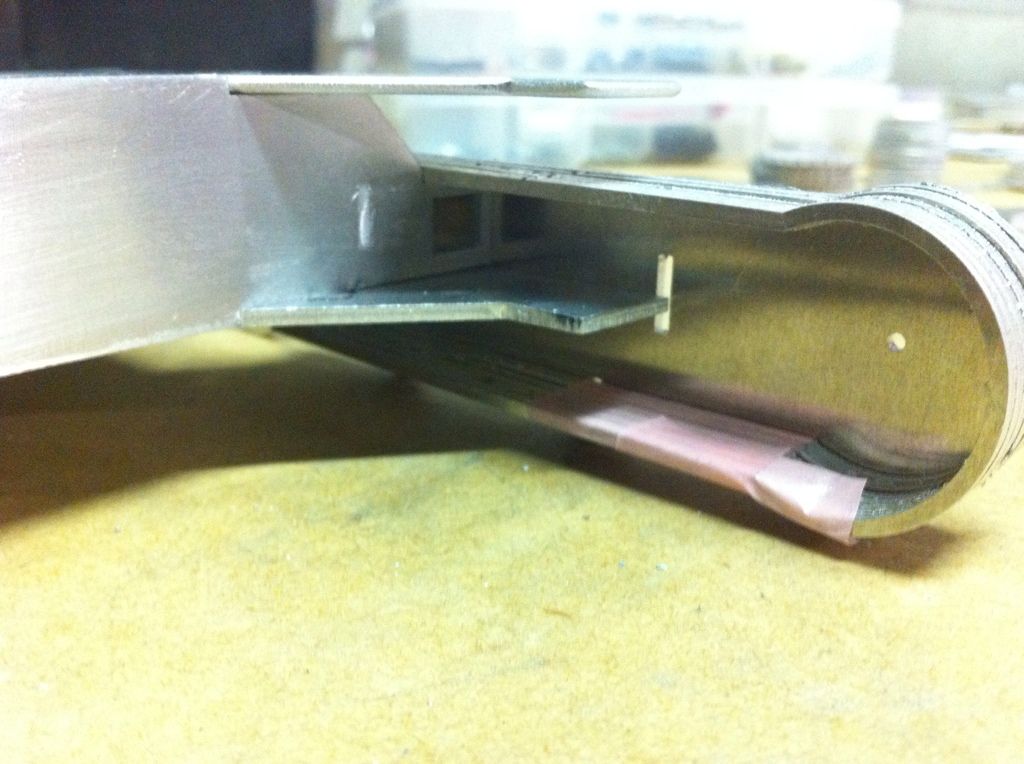
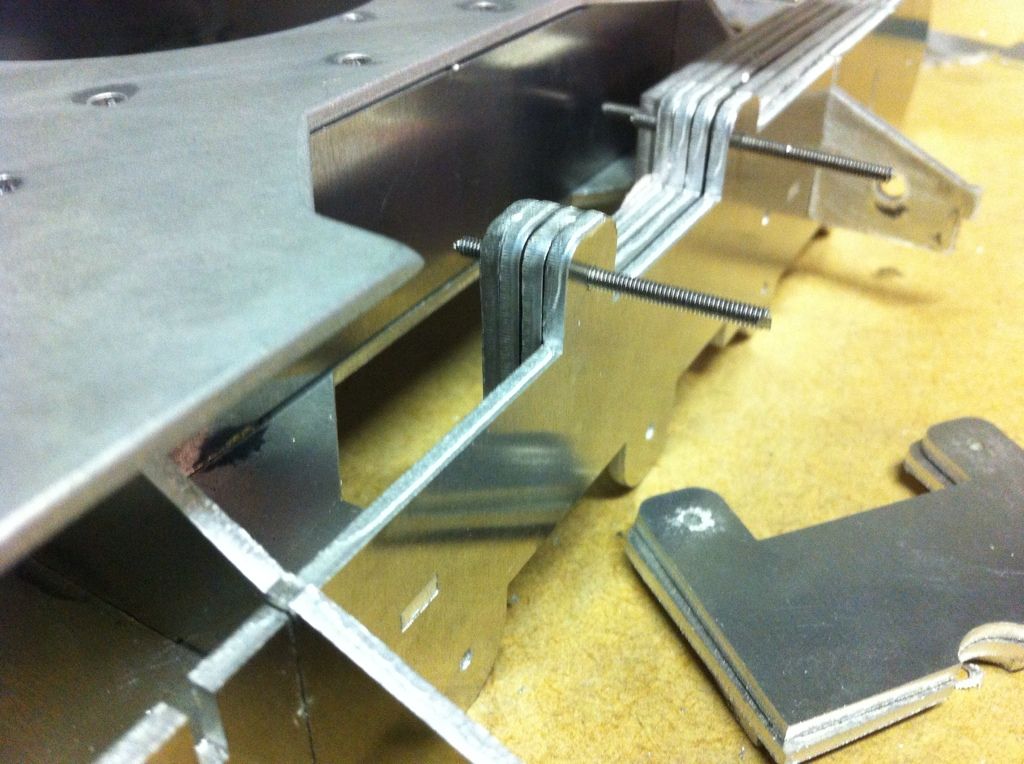
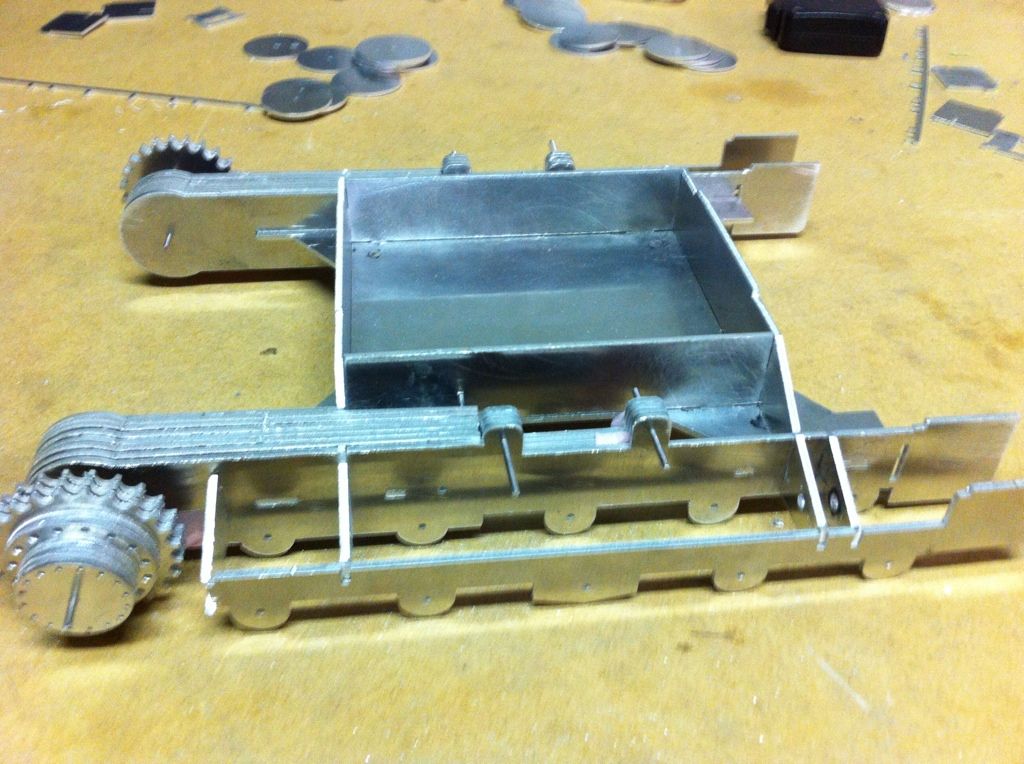
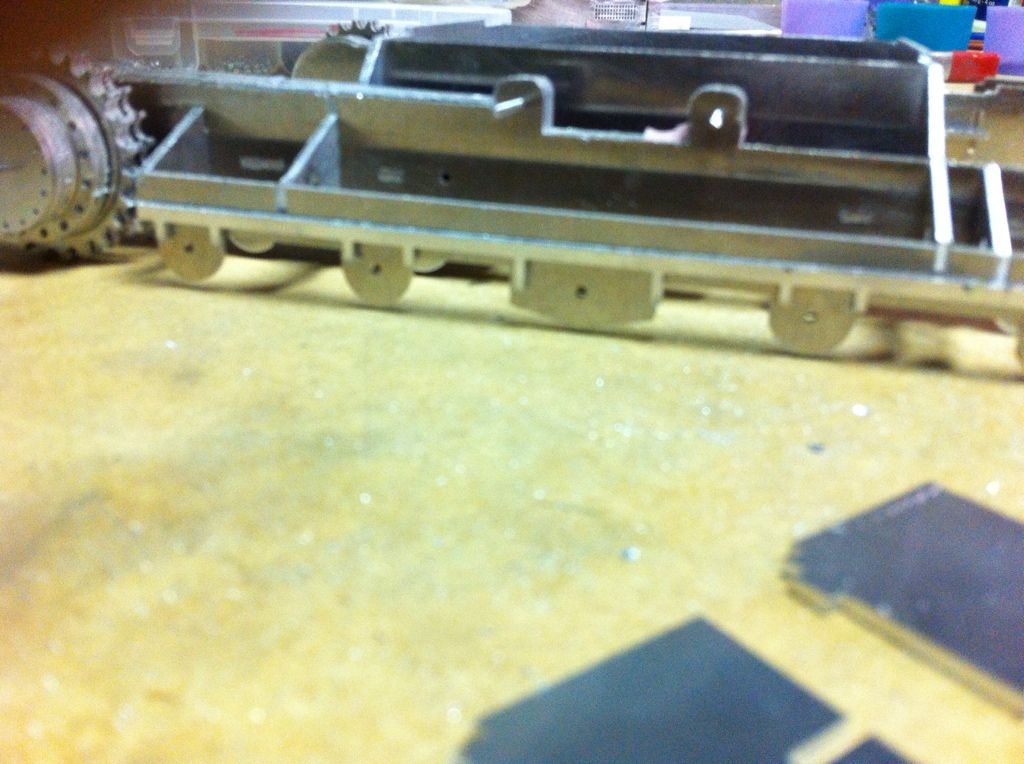
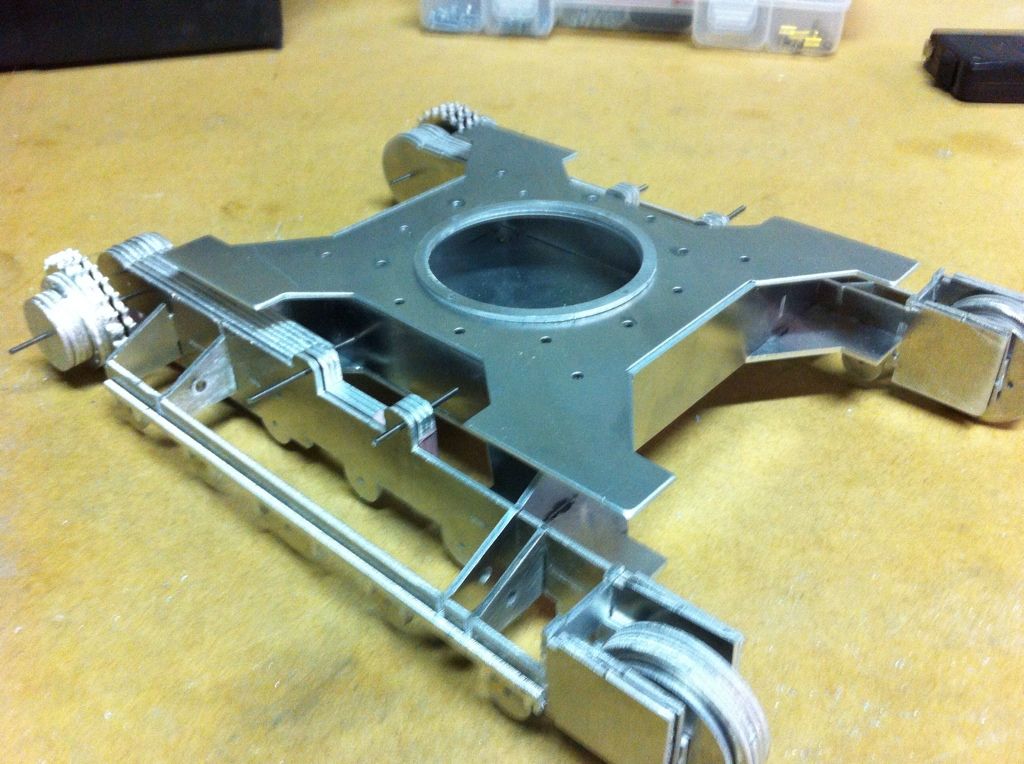
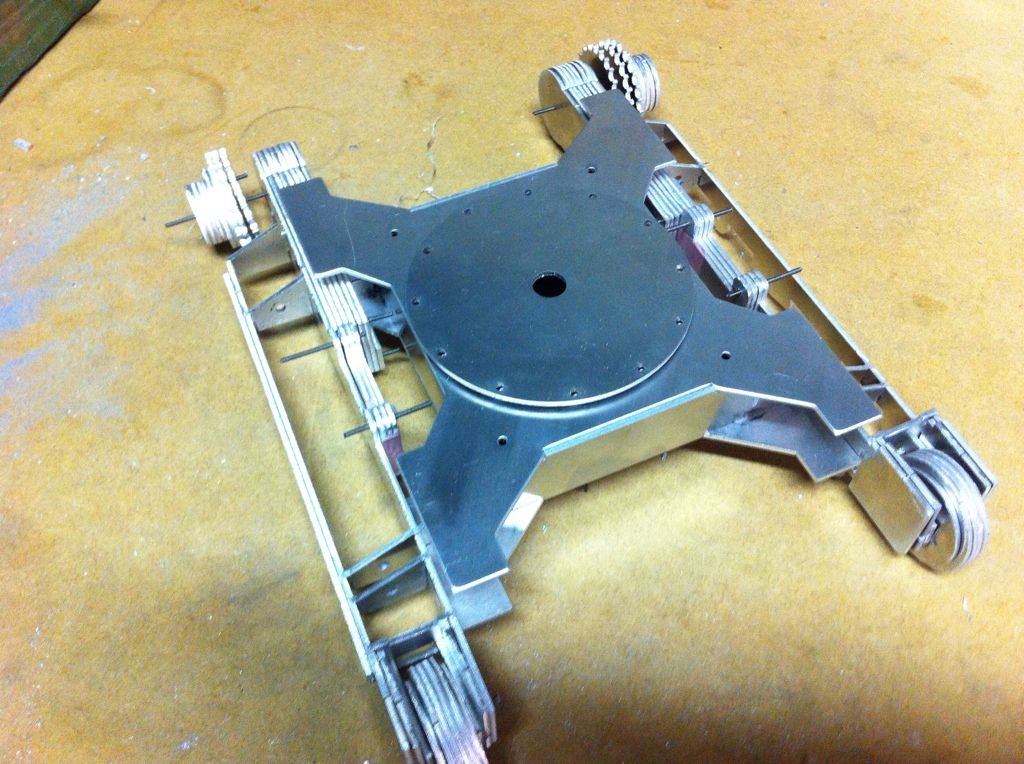
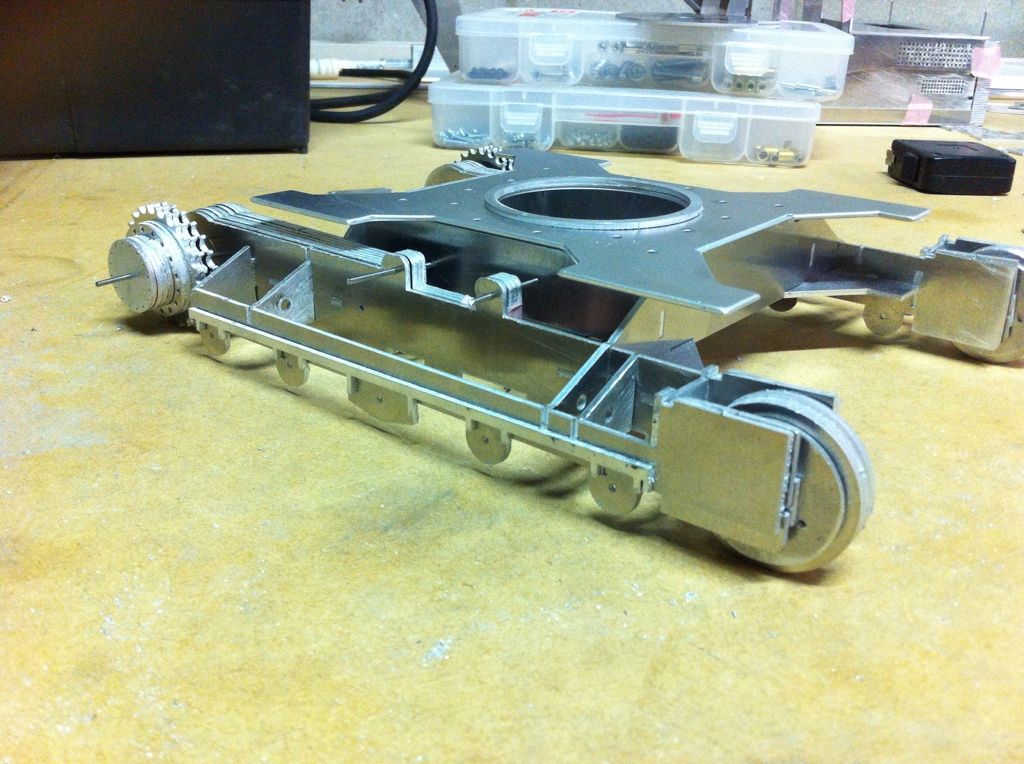
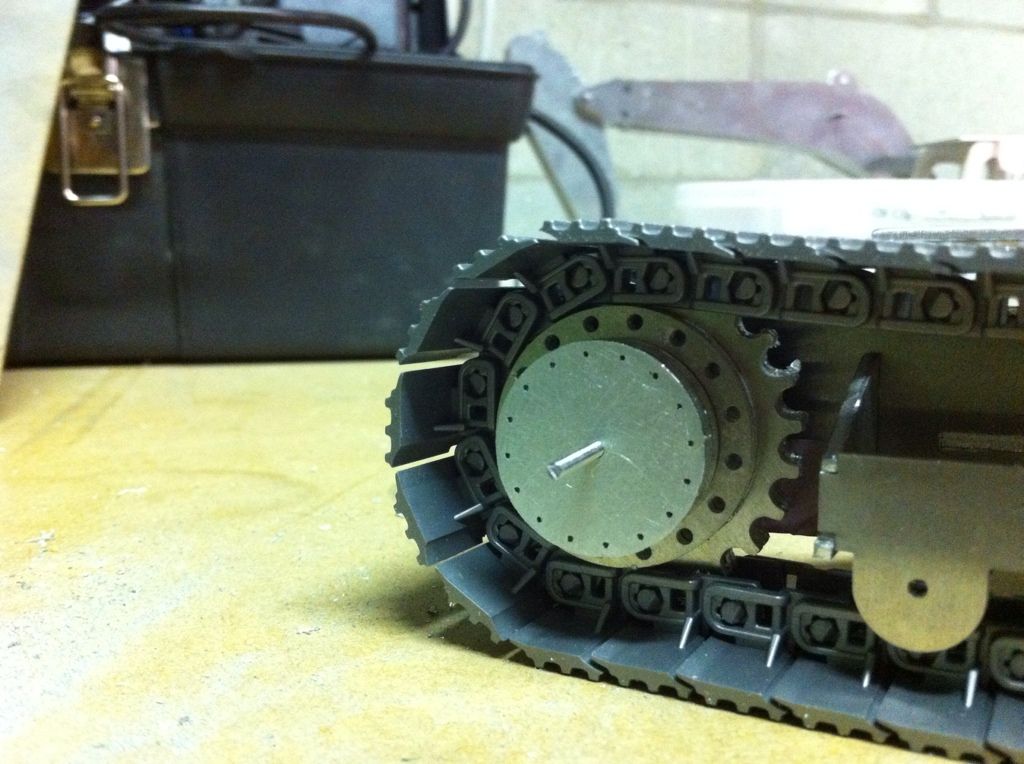
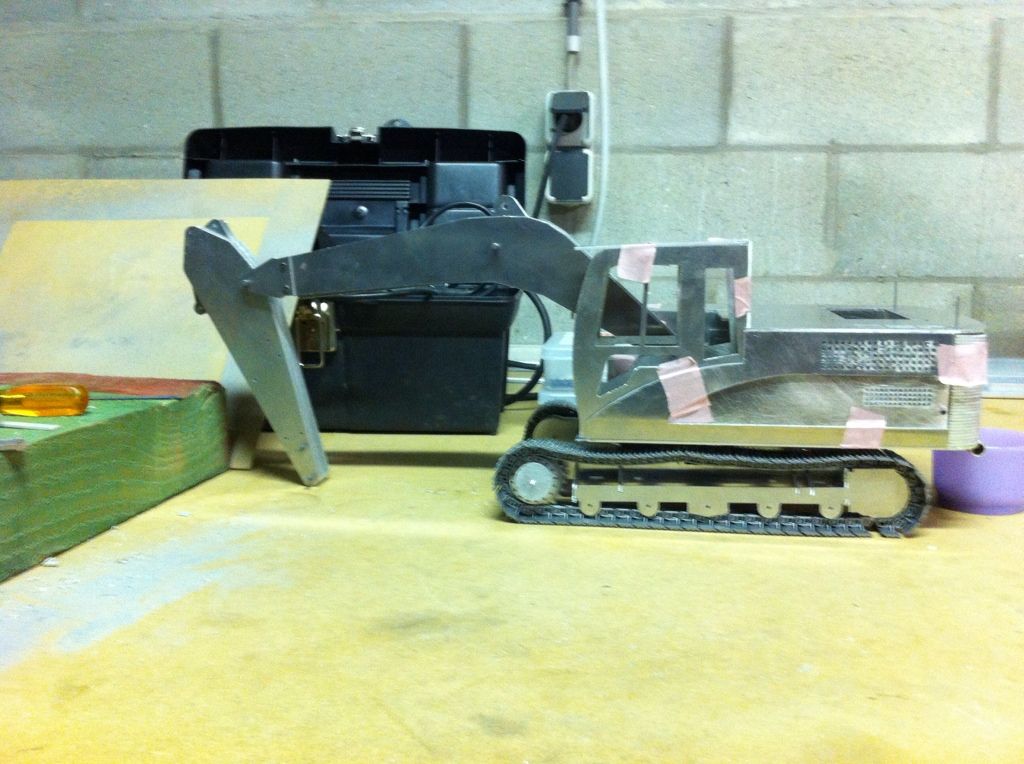
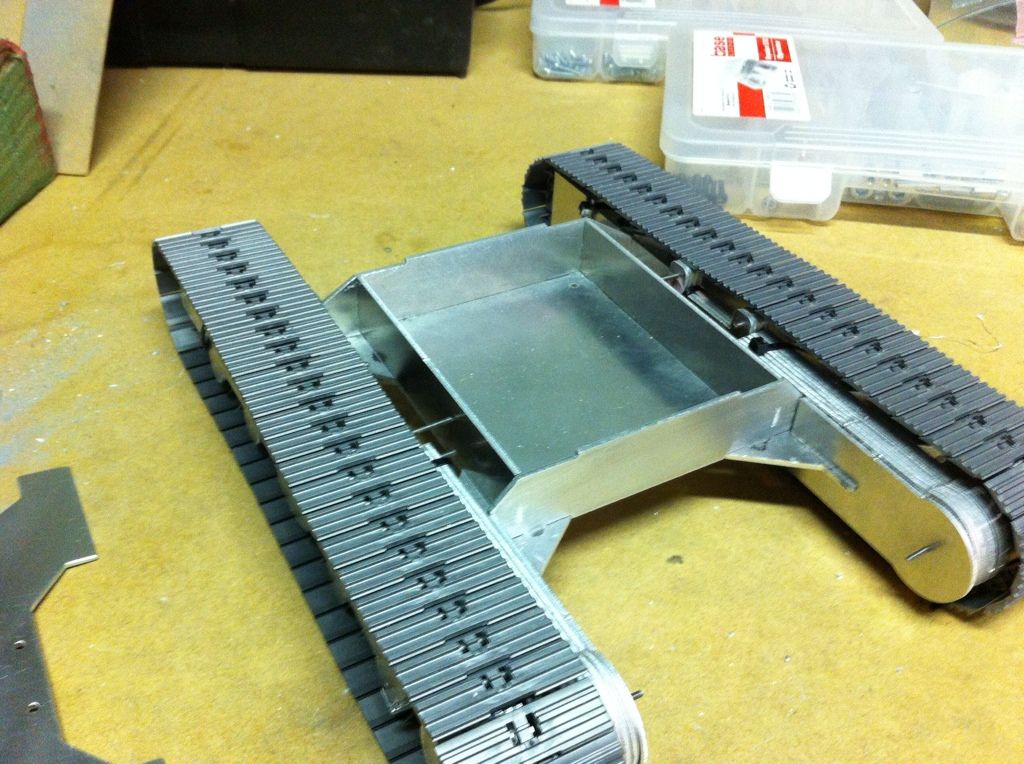
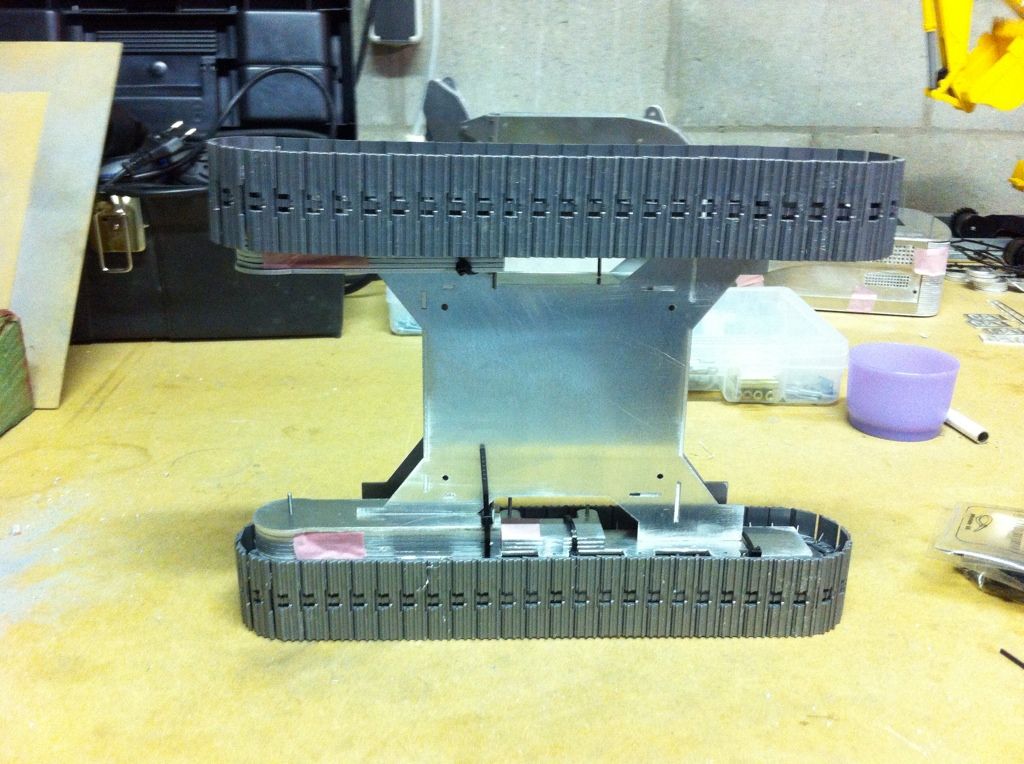
day 4
I started putting together the undercarriage.
No welding or no glue. base, top and side plates connect with the interlocking system. if you desire to, you can still weld it or apply glue.
I am going to install two small motors in the main compartment of the undercarriage. These motors will then drive a chain that runs in the chain compartment as in the picture below.

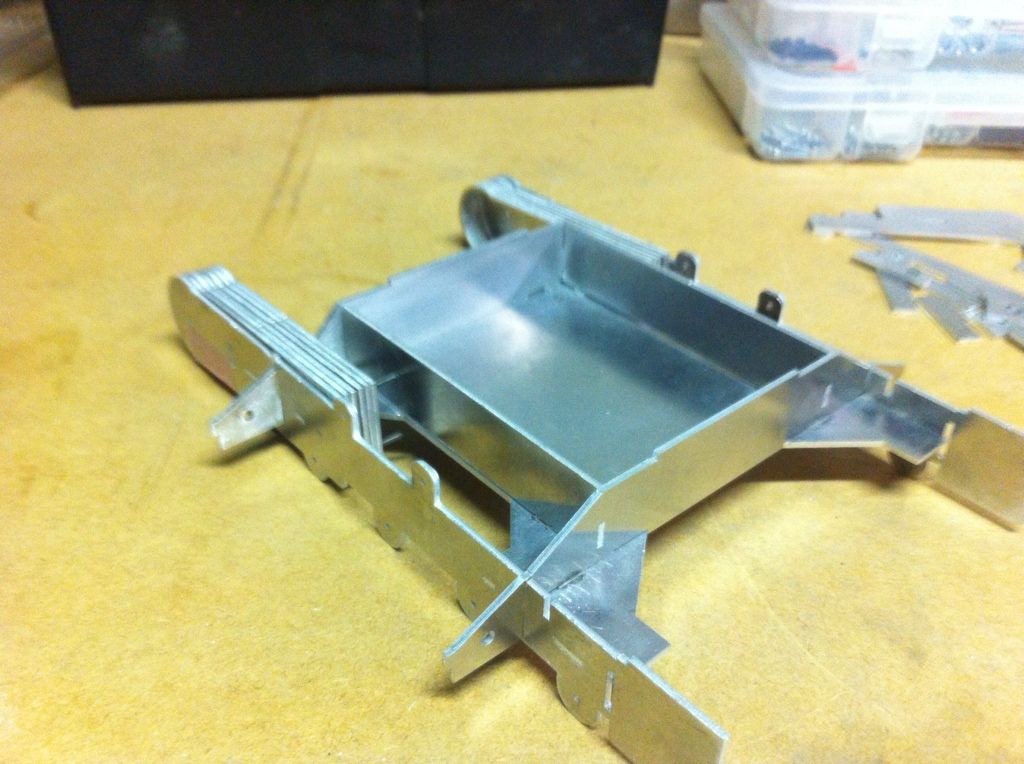
another closeup of the chain compartment
On each side I have foreseen 3 plates to mount the top track guidance rollers
I also cut a cover for the chain compartment
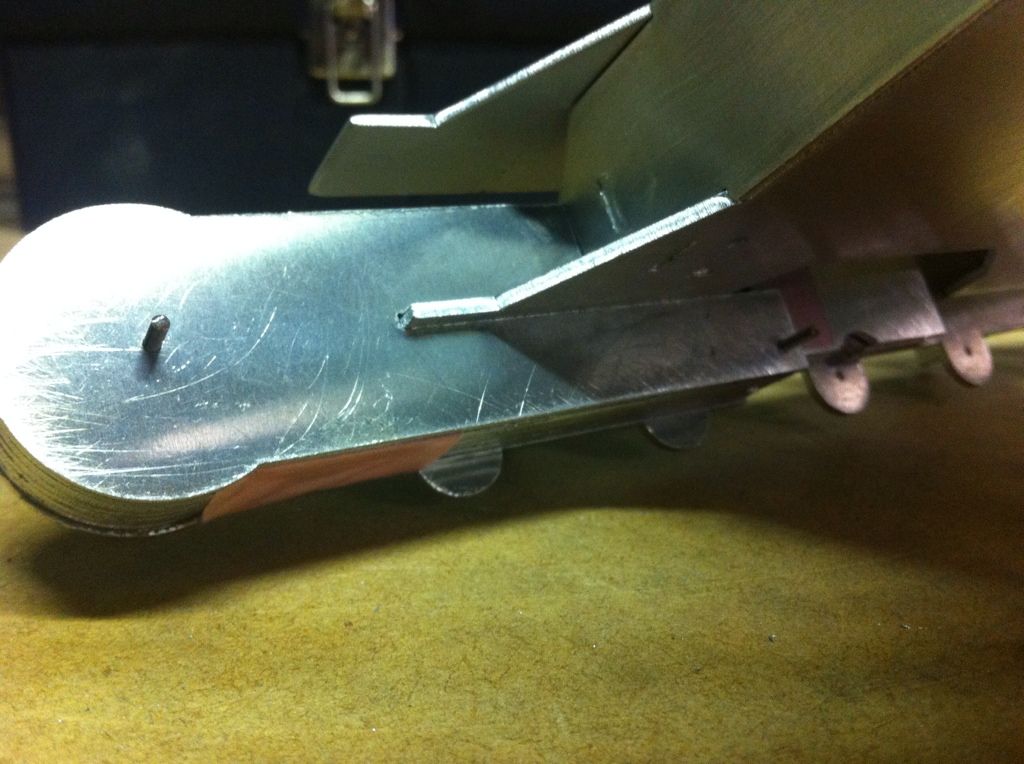

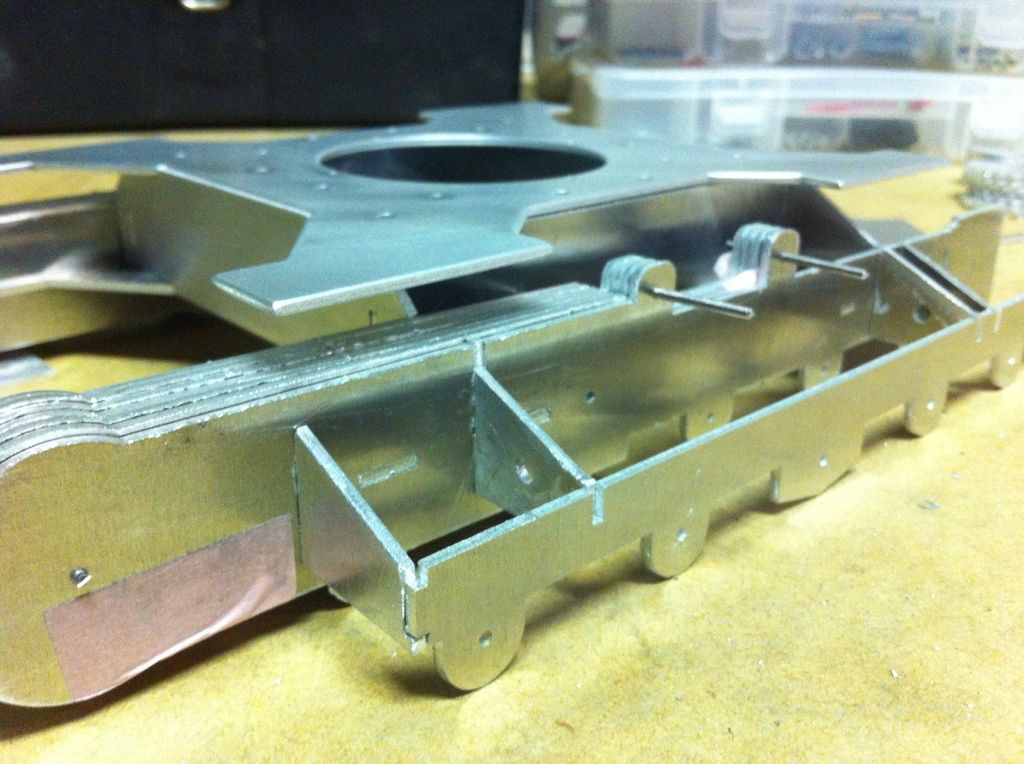
thats how the Kettenbagger looks so far
|
|
|
10.09.2012 20:59 |
|
|
caterpilar
Doppel-As
Dabei seit: 09.04.2012
Beiträge: 113
Maßstab: 1:16
Level: 33 [?]
Erfahrungspunkte: 502.879
Nächster Level: 555.345
Themenstarter
|
|
|
|
11.09.2012 15:51 |
|
|
caterpilar
Doppel-As
Dabei seit: 09.04.2012
Beiträge: 113
Maßstab: 1:16
Level: 33 [?]
Erfahrungspunkte: 502.879
Nächster Level: 555.345
Themenstarter
|
|
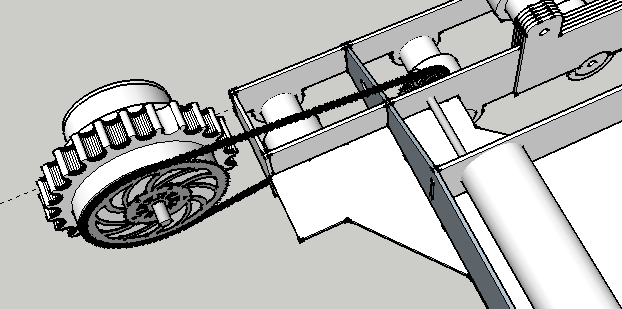
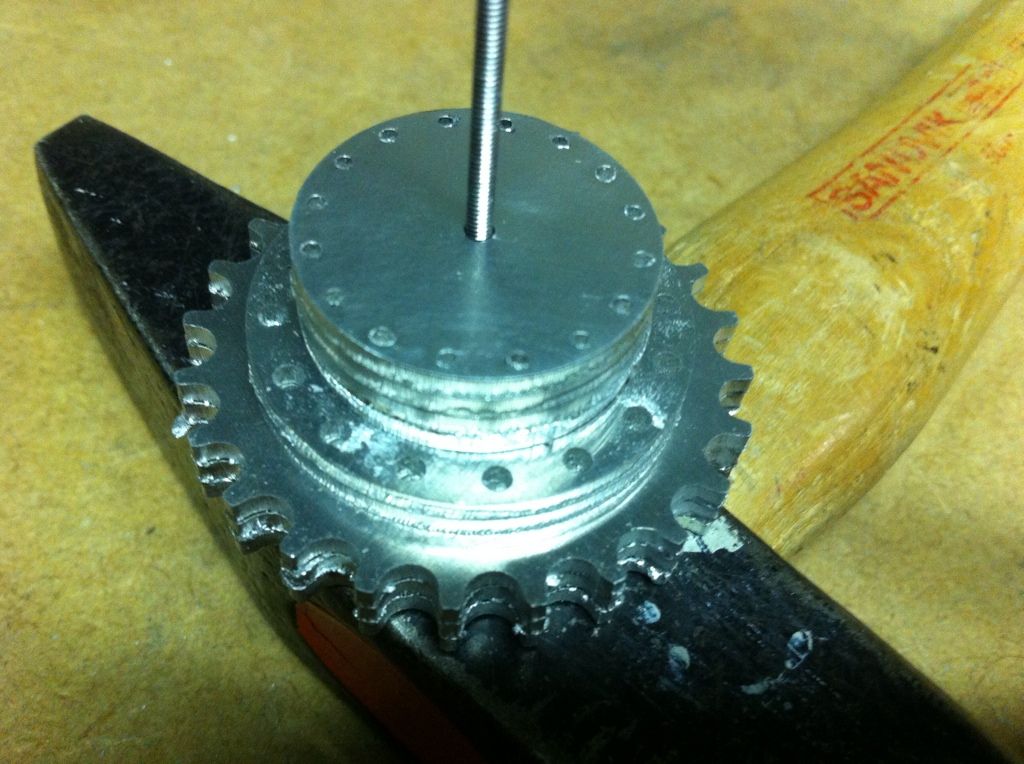
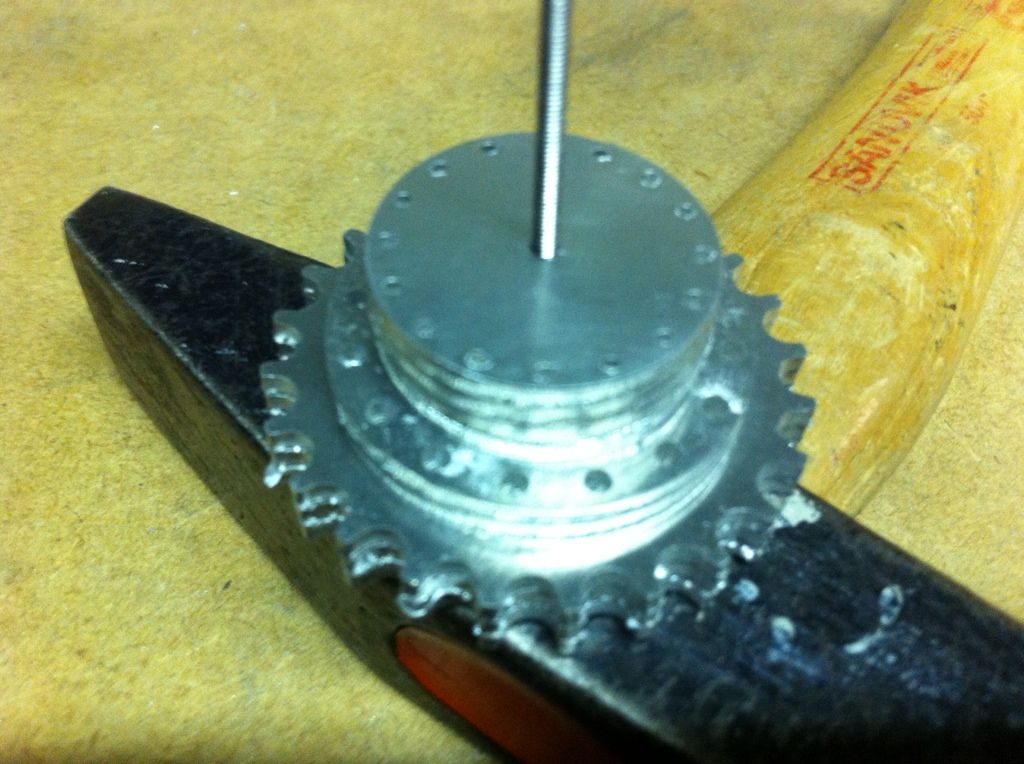
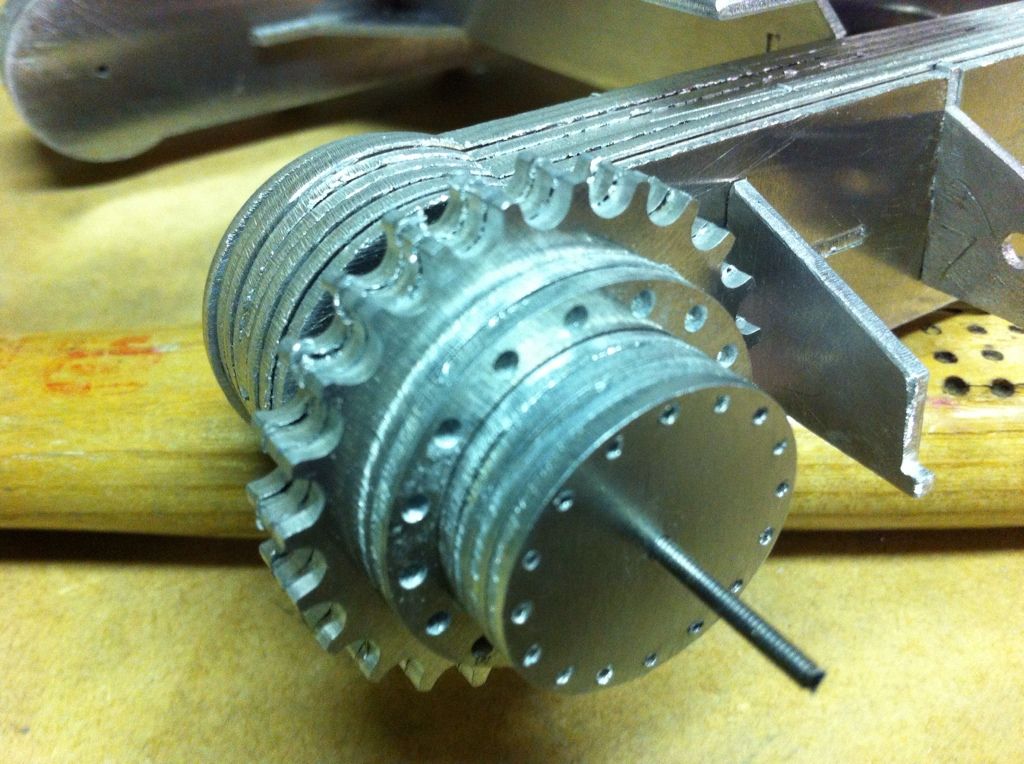
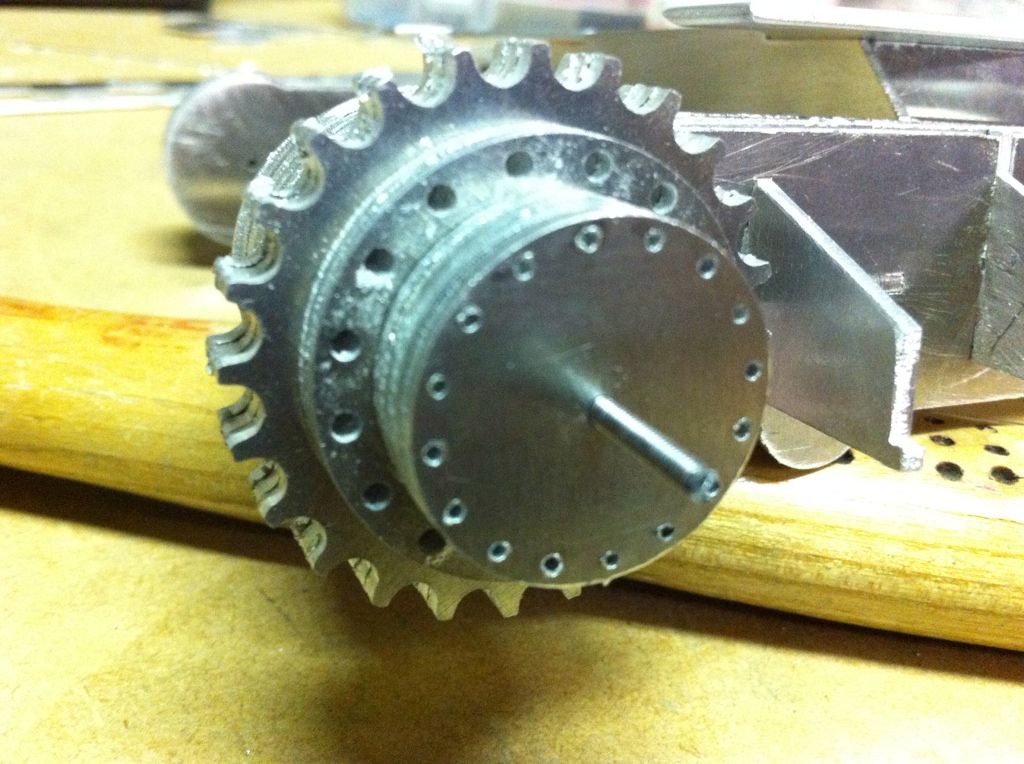
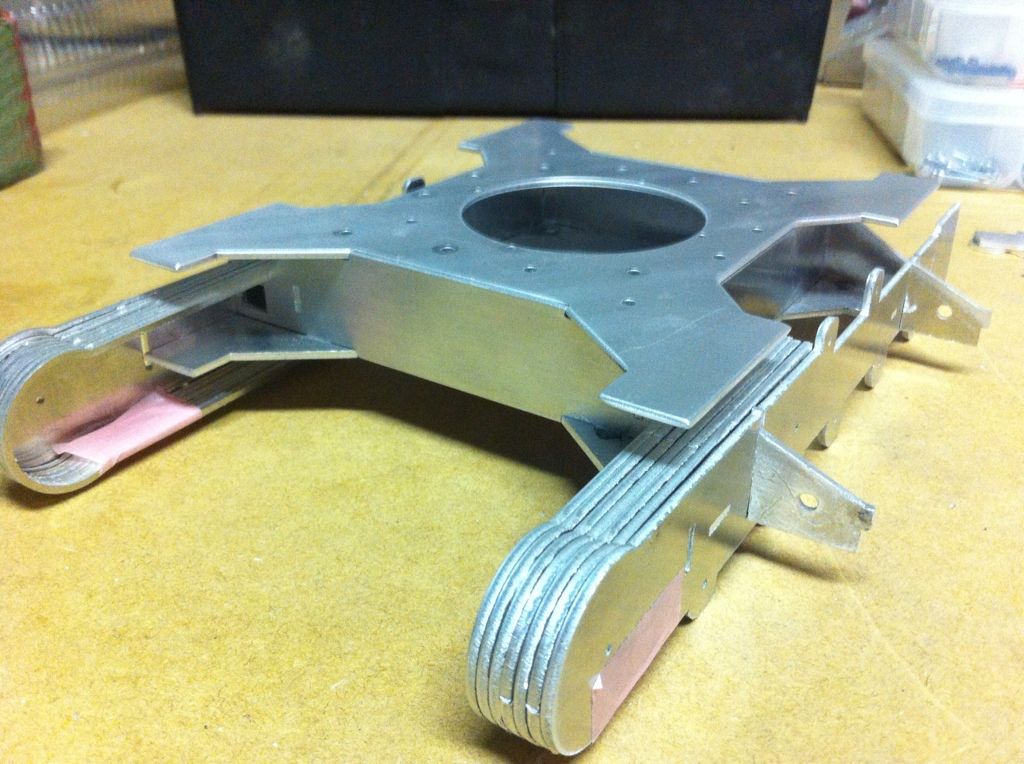
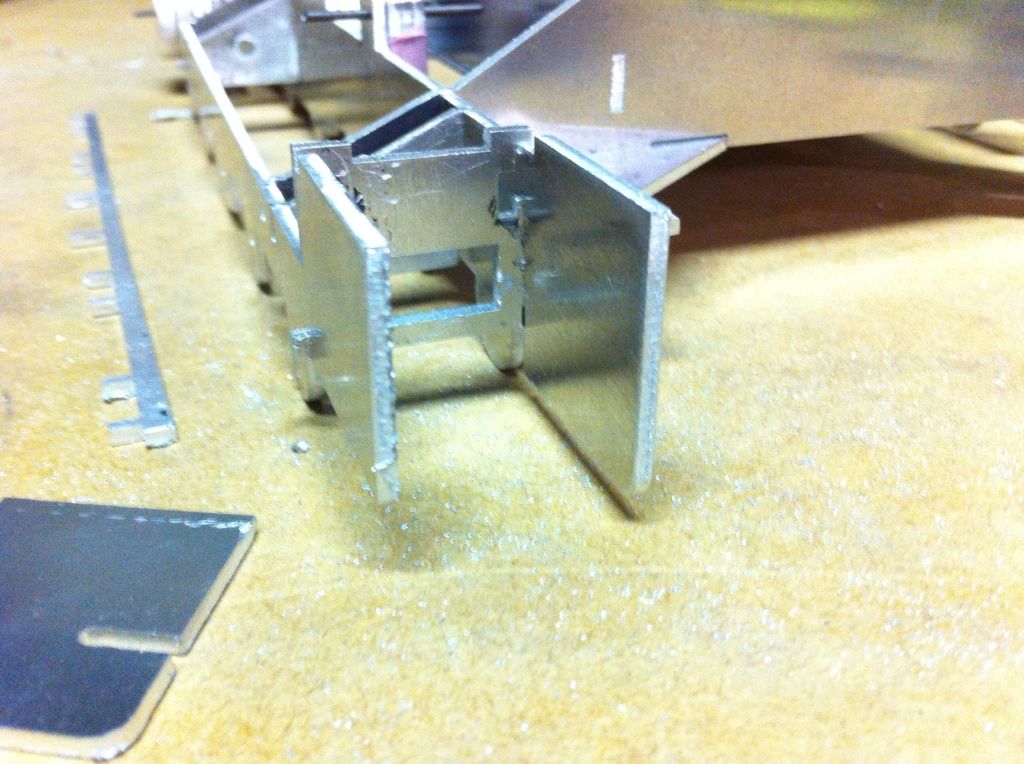
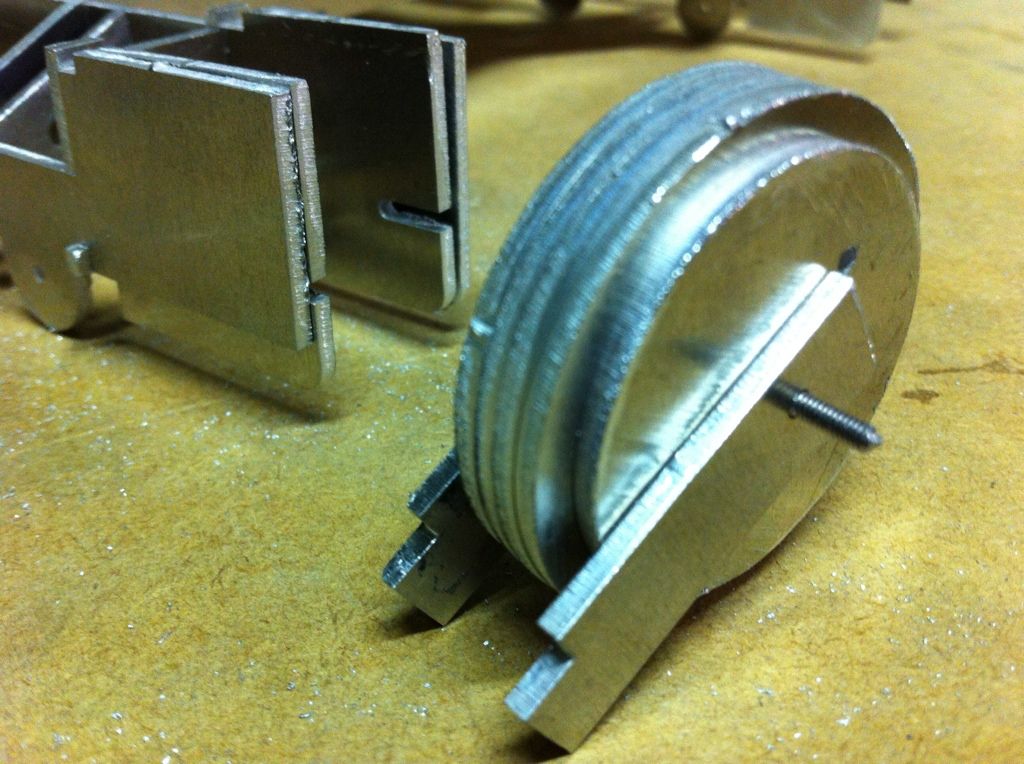
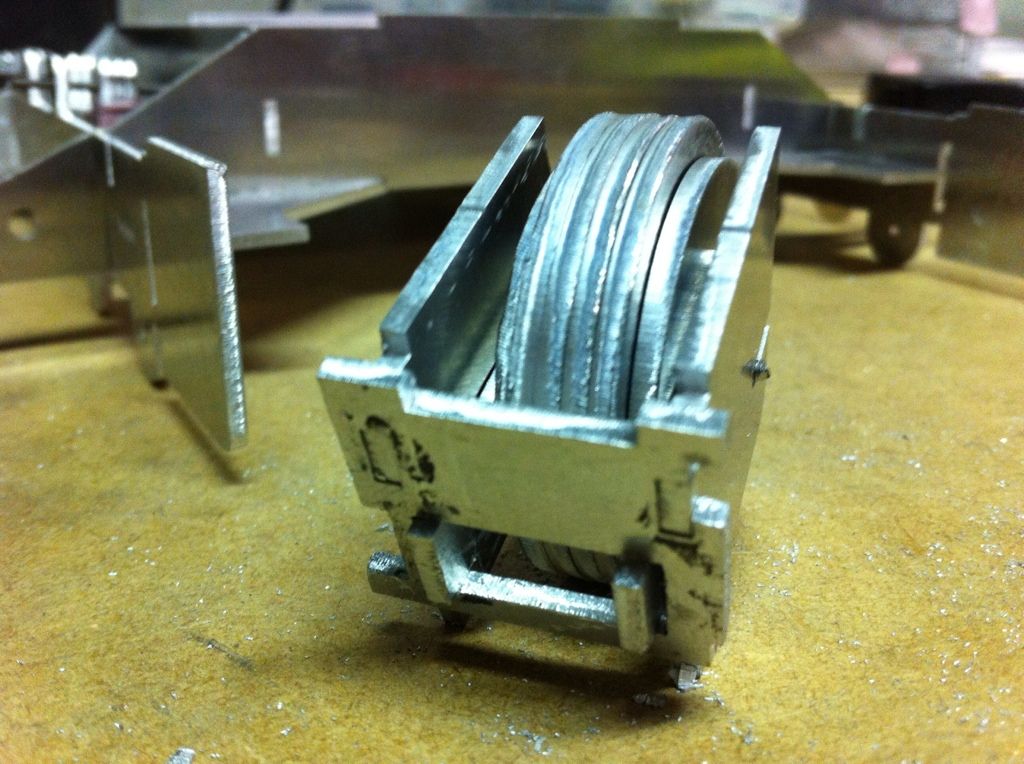
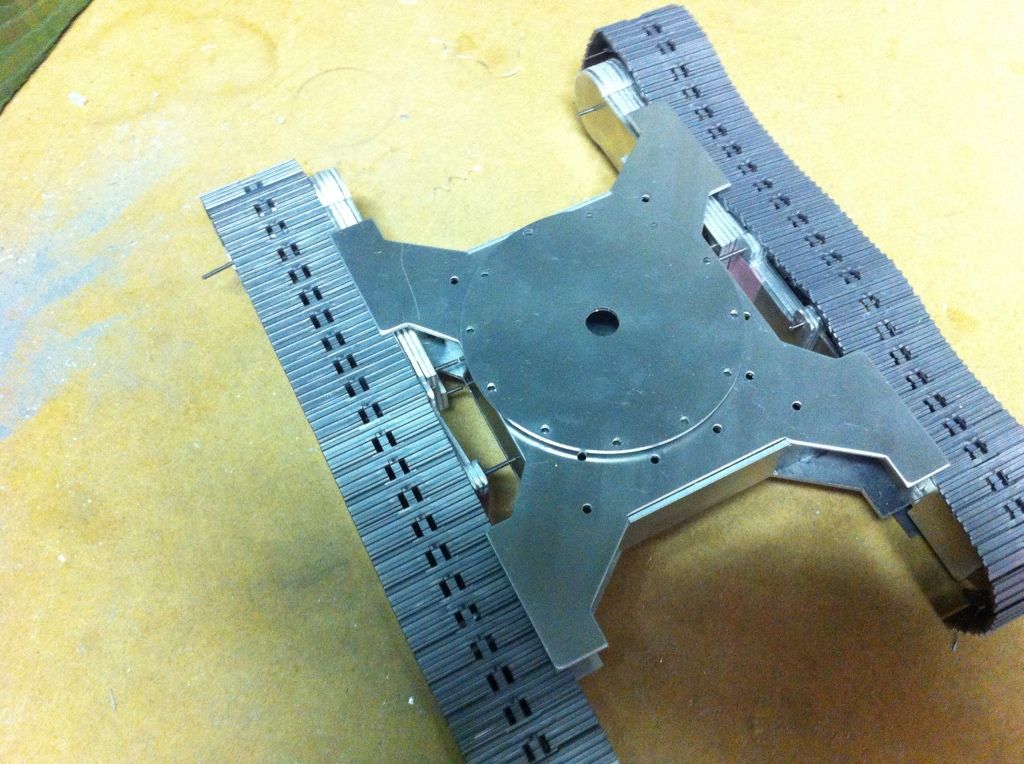
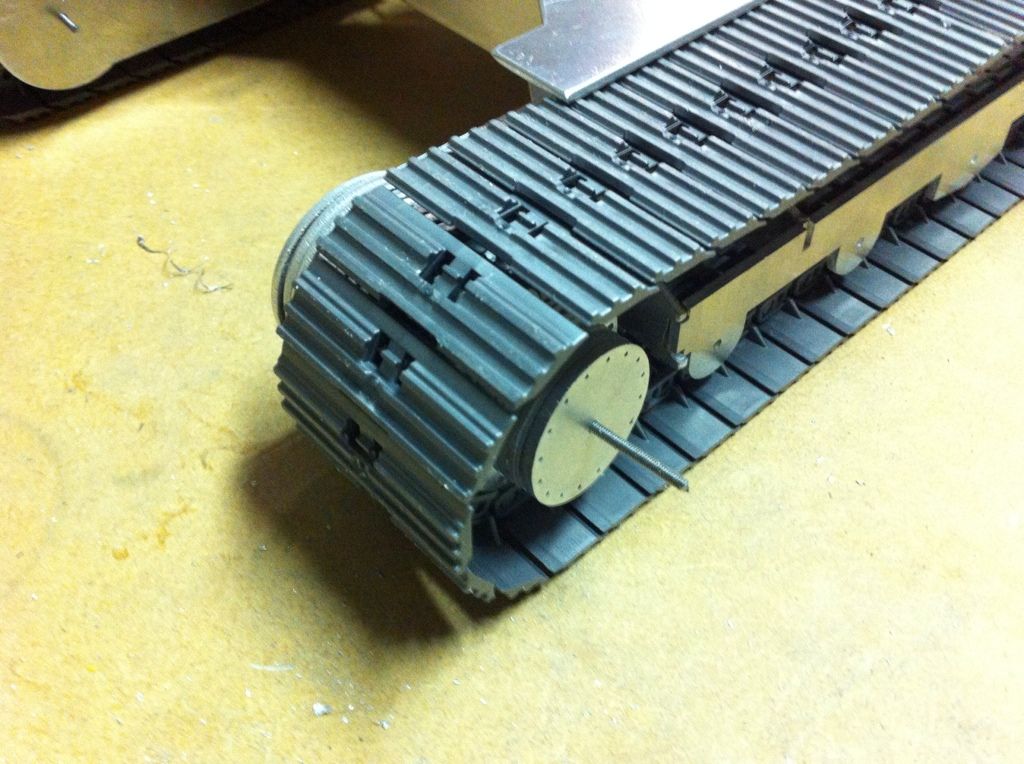
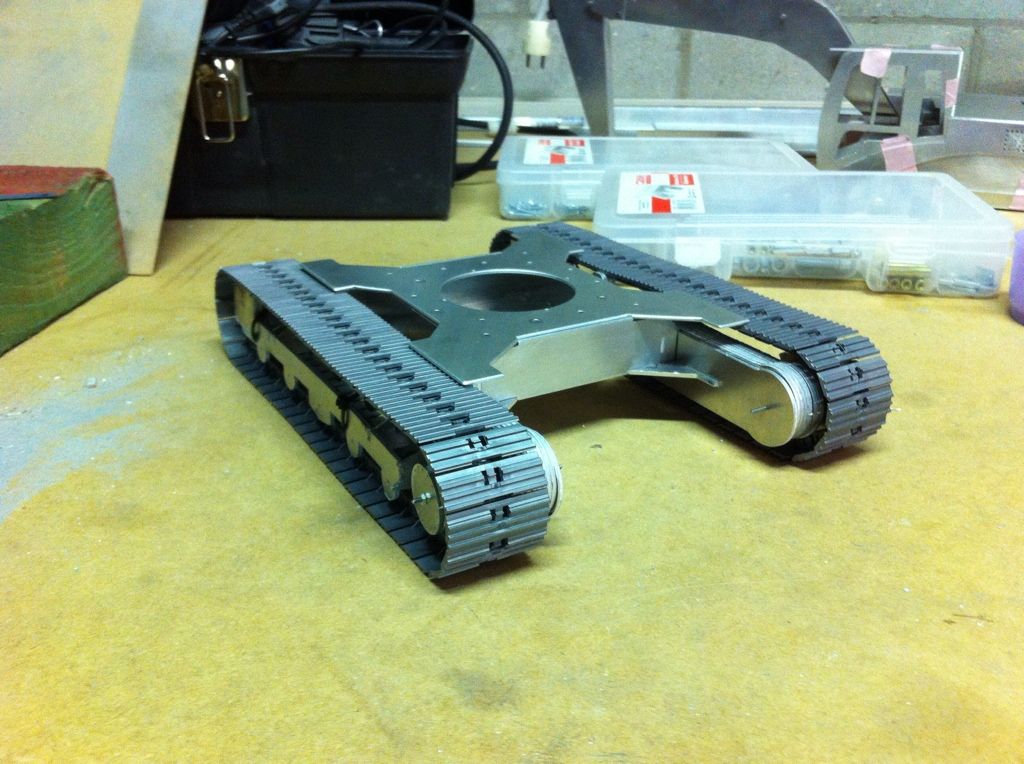
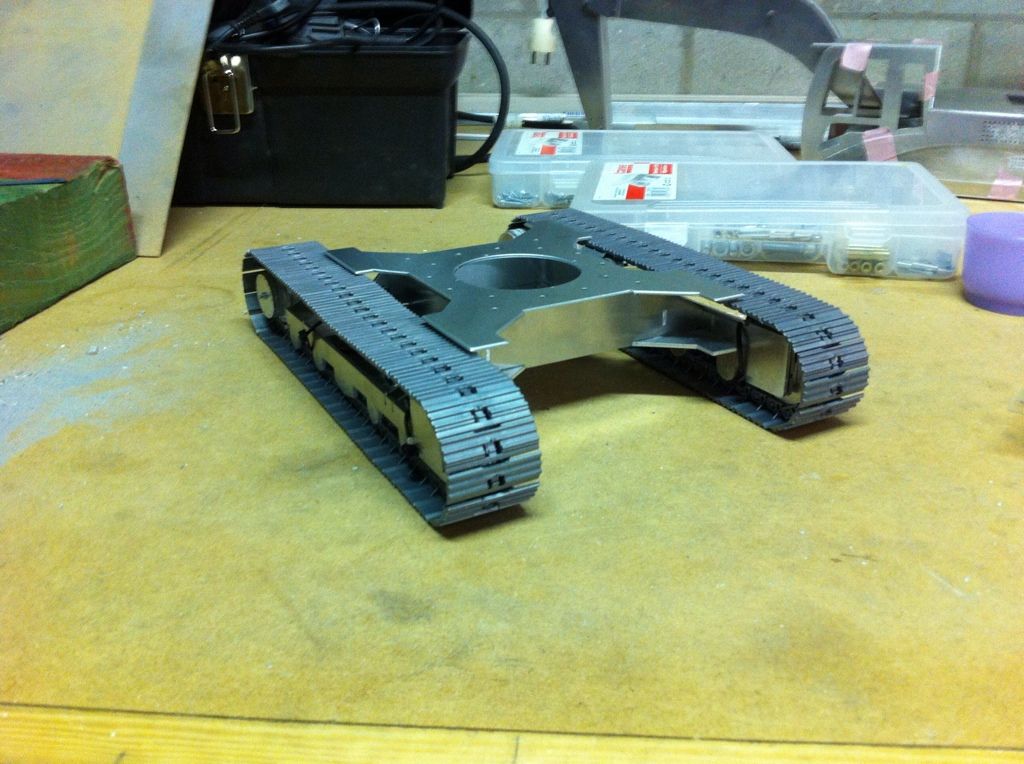
day 6
works continue on the undercarriage
preparing all the steps for the track's main guide wheel

|
|
|
12.09.2012 10:02 |
|
|
wimo

Tripel-As

Dabei seit: 08.04.2010
Beiträge: 247
Maßstab: 1:16
Wohnort: Rotenburg an der Fulda
Level: 38 [?]
Erfahrungspunkte: 1.279.954
Nächster Level: 1.460.206
|
|
wow.

Sorry, but my english is not so good, i`ve learnt a little bit in scool 40 years ago.
Verry nice work, all in sandwitch form constructet parts.
I think its a dificult work all this parts bring to paper.
Thats perfekt work on a upper level.
i can understand that you not give it to any other for copy.
its a hard thing to construct it any moth.
Its a real great work.

__________________
MfG
Wilfried
Geht nit gibts nit
|
|
|
13.09.2012 02:00 |

|
|
caterpilar
Doppel-As
Dabei seit: 09.04.2012
Beiträge: 113
Maßstab: 1:16
Level: 33 [?]
Erfahrungspunkte: 502.879
Nächster Level: 555.345
Themenstarter
|
|
vielen dank Wimo. Your english is great! You can write in German if you want. I do understand German very well.
I have difficulties in writing in German
Many thanks for the nice comments!
Grussen
Koen
|
|
|
13.09.2012 10:01 |
|
|
|
|
|
|
|
|
caterpilar
Doppel-As
Dabei seit: 09.04.2012
Beiträge: 113
Maßstab: 1:16
Level: 33 [?]
Erfahrungspunkte: 502.879
Nächster Level: 555.345
Themenstarter
|
|
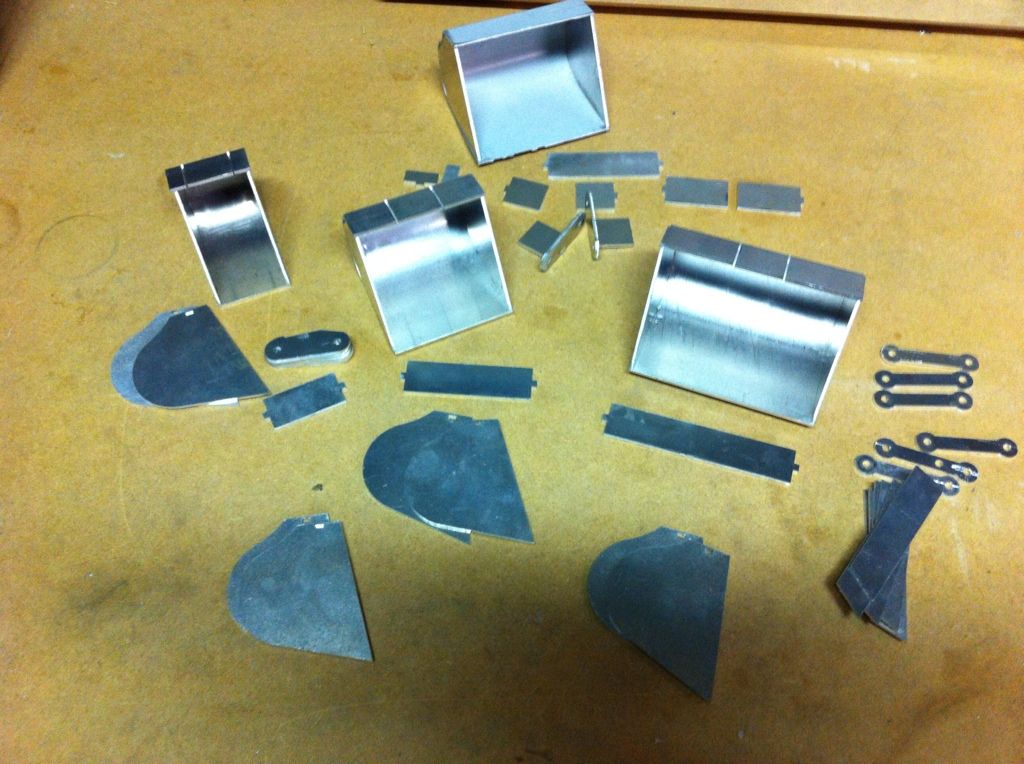
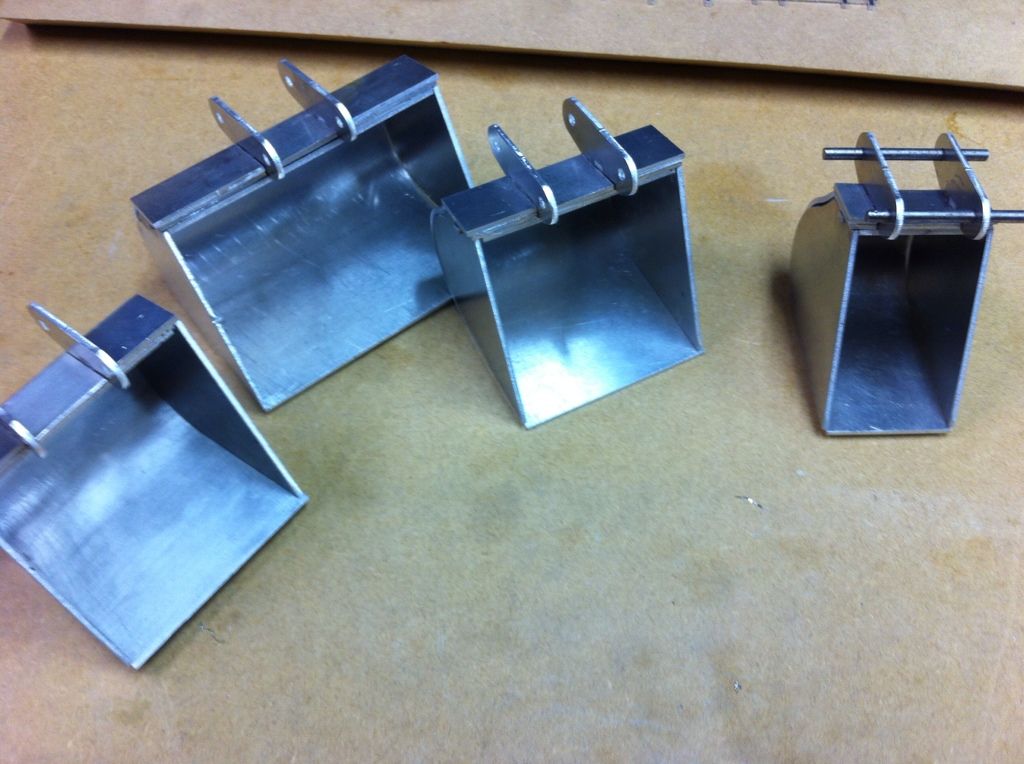
Hier alle Teilen für die 4 Löffeln
Below all the parts for the 4 buckets
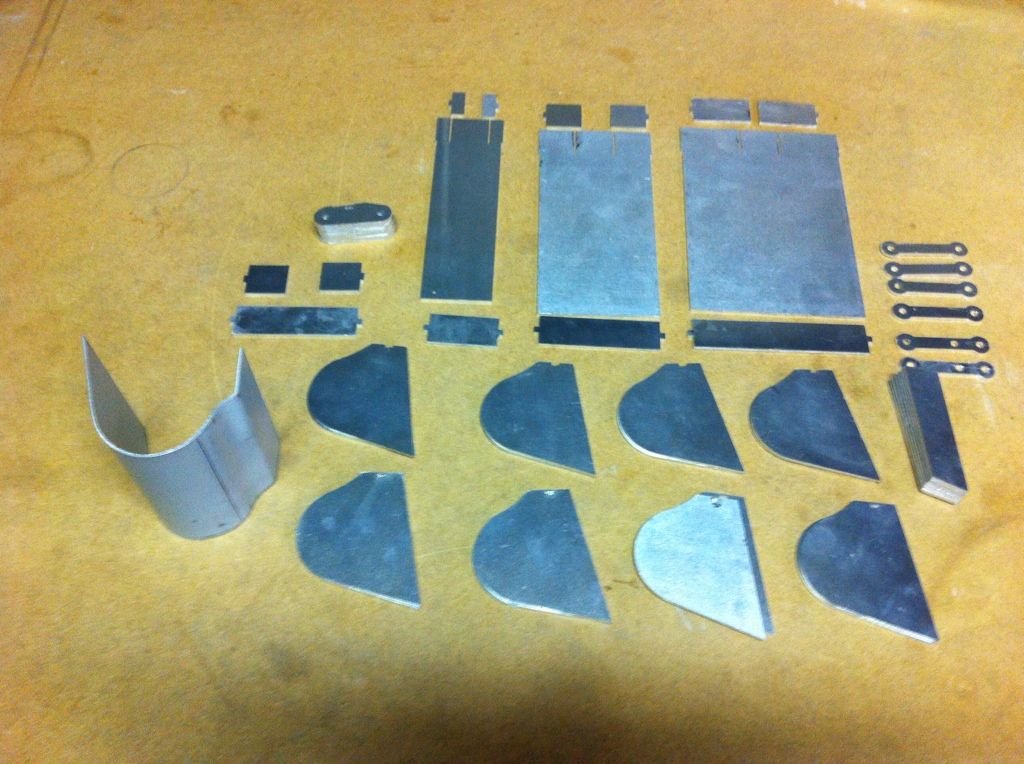
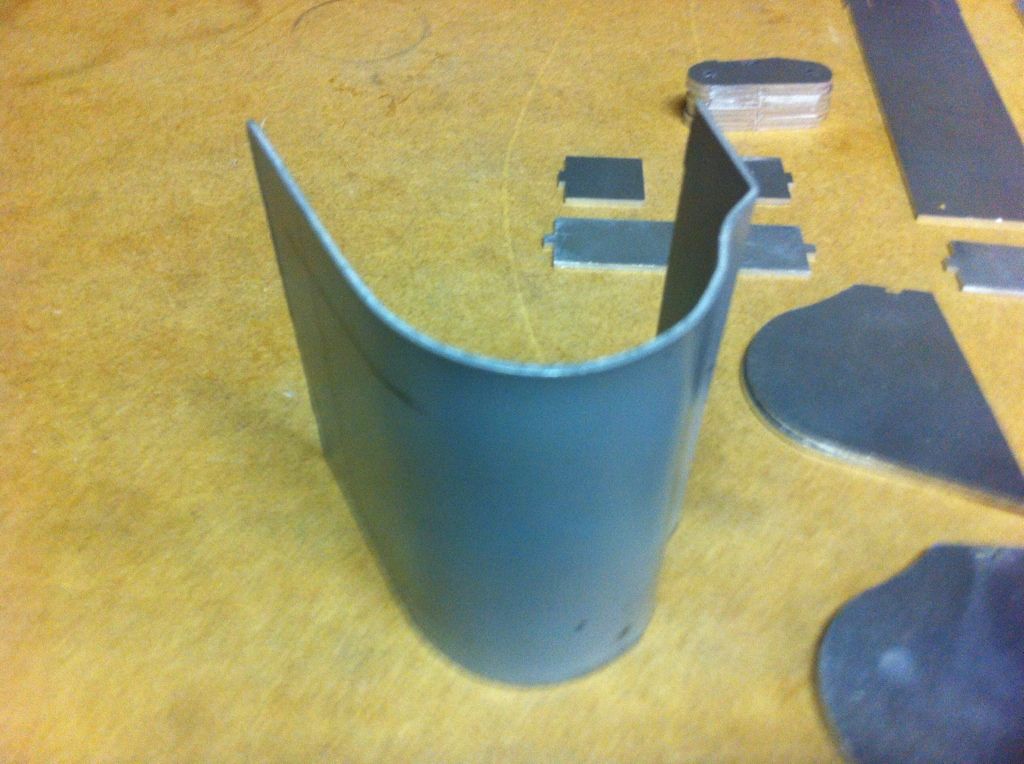
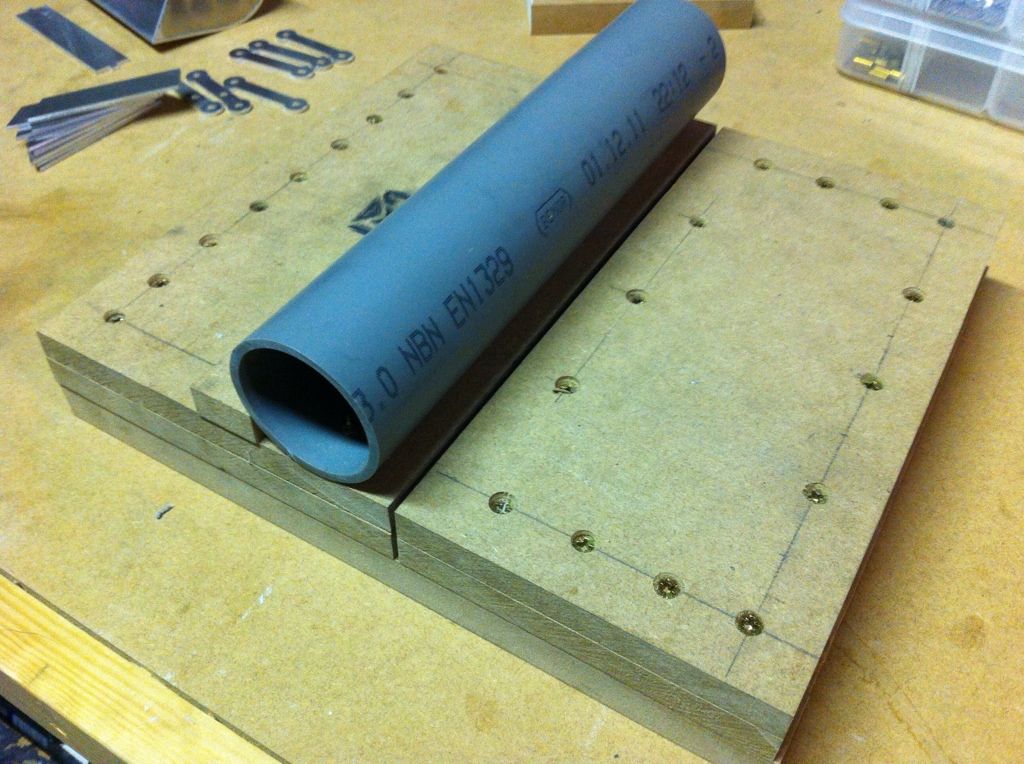
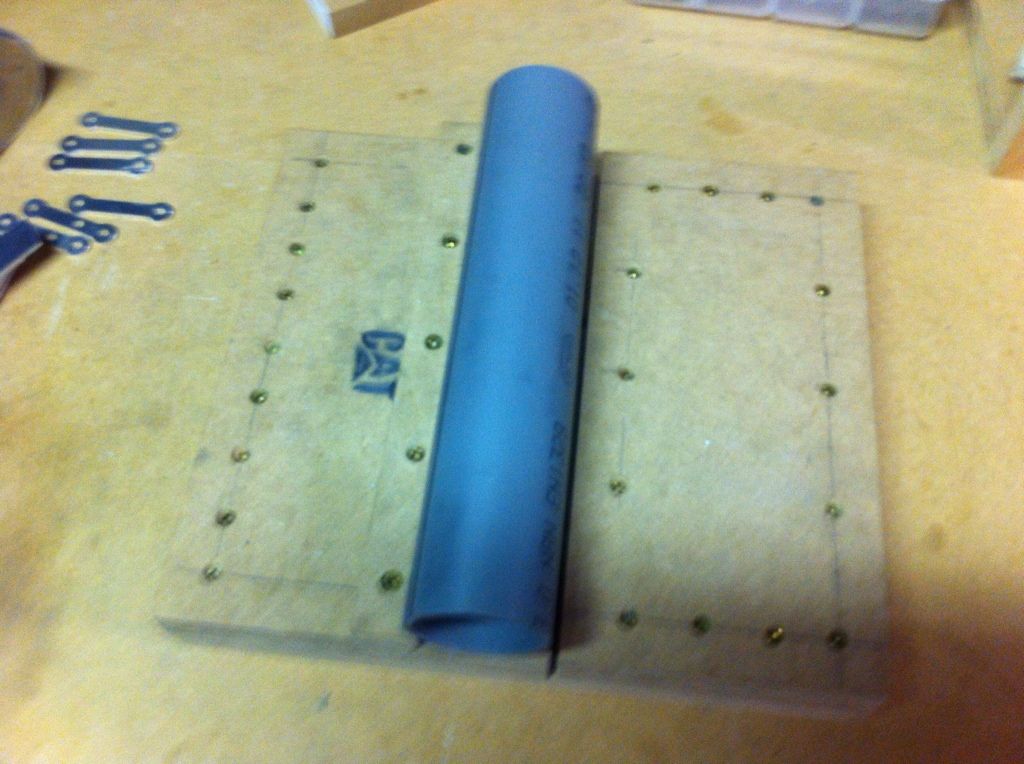
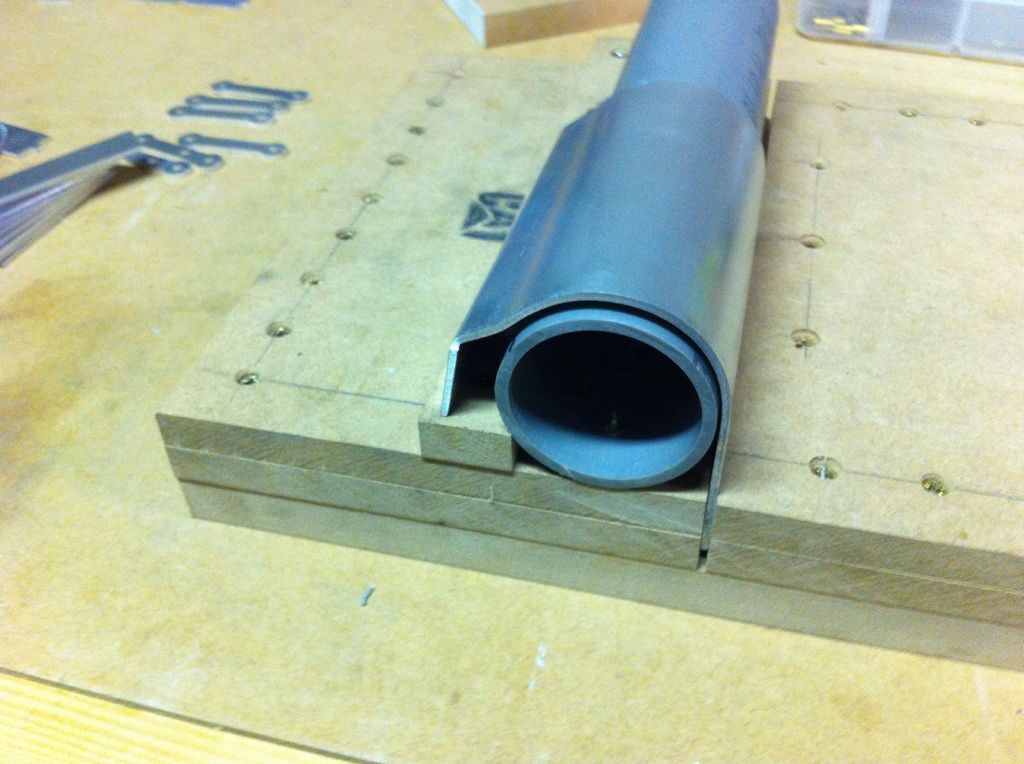
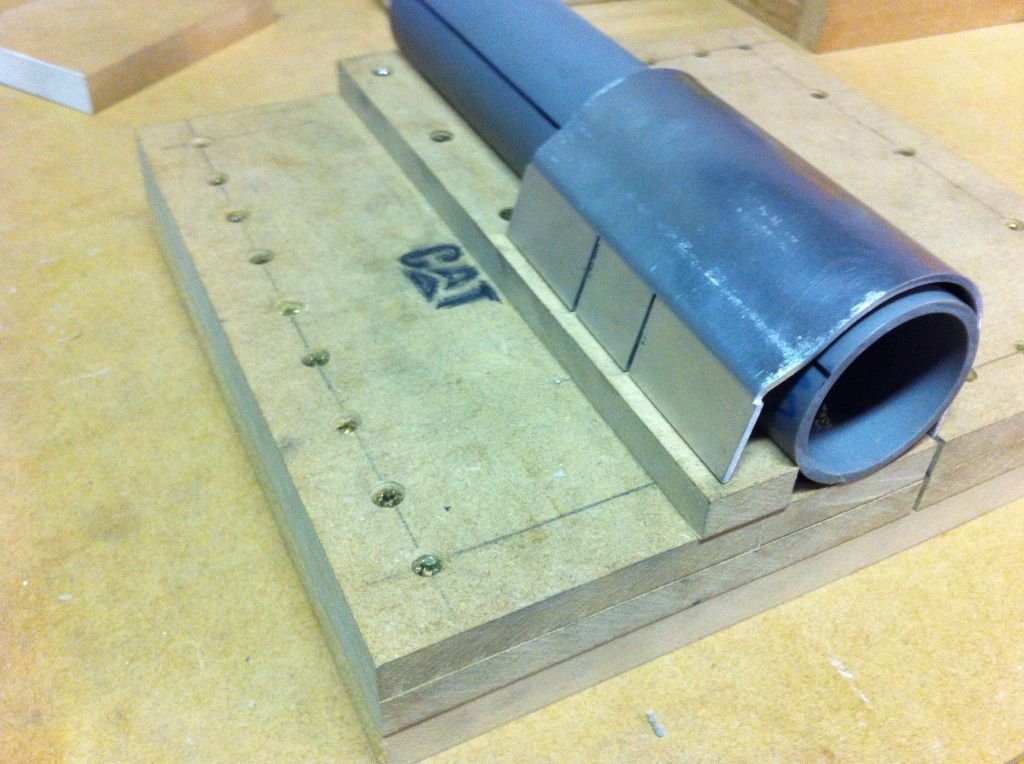
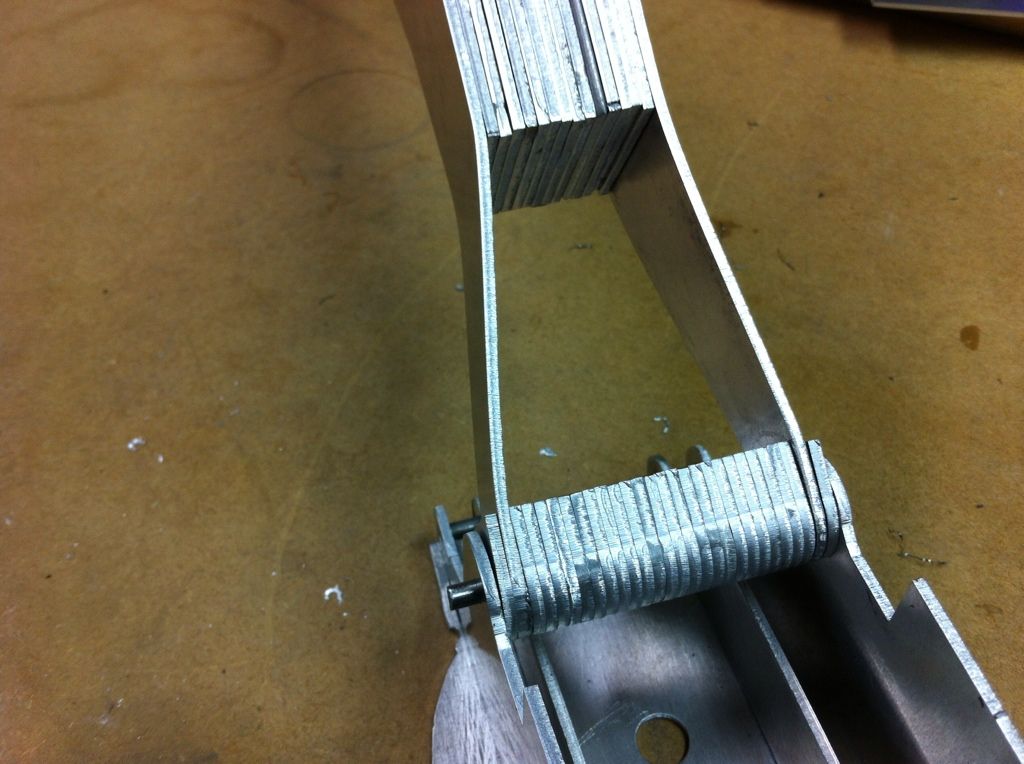
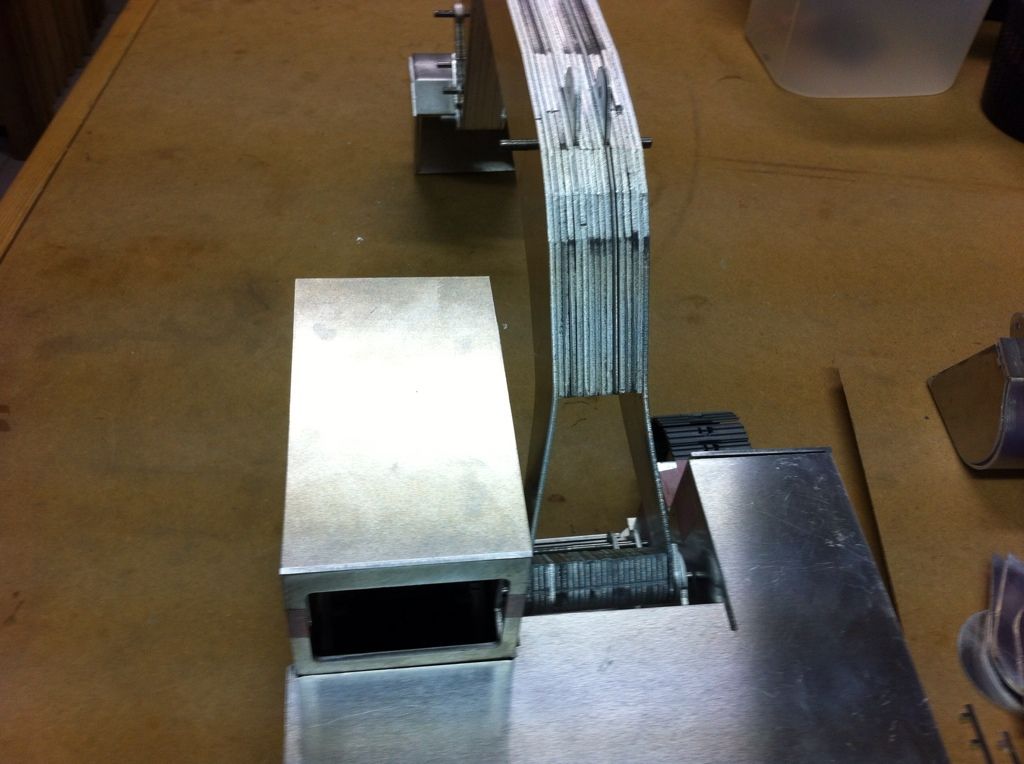
I spent a few days thinking how to bend the bucket shape to allow a nice fit with the laser cute sides.
I did not wanted to apply heat to bend the aluminum plates. I also didn't wanted to use a hammer. So I made a very handy tool out of some scrap material I had in my workshop. And it did the job very well.
I did a test bend first with some 1,5mm aluminum first before starting to bend the laser cut 2mm plates.
Here is the result
So I did all 4 of them in 2mm. This is how the smallest bucket looks like
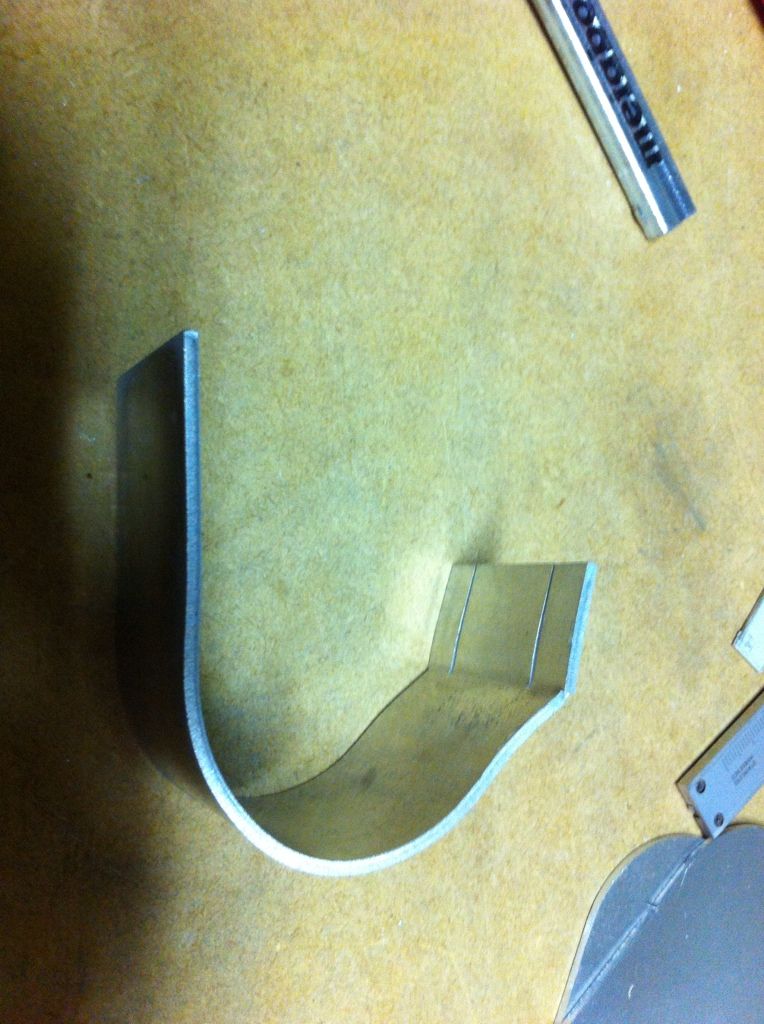
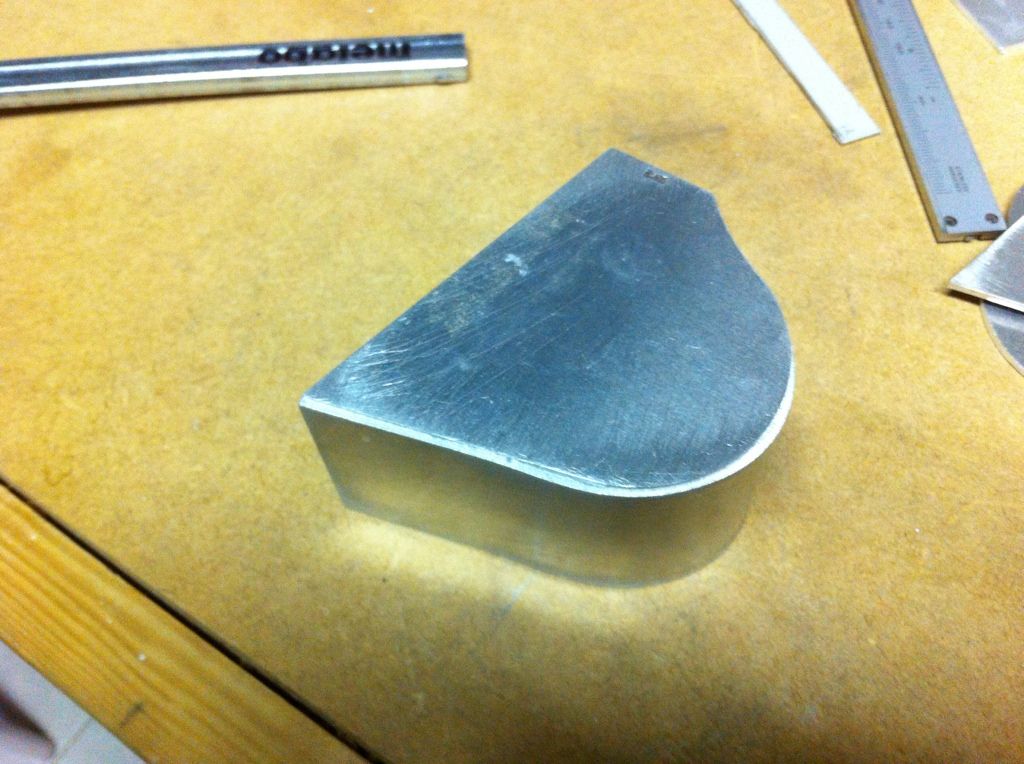
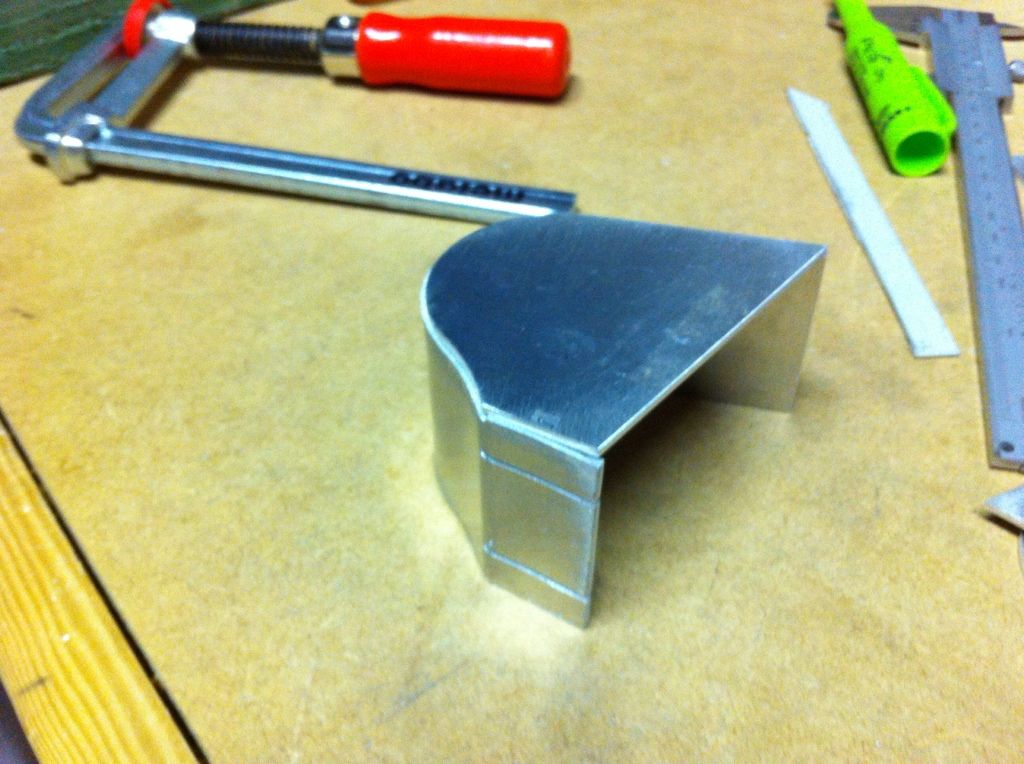
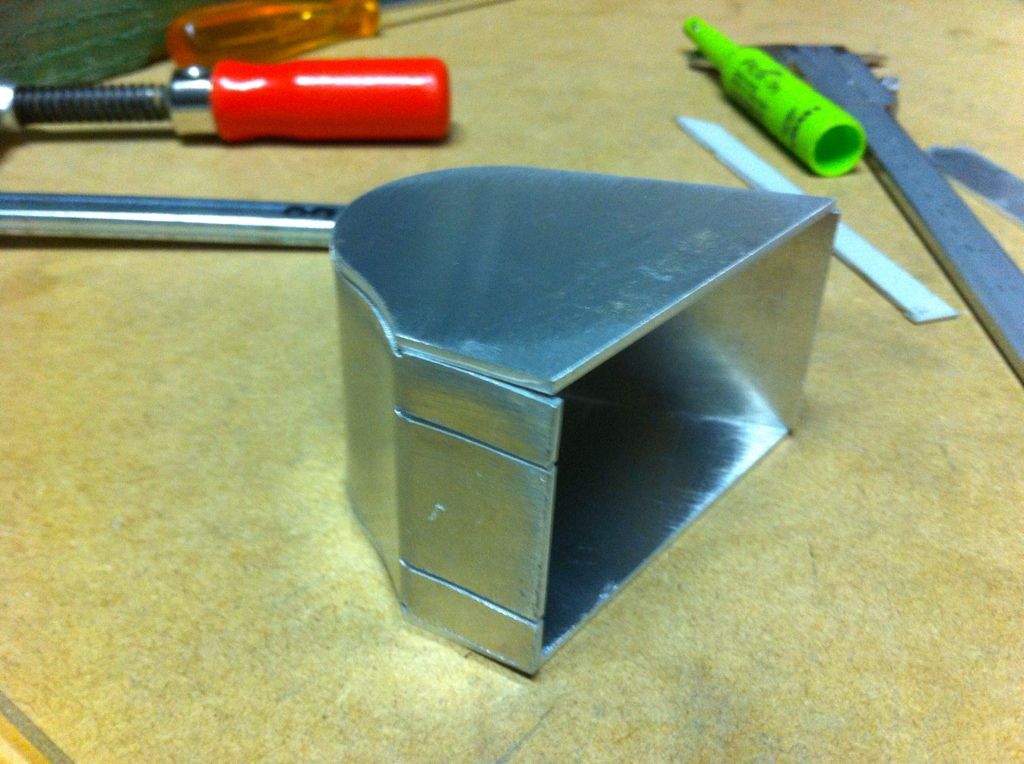
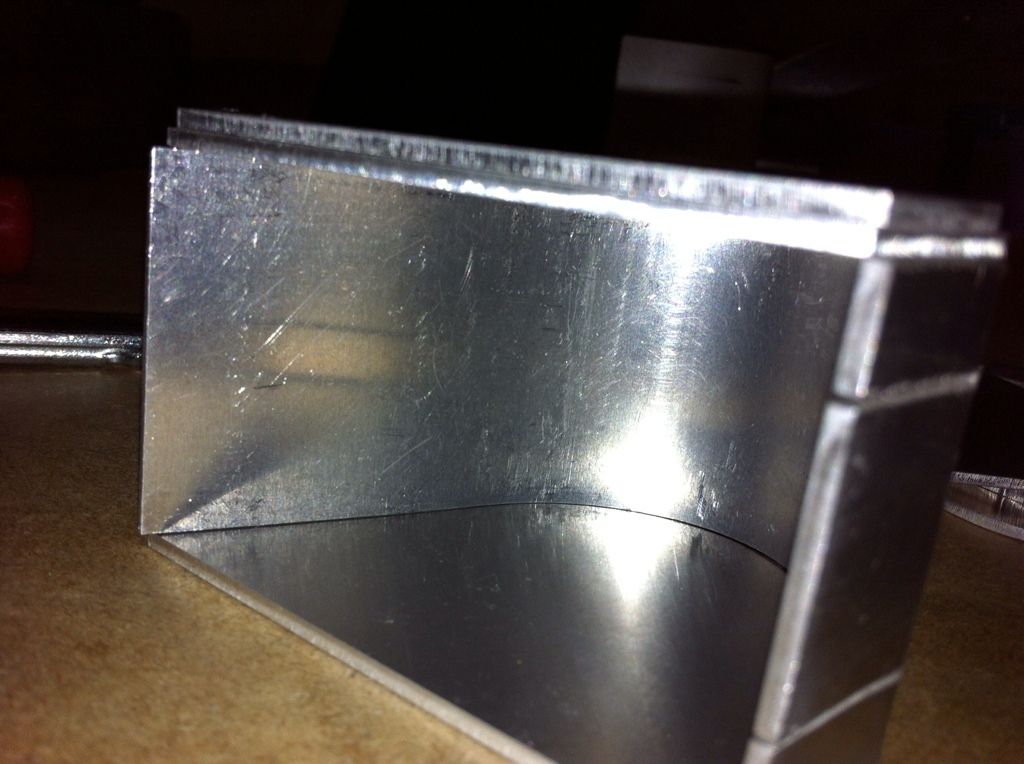
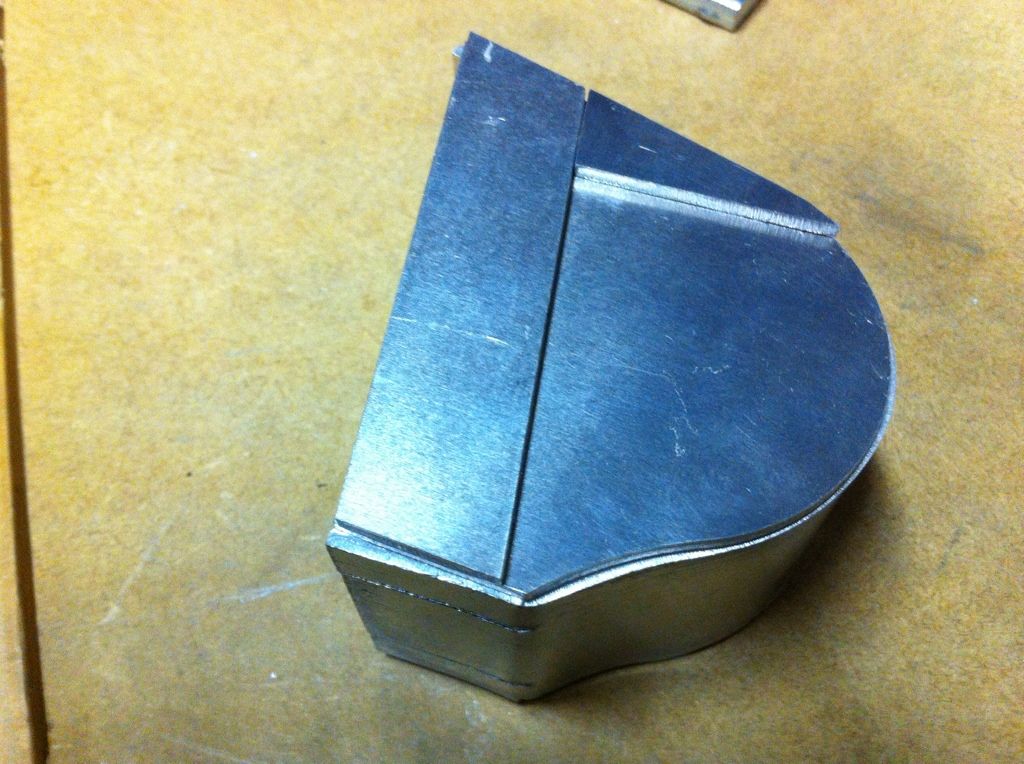
the next bucket is a litter bigger
and then finally the largest bucket
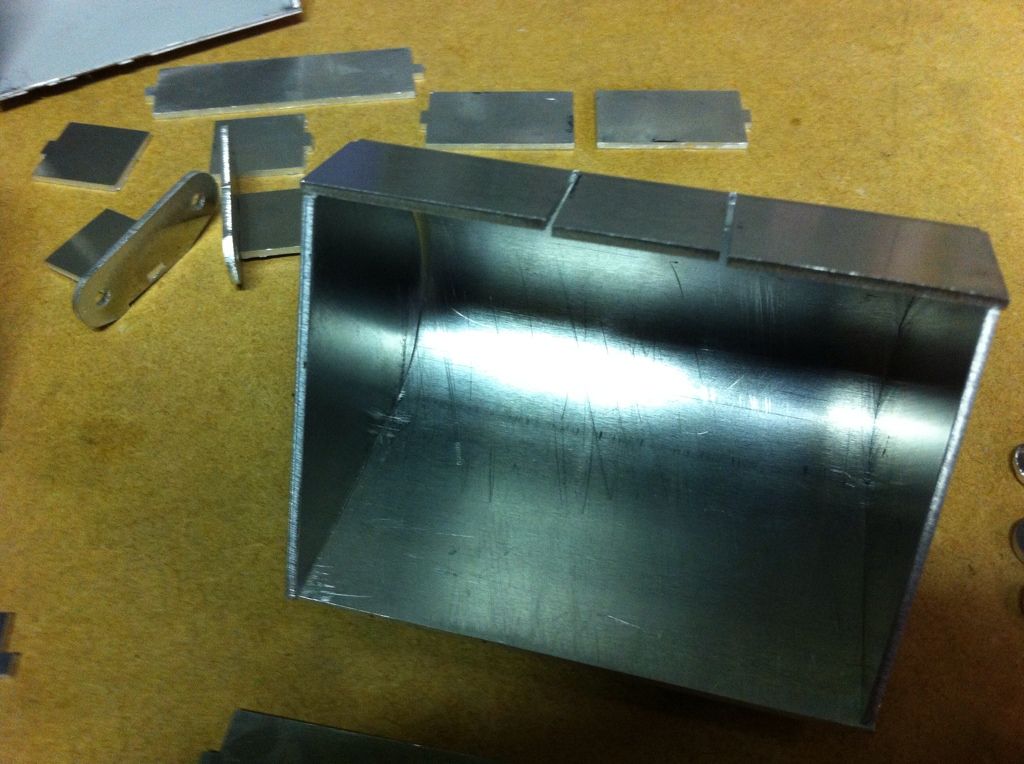
and the line up
|
|
|
17.09.2012 11:12 |
|
|
|
|
|
|
|
|
caterpilar
Doppel-As
Dabei seit: 09.04.2012
Beiträge: 113
Maßstab: 1:16
Level: 33 [?]
Erfahrungspunkte: 502.879
Nächster Level: 555.345
Themenstarter
|
|
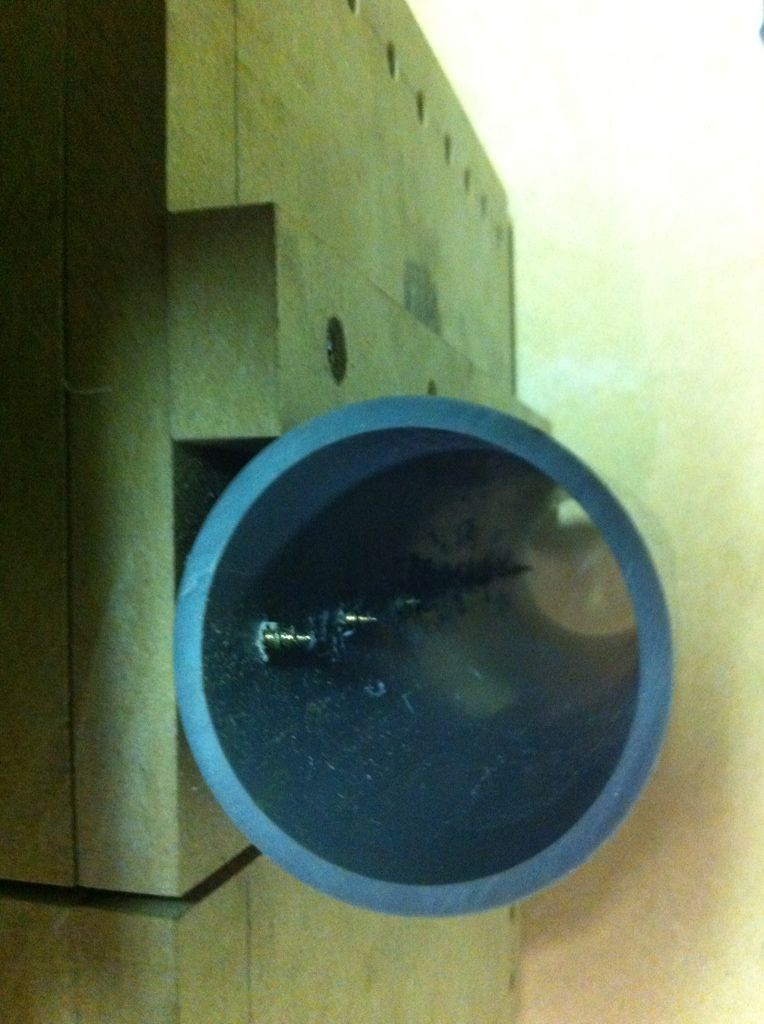
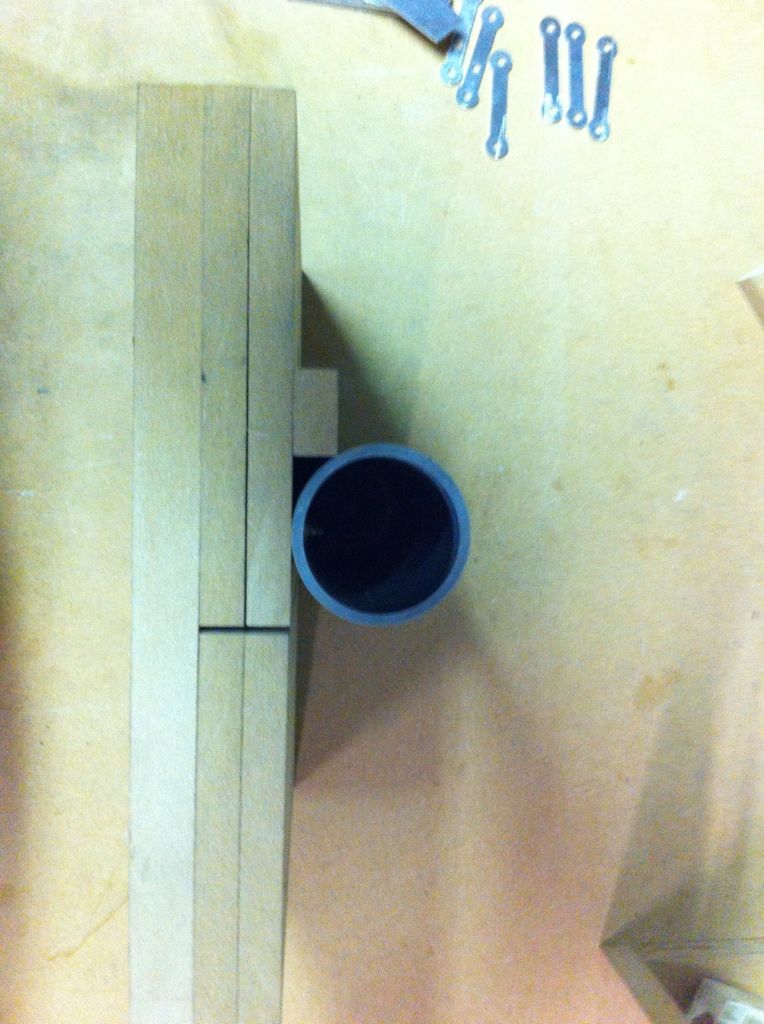
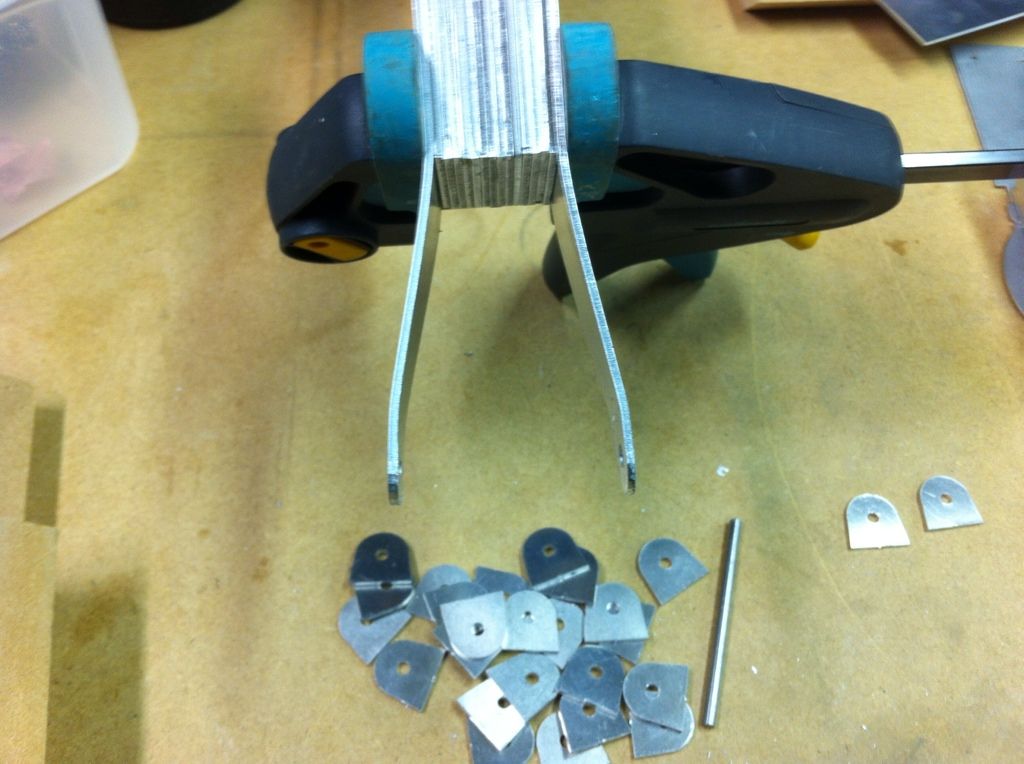
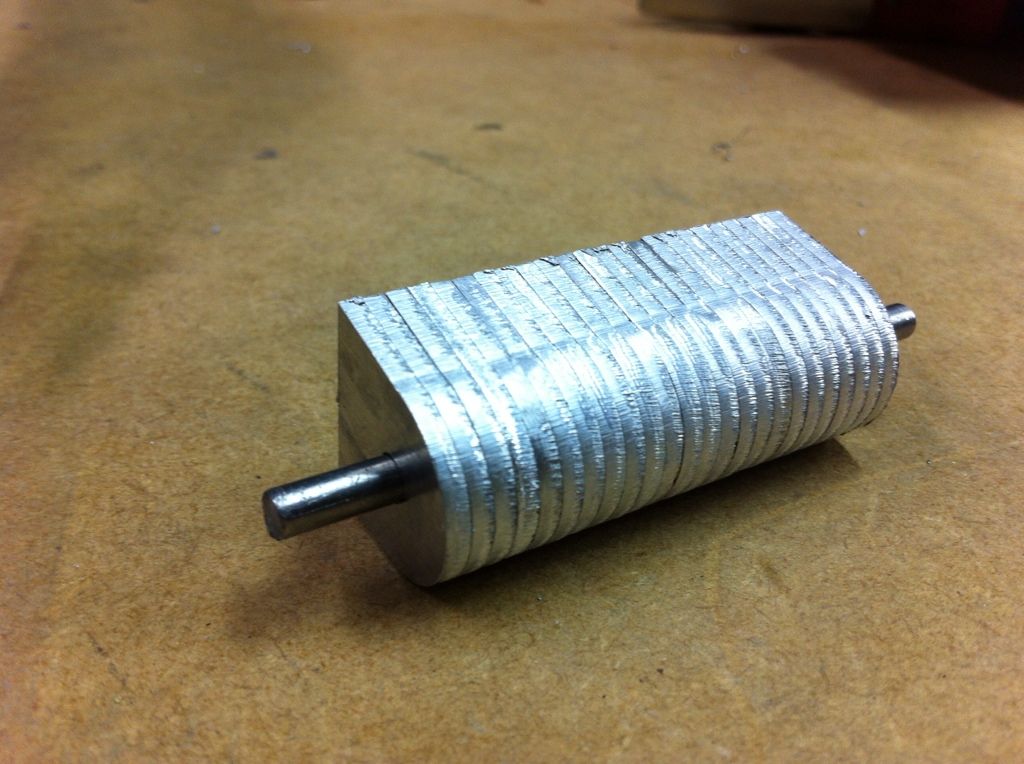
This is the device I made to bend the buckets. Is made out of 50mm tubing and MDF scrap material.
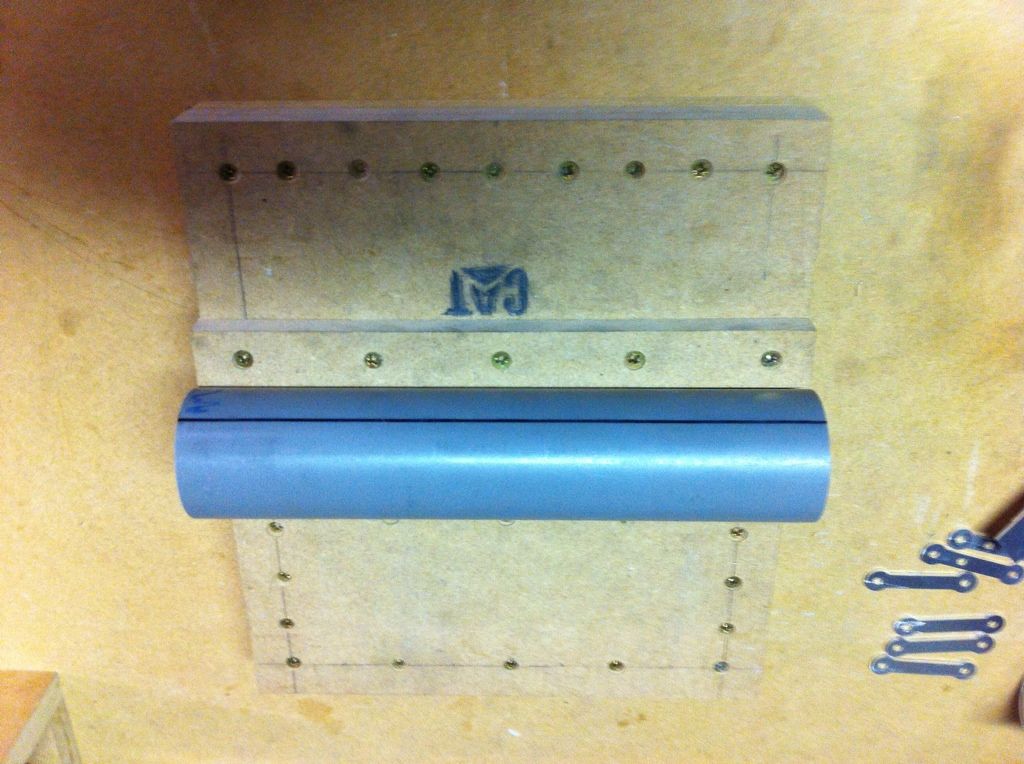
I fixed the tube with screws
|
|
|
25.09.2012 10:17 |
|
|
caterpilar
Doppel-As
Dabei seit: 09.04.2012
Beiträge: 113
Maßstab: 1:16
Level: 33 [?]
Erfahrungspunkte: 502.879
Nächster Level: 555.345
Themenstarter
|
|
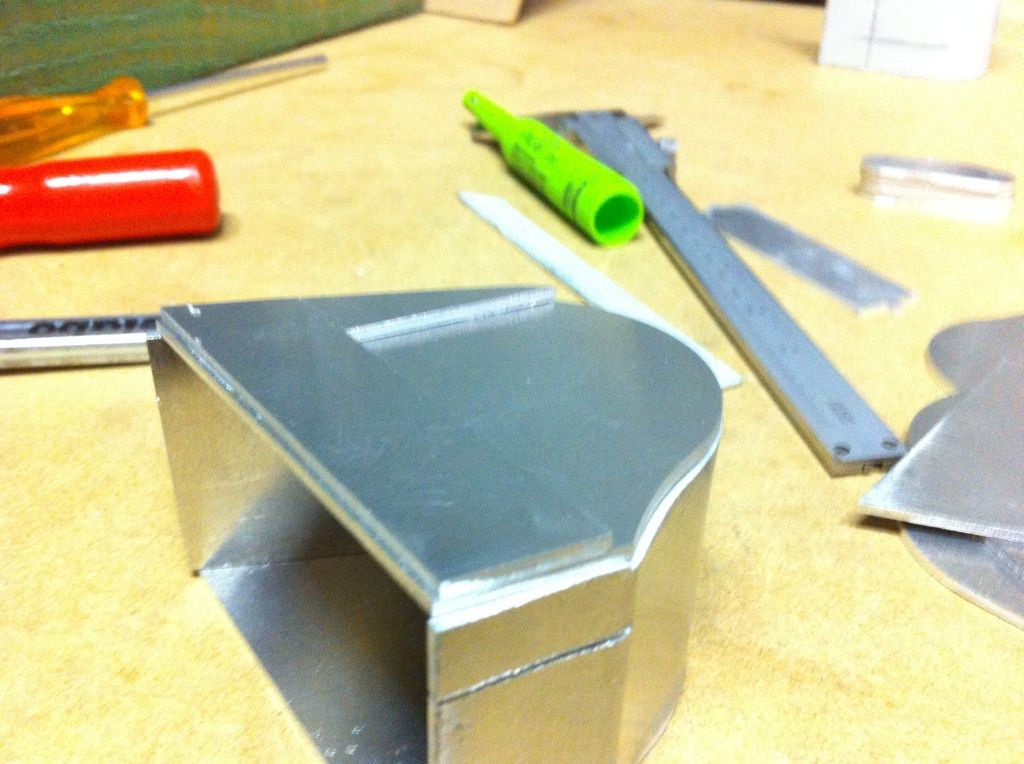
I prepared all the buckets for welding with Easyweld. Once that is done, the second side plates will come on
The bucket teeth
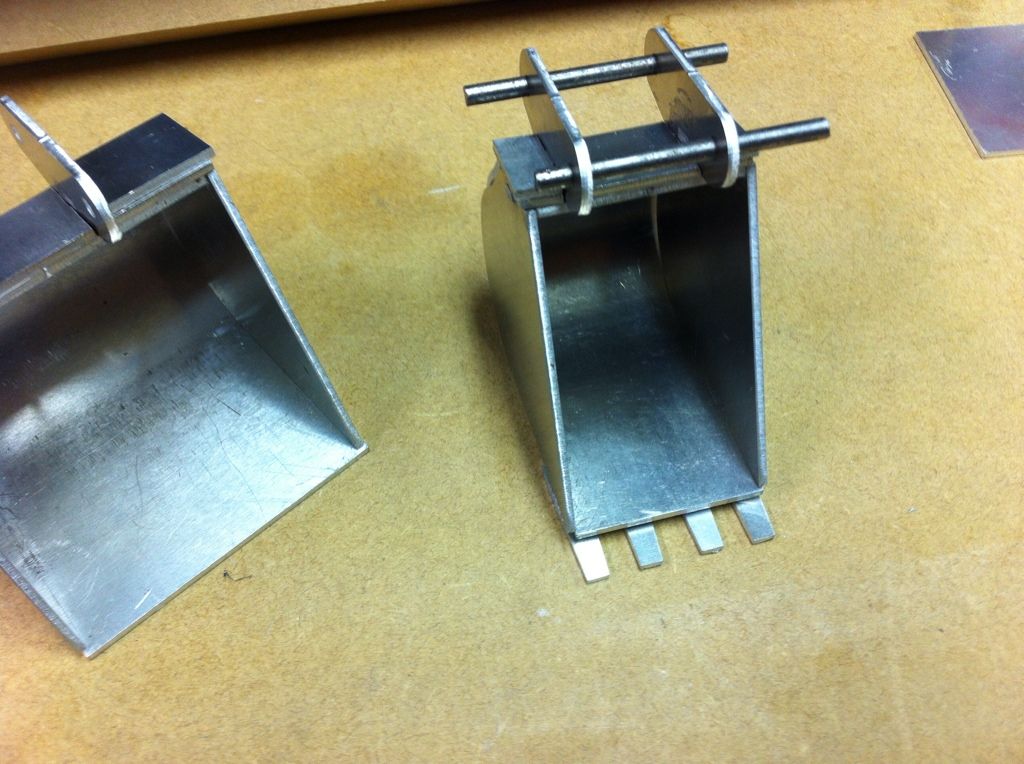
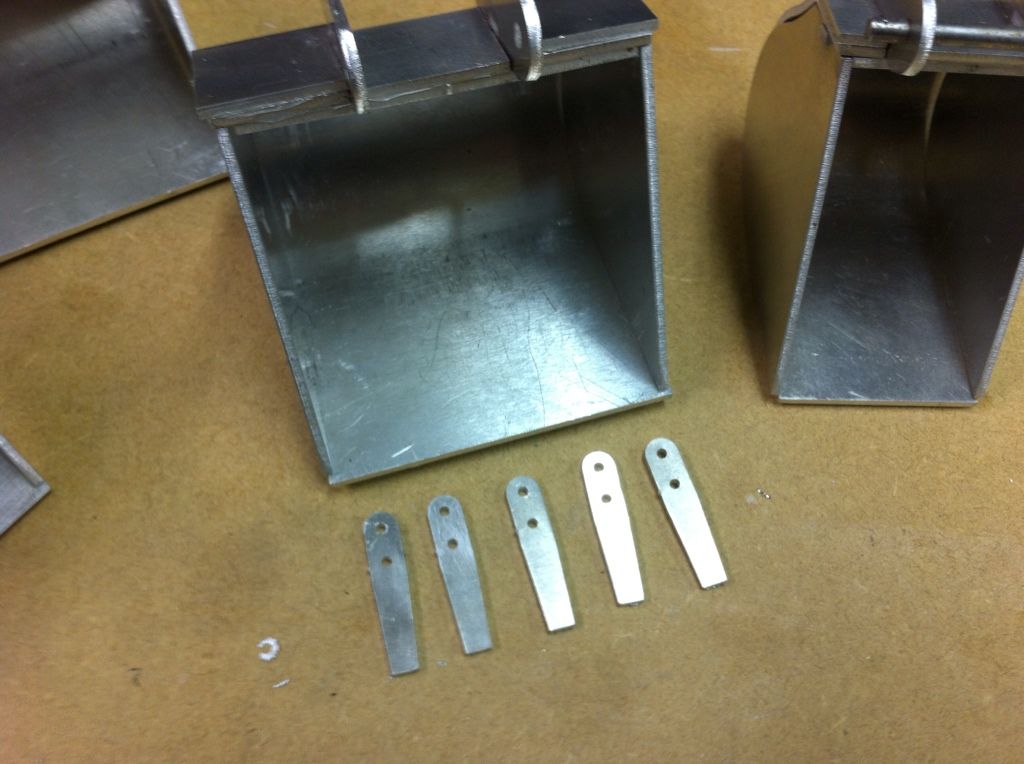
I have plenty of teeth to fit them to all buckets if needed

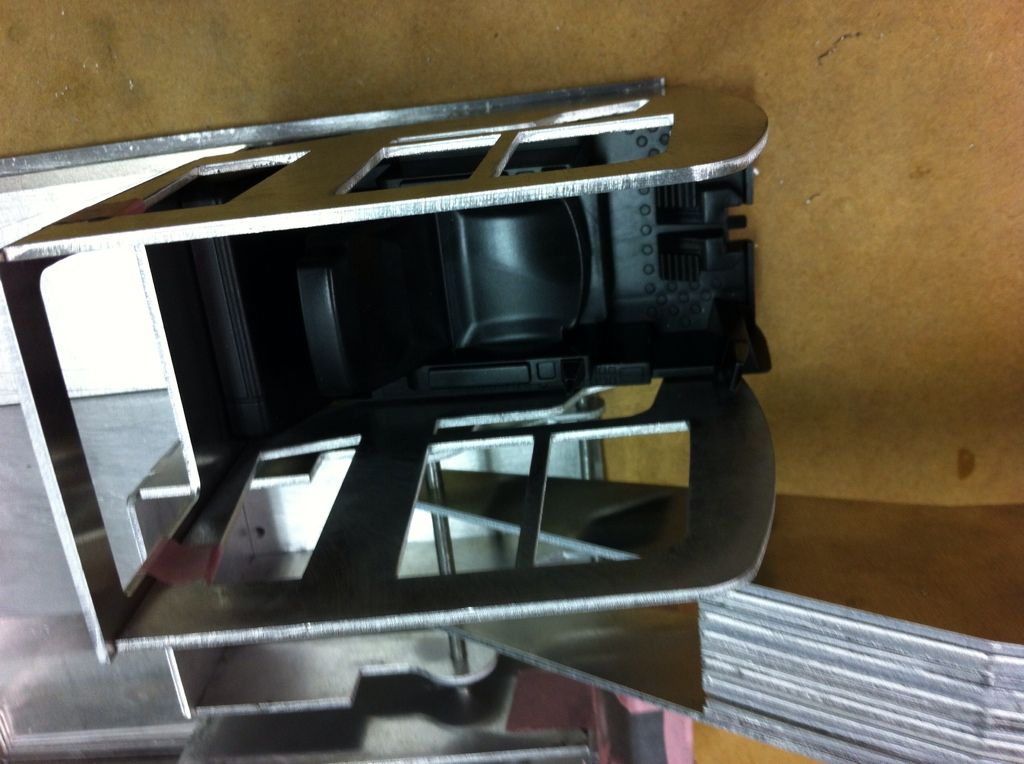
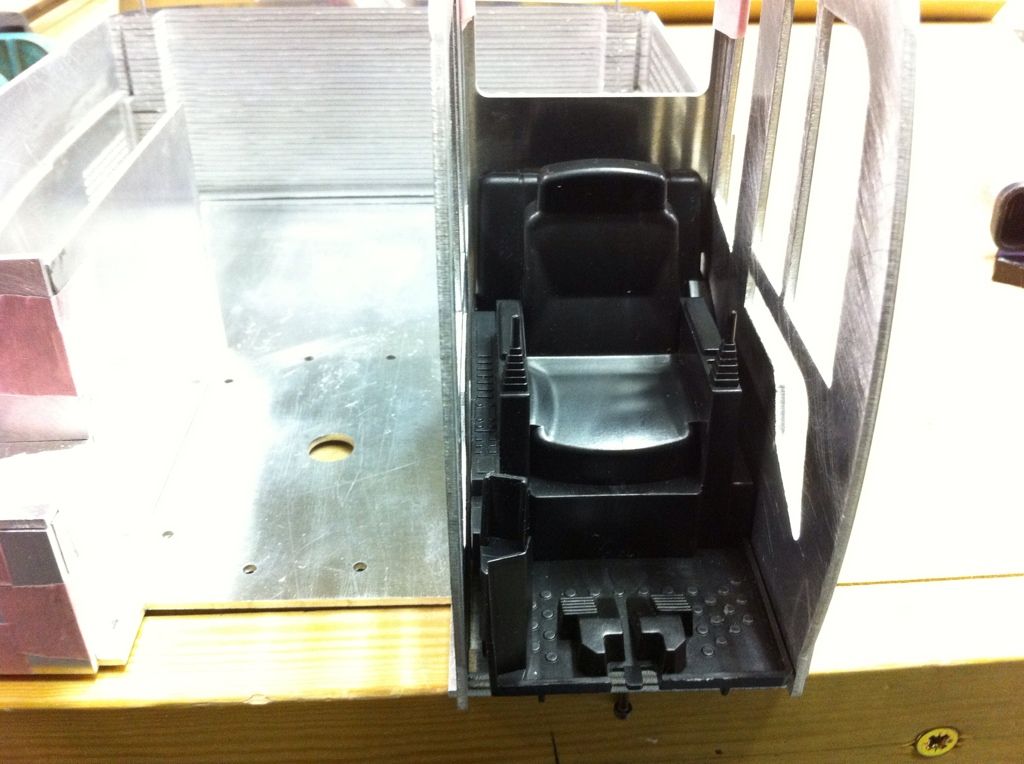
The cover for accessing the battery and pump room
and the seat...
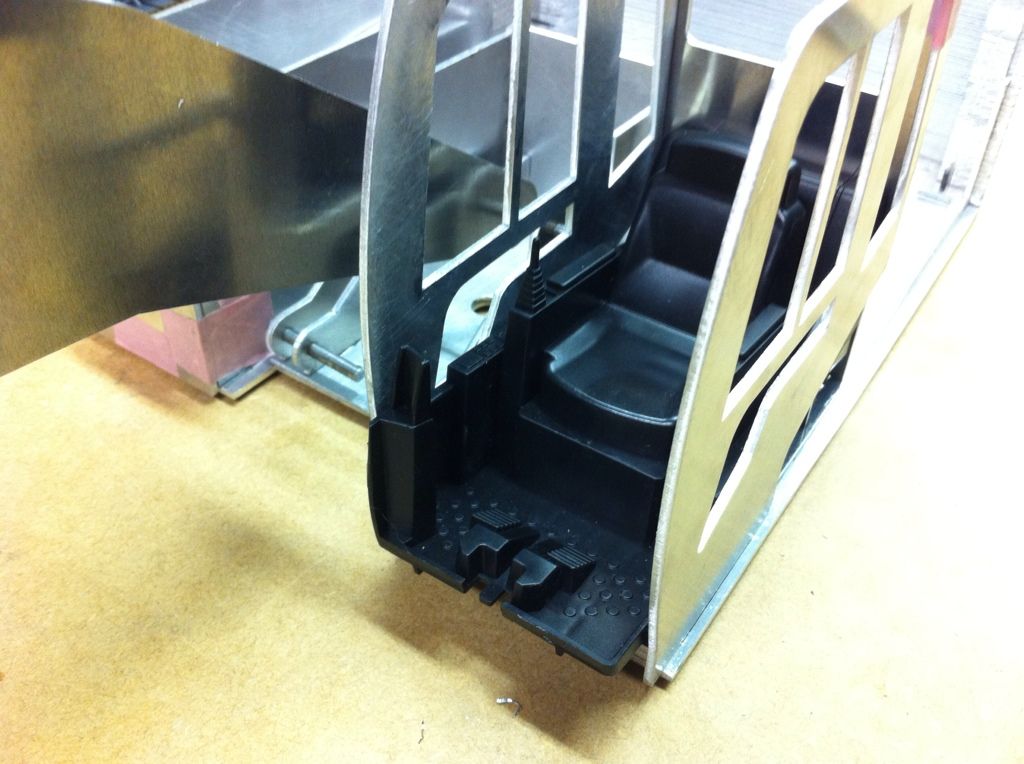
its coming together quiet well
|
|
|
25.09.2012 11:07 |
|
|
caterpilar
Doppel-As
Dabei seit: 09.04.2012
Beiträge: 113
Maßstab: 1:16
Level: 33 [?]
Erfahrungspunkte: 502.879
Nächster Level: 555.345
Themenstarter
|
|
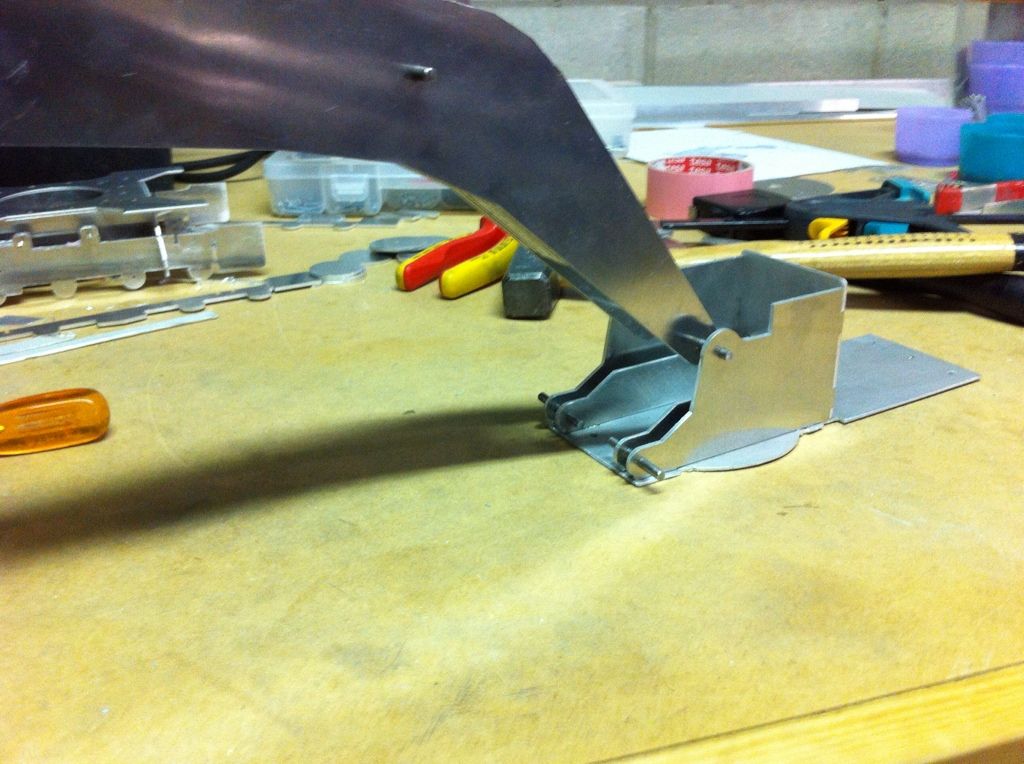
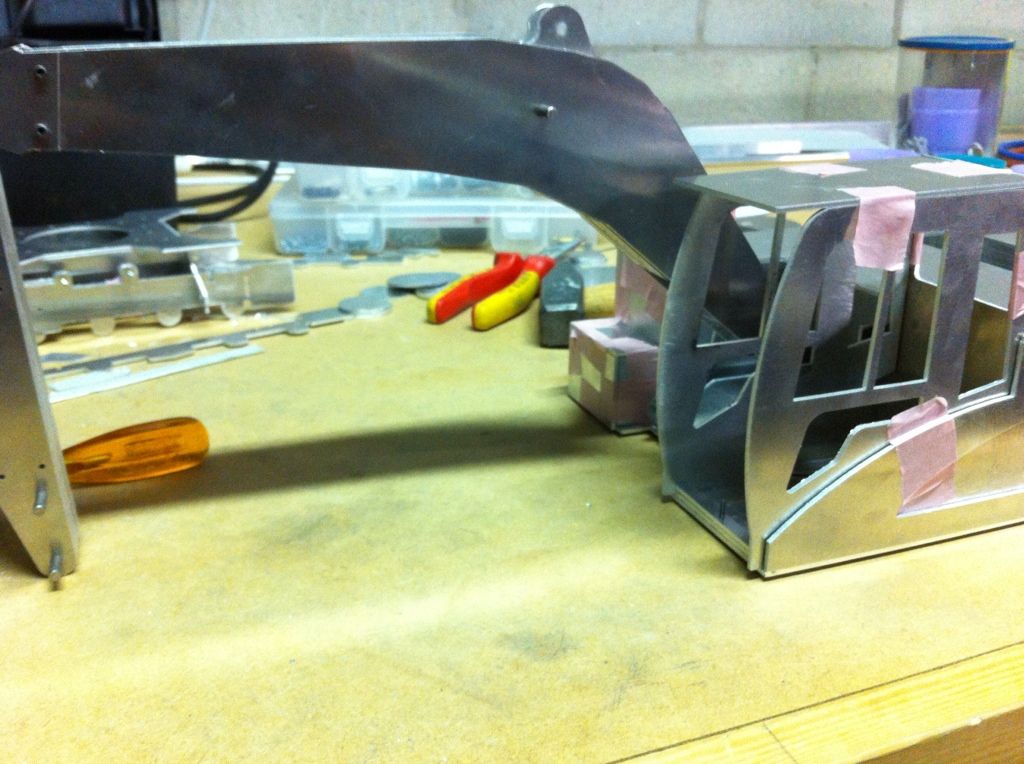
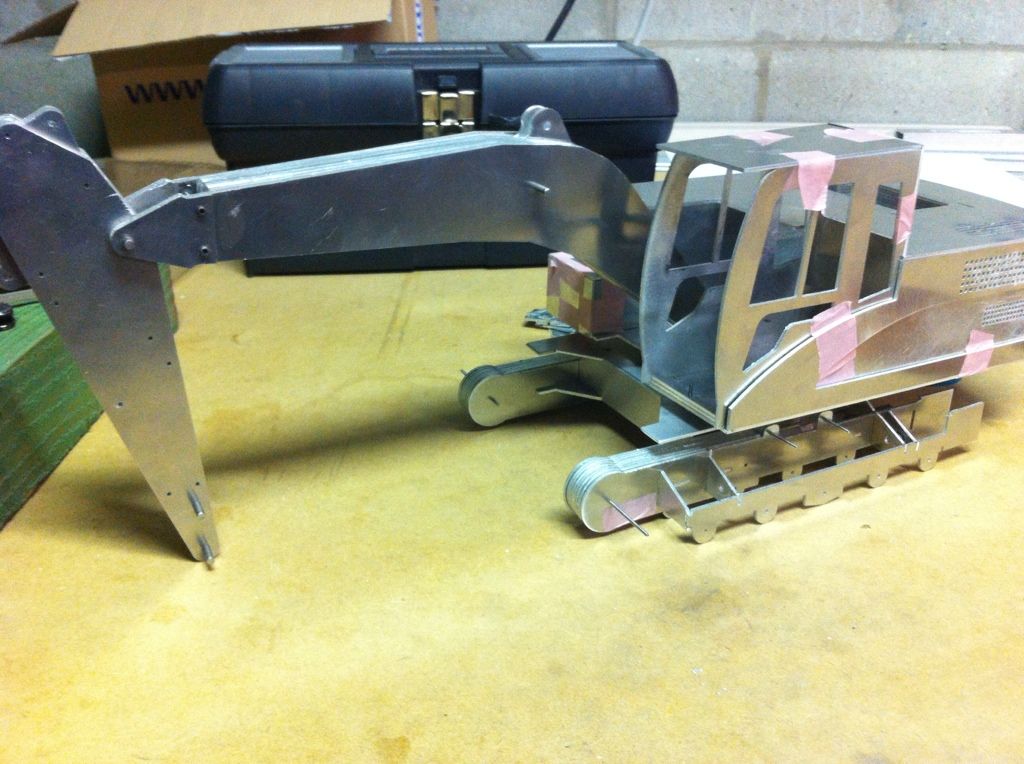
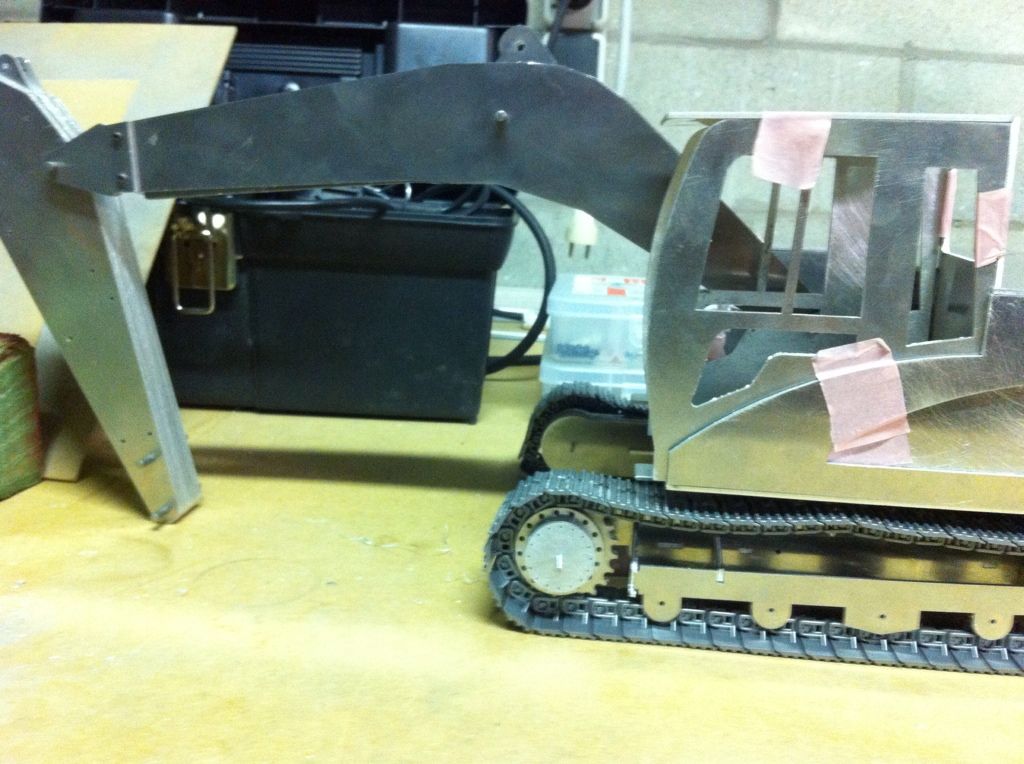
Some more pictures of the built:

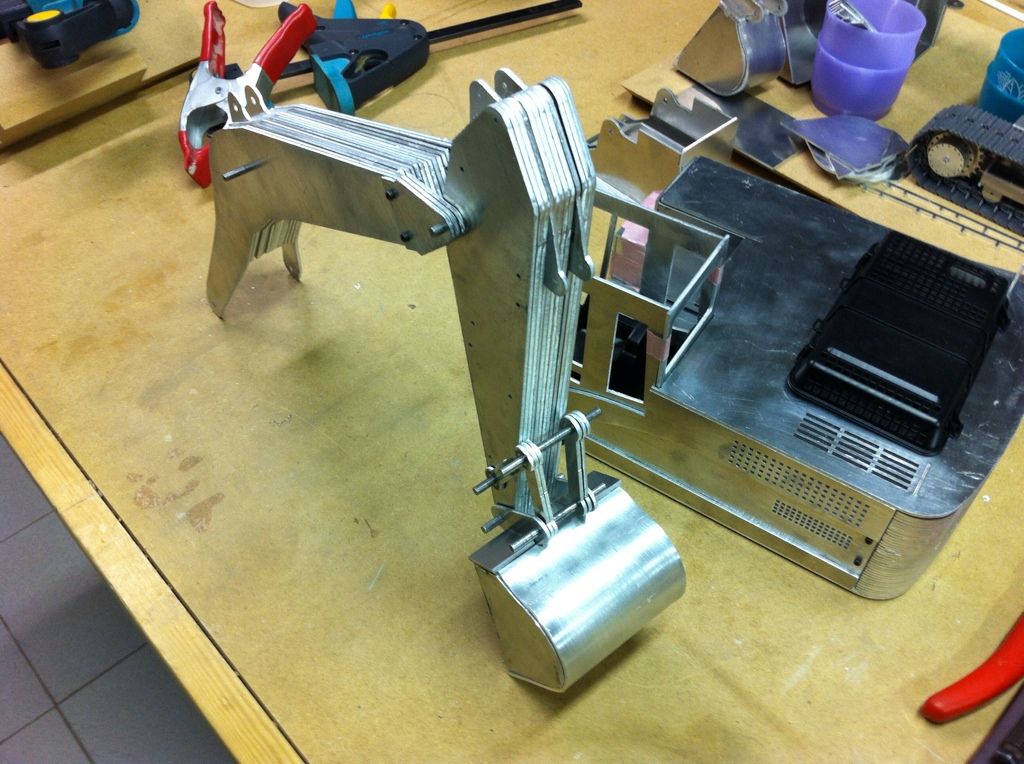
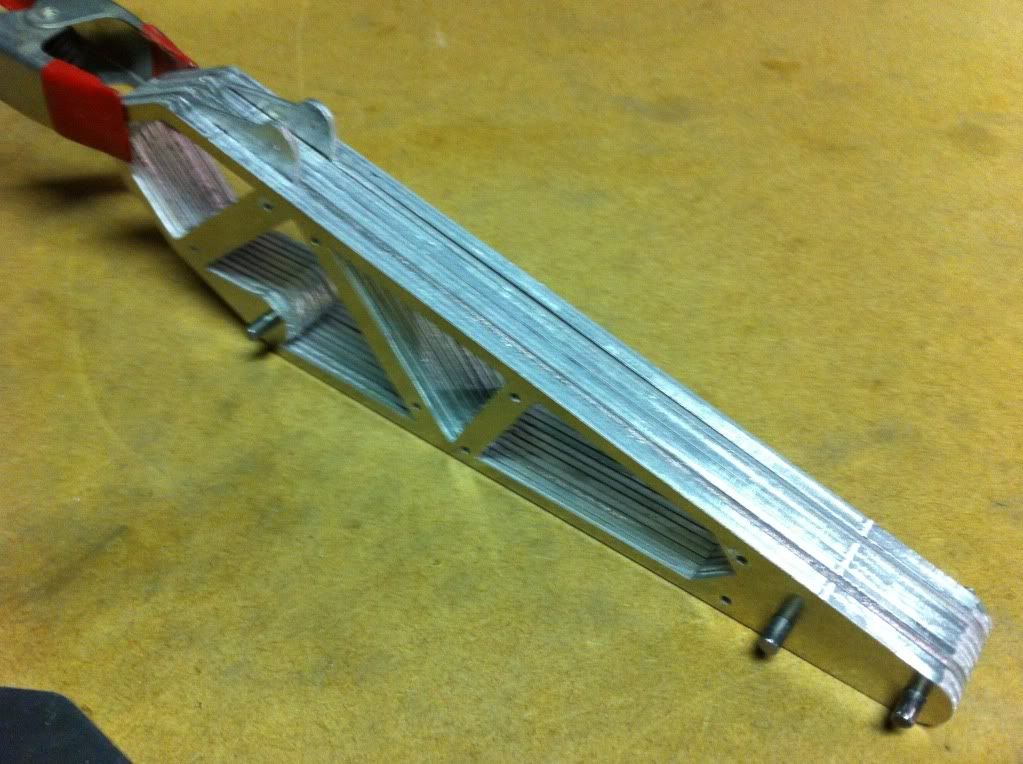
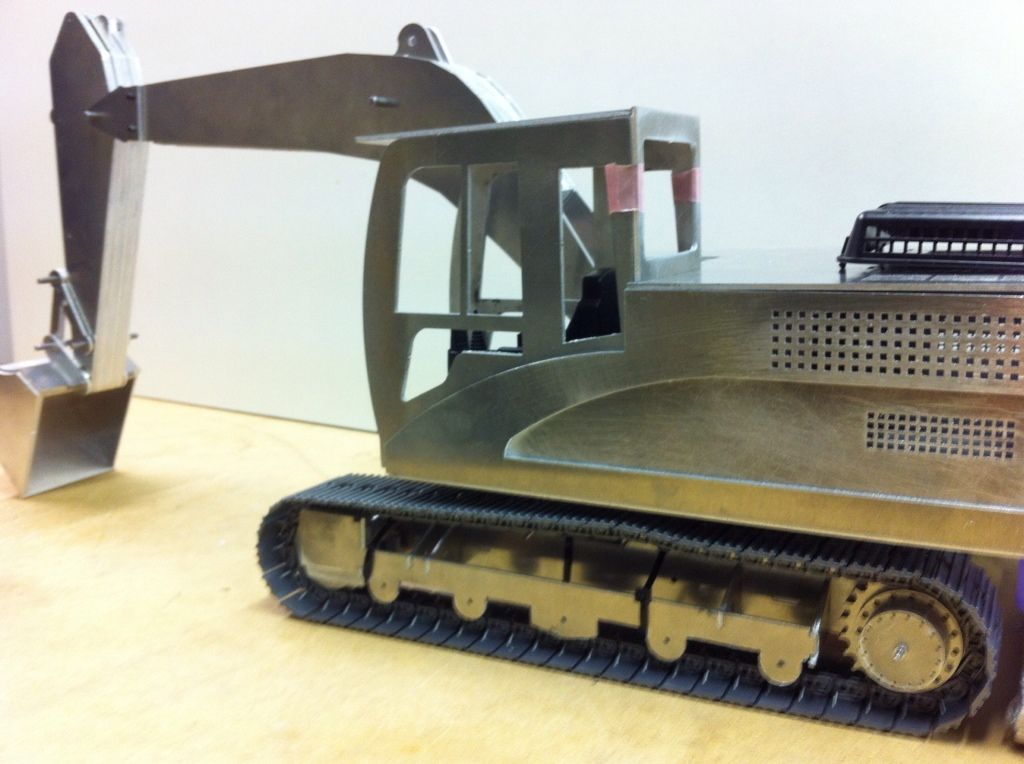
I finished off the boom yesterday:
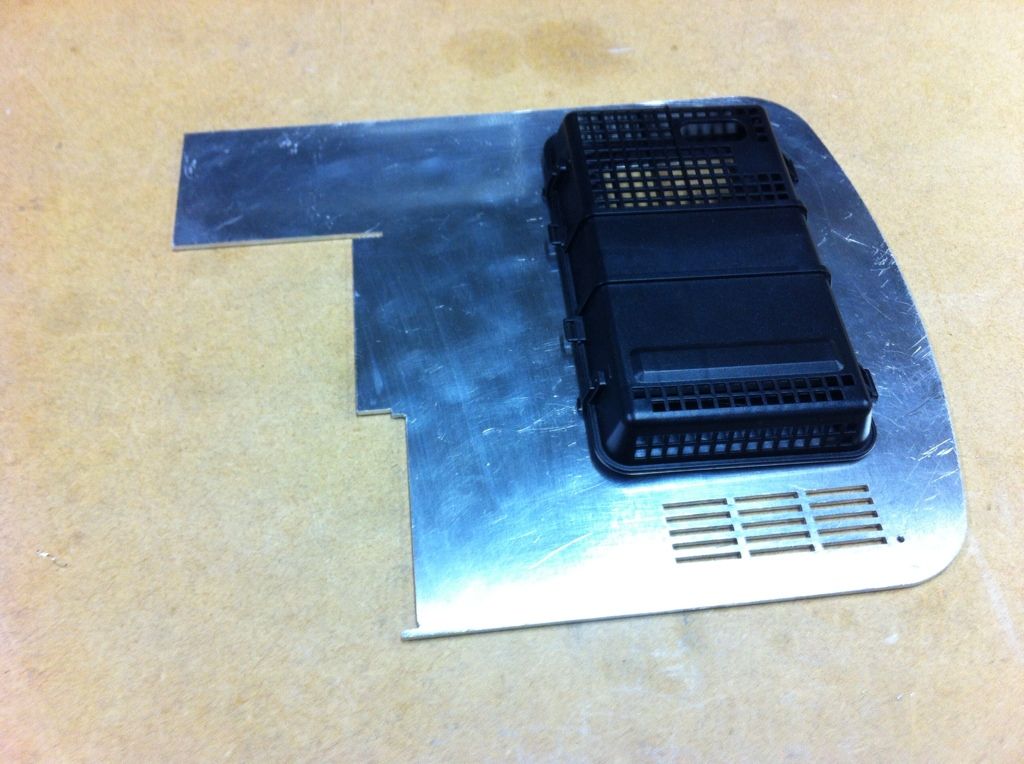
Then I cut a small part of the back of the seat to make it fit perfectly in the cabin:
|
|
|
26.09.2012 09:31 |
|
|
caterpilar
Doppel-As
Dabei seit: 09.04.2012
Beiträge: 113
Maßstab: 1:16
Level: 33 [?]
Erfahrungspunkte: 502.879
Nächster Level: 555.345
Themenstarter
|
|
I measured the distances for the cylinders. Now I can start ordering them.

The manufacturer finished off a few more kits. Quiet impressive what the laser can do...
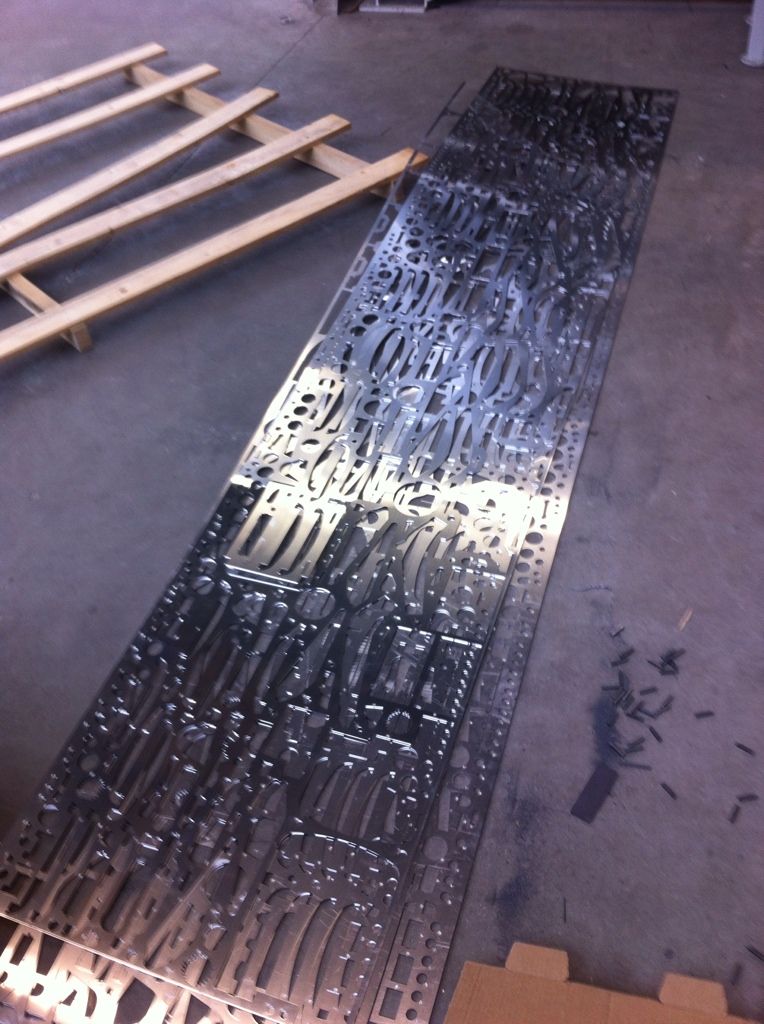
The placement of the parts on the Aluminum sheets are showing quiet some space between the parts. Fitting parts closer to each other will not give a great end result due to the heat generated by the cutting process.
|
|
|
03.10.2012 10:40 |
|
|
|
|
|
  |
Views heute: 176.127 | Views gestern: 174.366 | Views gesamt: 256.914.171
Impressum
|
|
 |
|
 |
|